Storyist 4 for iOS is a paid upgrade that requires iOS 14 or later. If you’re a Storyist 3 user, you’re probably curious about what’s changed. This overview describes the changes in some detail.
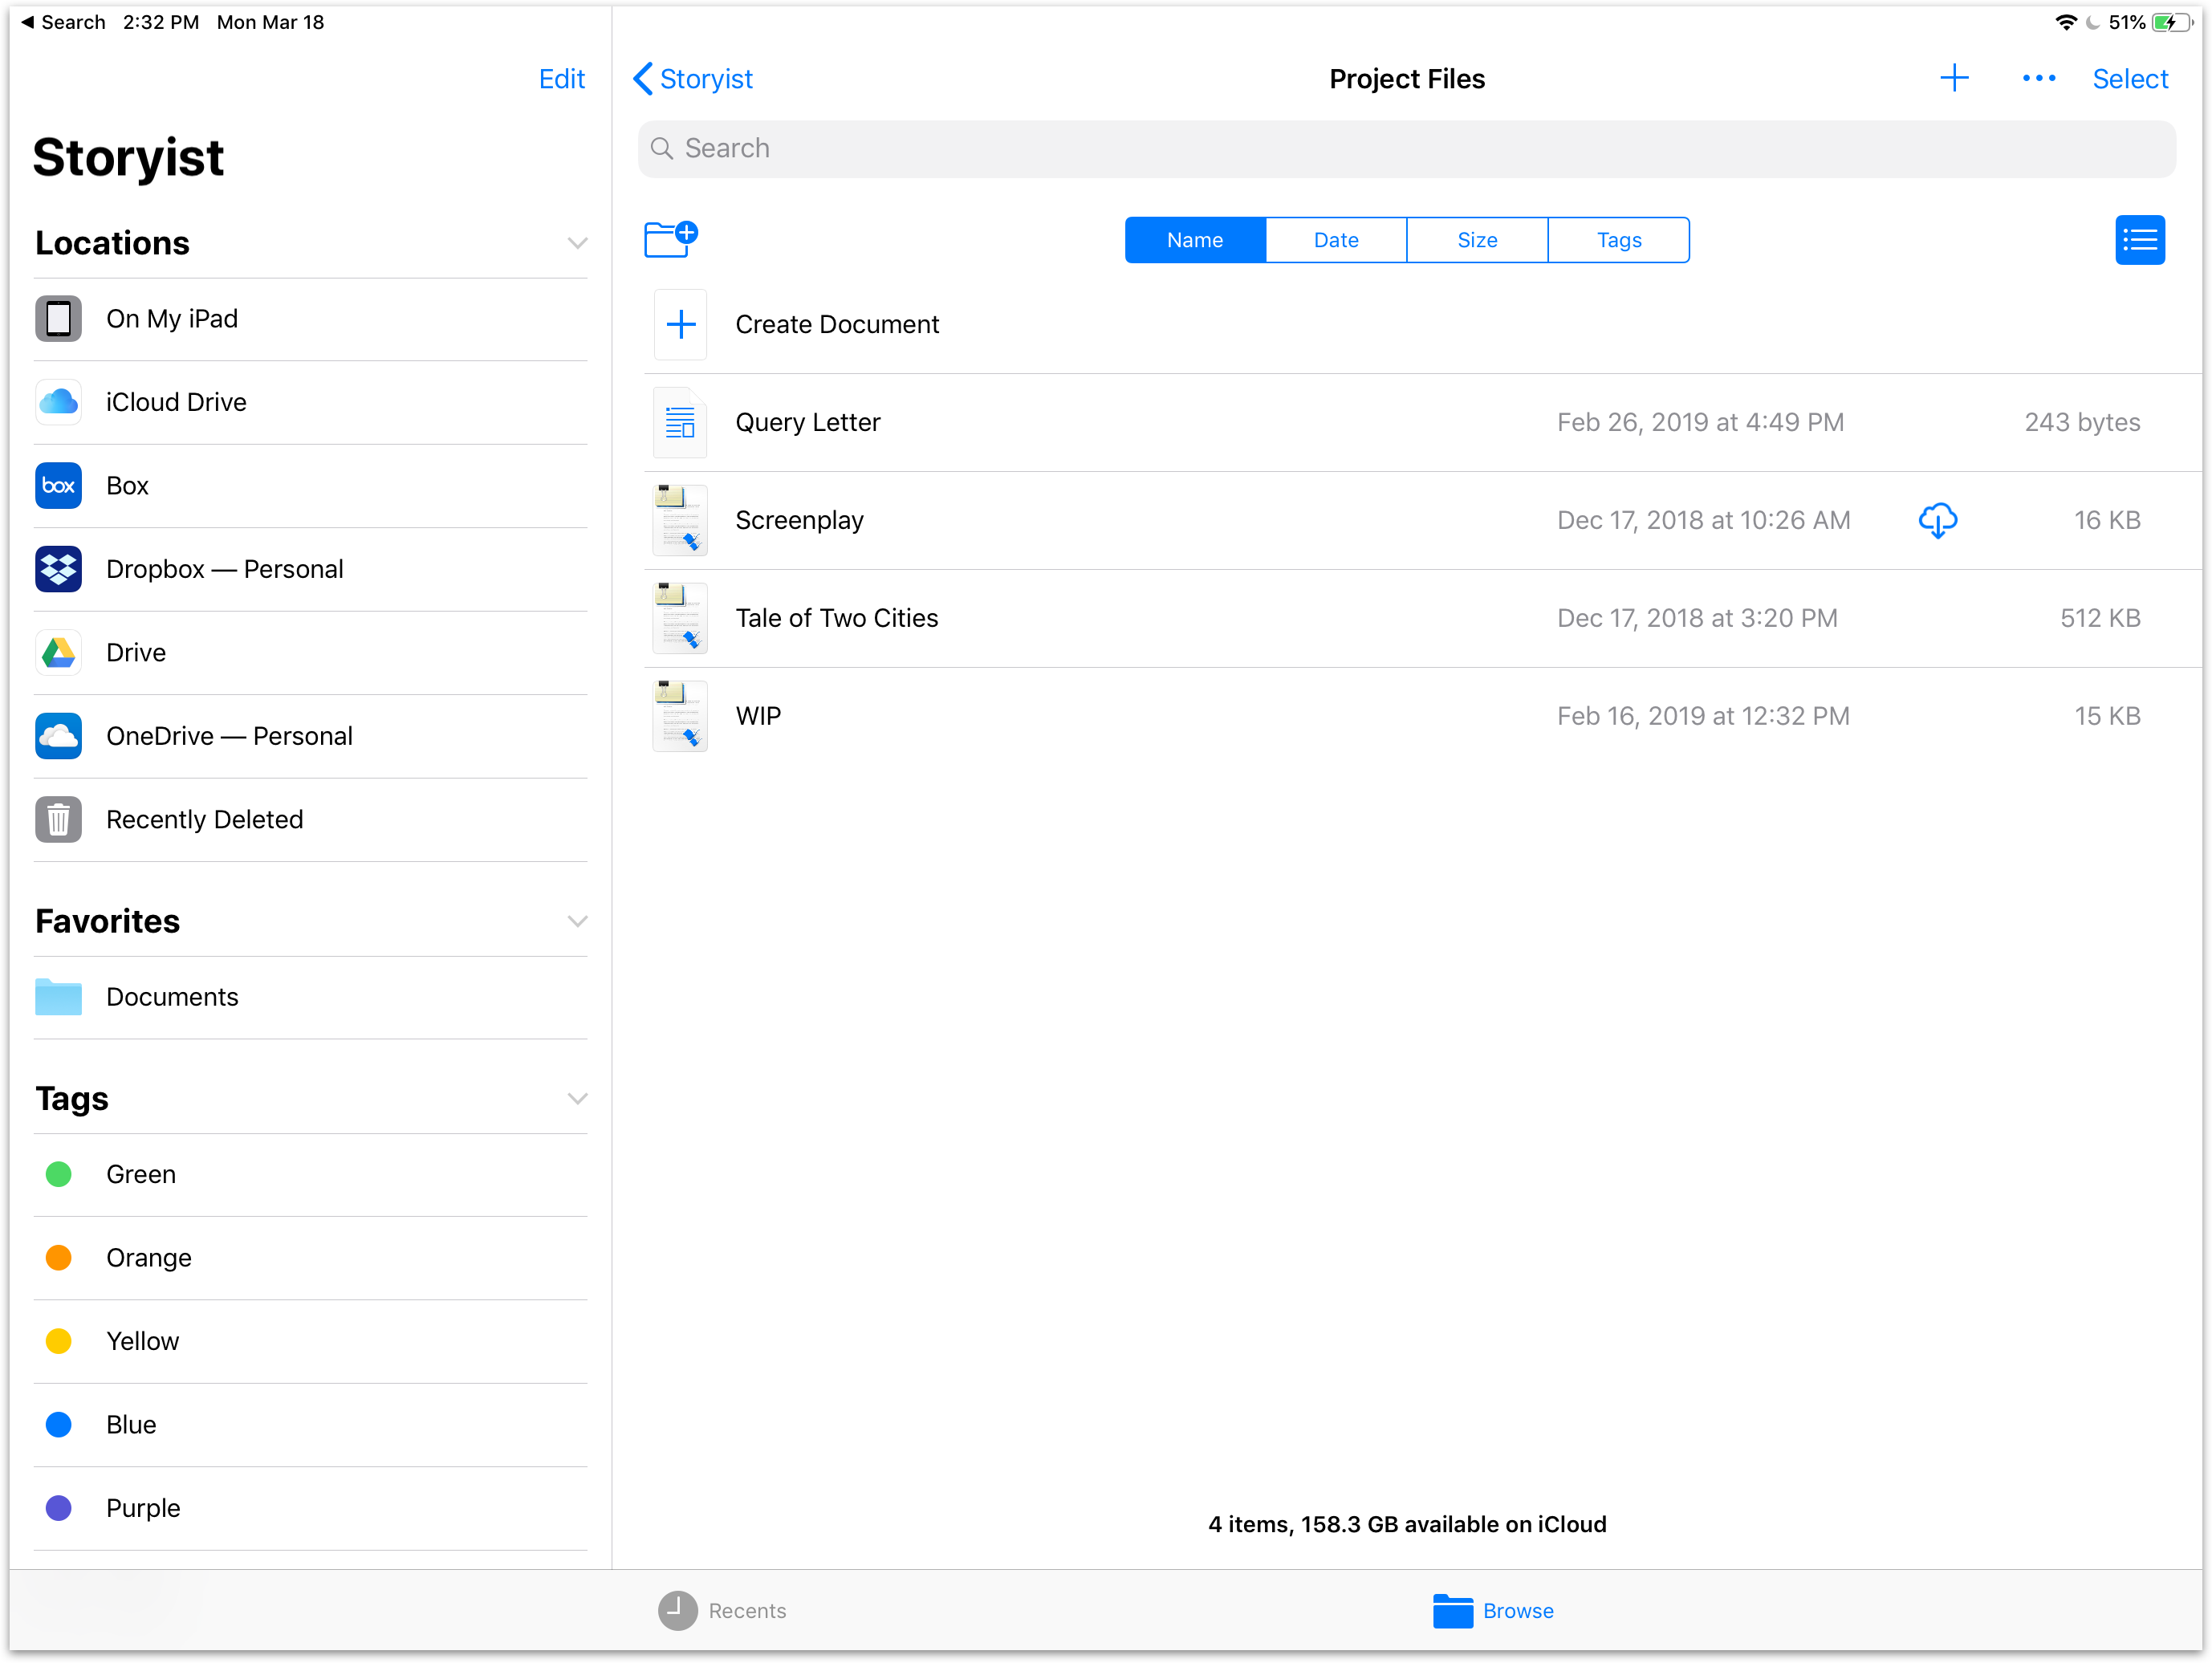
Storyist 4 adopts the Files user interface and functionality that Apple introduced the Files app in iOS 11. If you’re not familiar with the Files app, check out Apple’s tutorial.
Here are some of the new features it brings to Storyist.
If you’re a long-time iOS user, you know that files originally “belonged” to the app that created them. One side effect of this model was that you needed to copy a file to another app before editing it in that app. If you weren’t careful, you would end up with multiple copies of the file in different apps and would need to keep track of which modifications were made in which app. Many apps still operate this way.
However, when using apps that support the “edit in place” Files functionality (as Storyist 4 does), you can now edit a file wherever it is stored without having to copy it. This means you can organize your work in whatever way suits your project and avoid the multiple copy problem.
Another main feature of the Files interface is that it gives 3rd-party cloud storage providers like Box, Dropbox, Google Drive, and OneDrive a single, Apple-approved, way to integrate their services with iOS.
Storyist 3 supported only iCloud and Dropbox. With Storyist 4, you can use any provider that supports the Files app. Box, Dropbox, Google Drive, and Microsoft OneDrive, for example, all support the Files app.
To set up a 3rd-party cloud storage provider:
Since the support for the storage service is now provided by the storage provider’s app, you’ll get the new features and bug fixes right from the source. Just be sure you keep the storage provider’s app up-to-date.
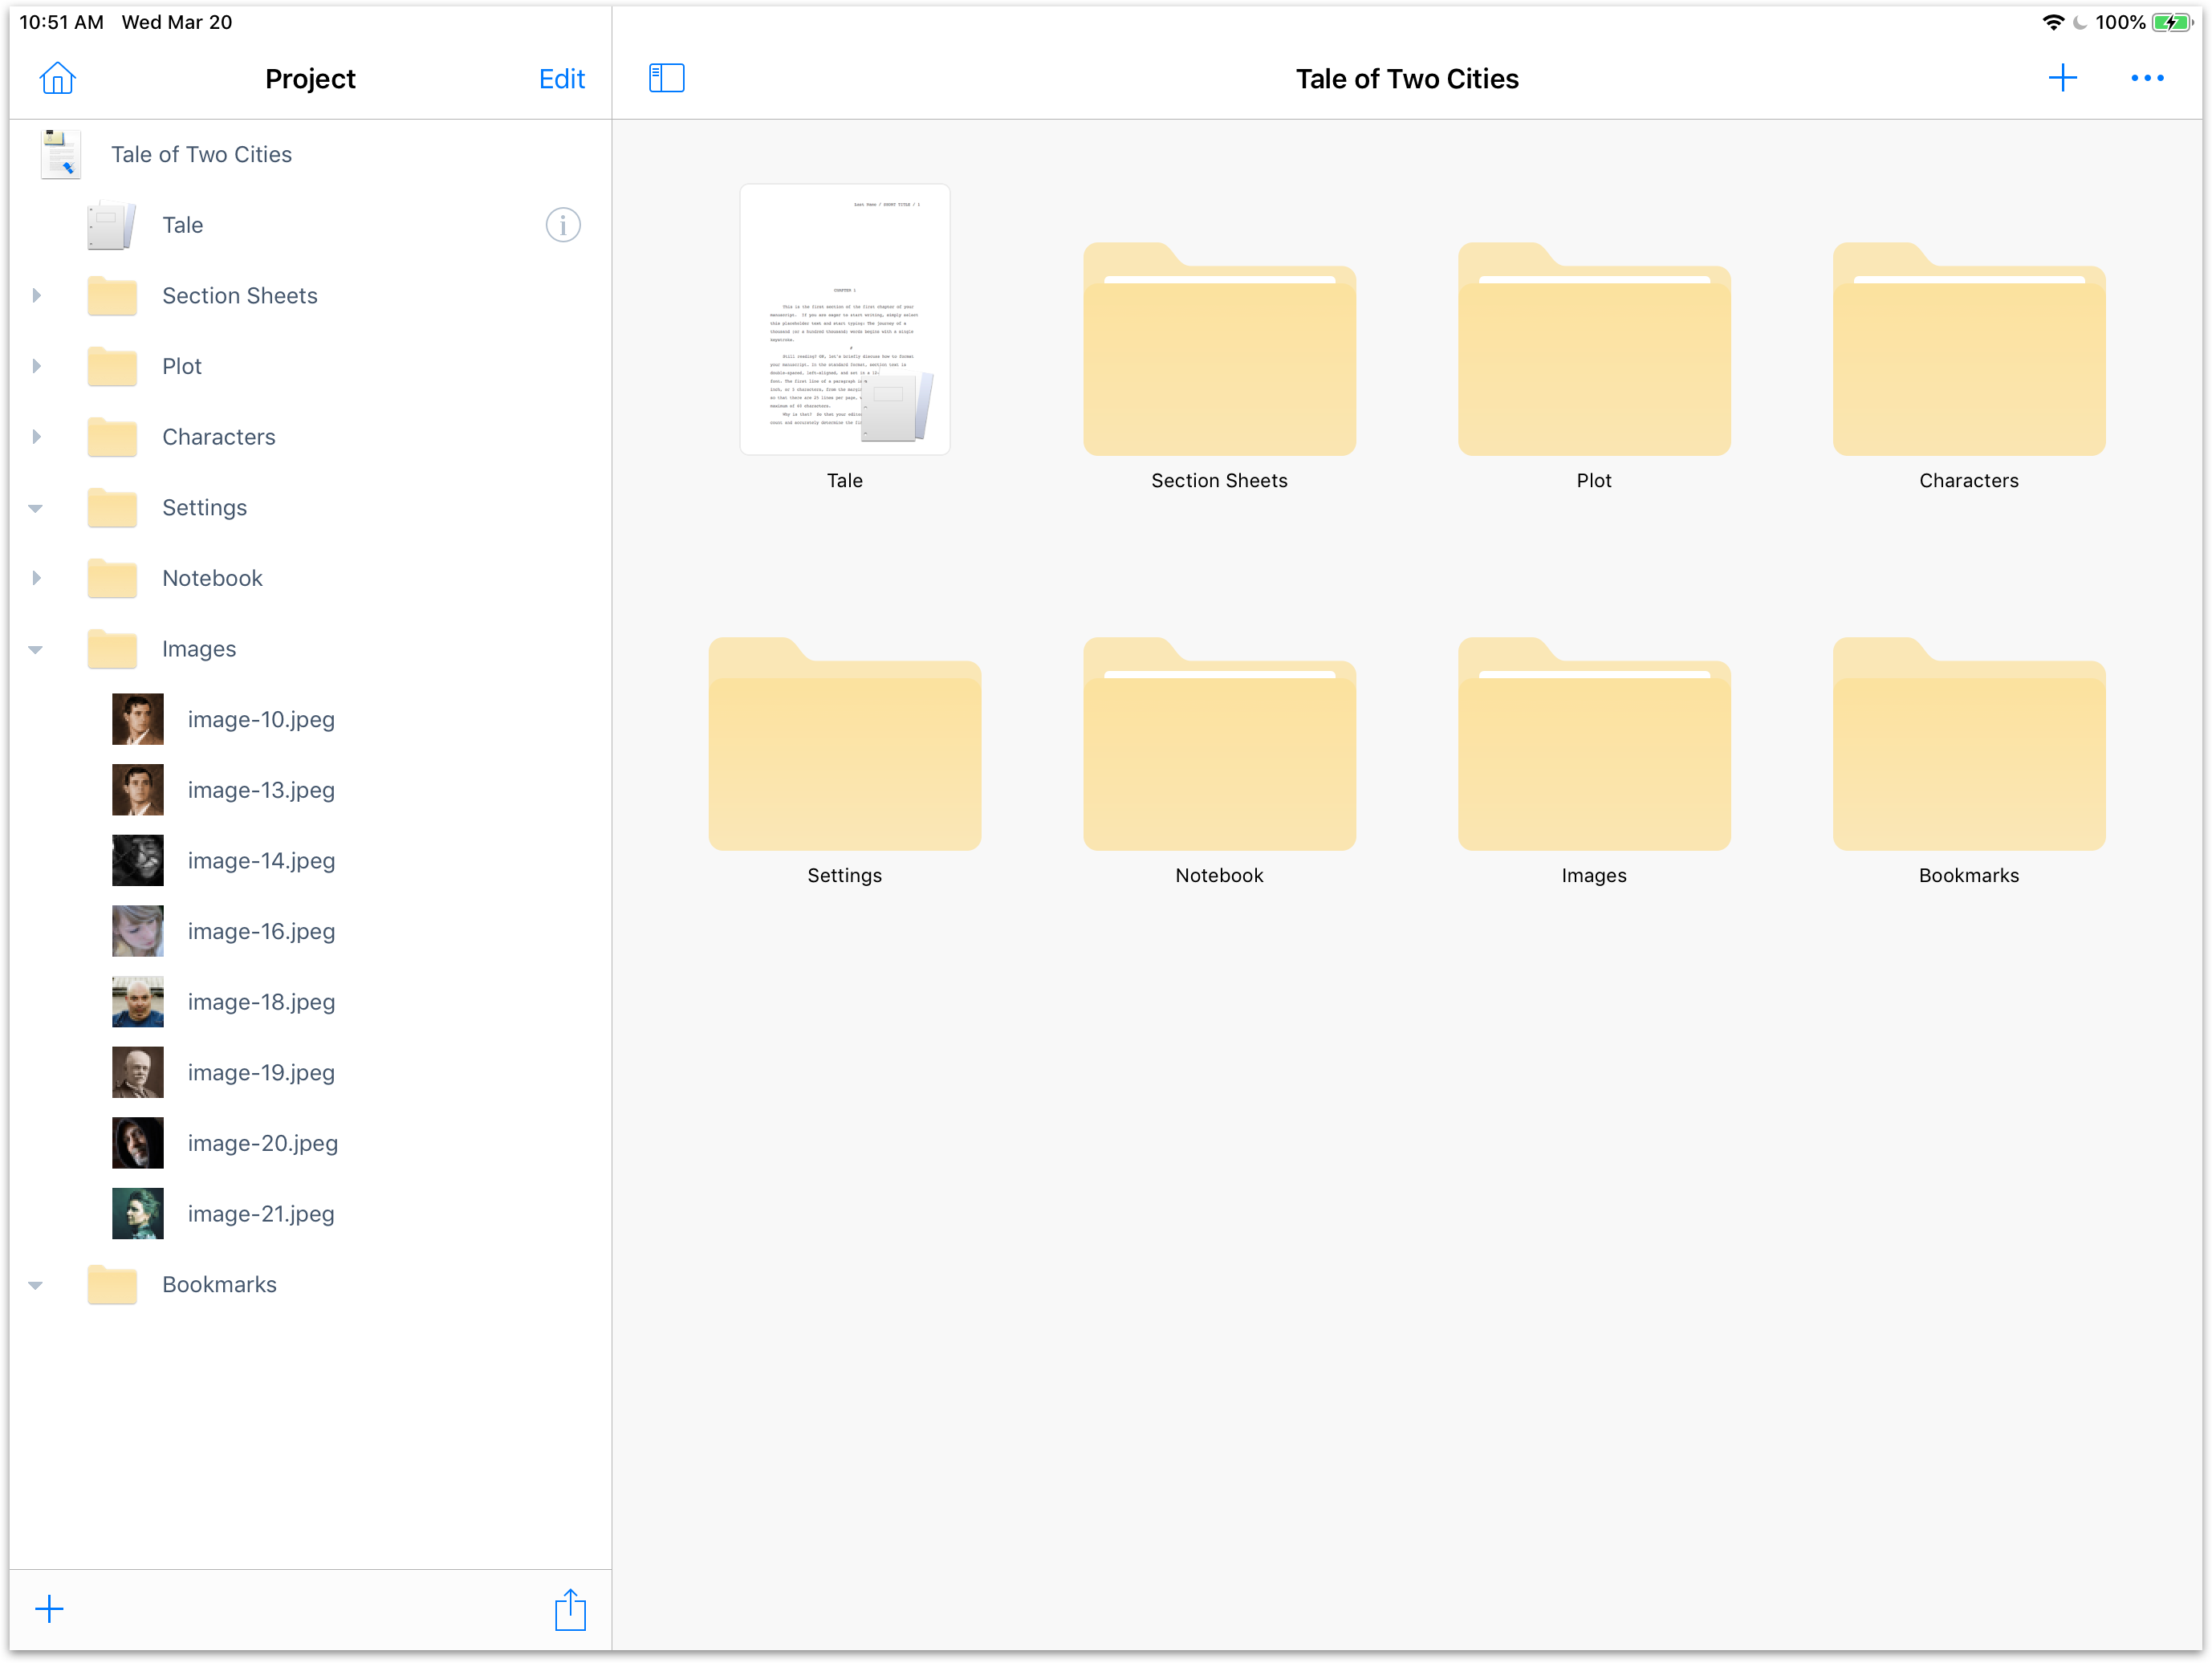
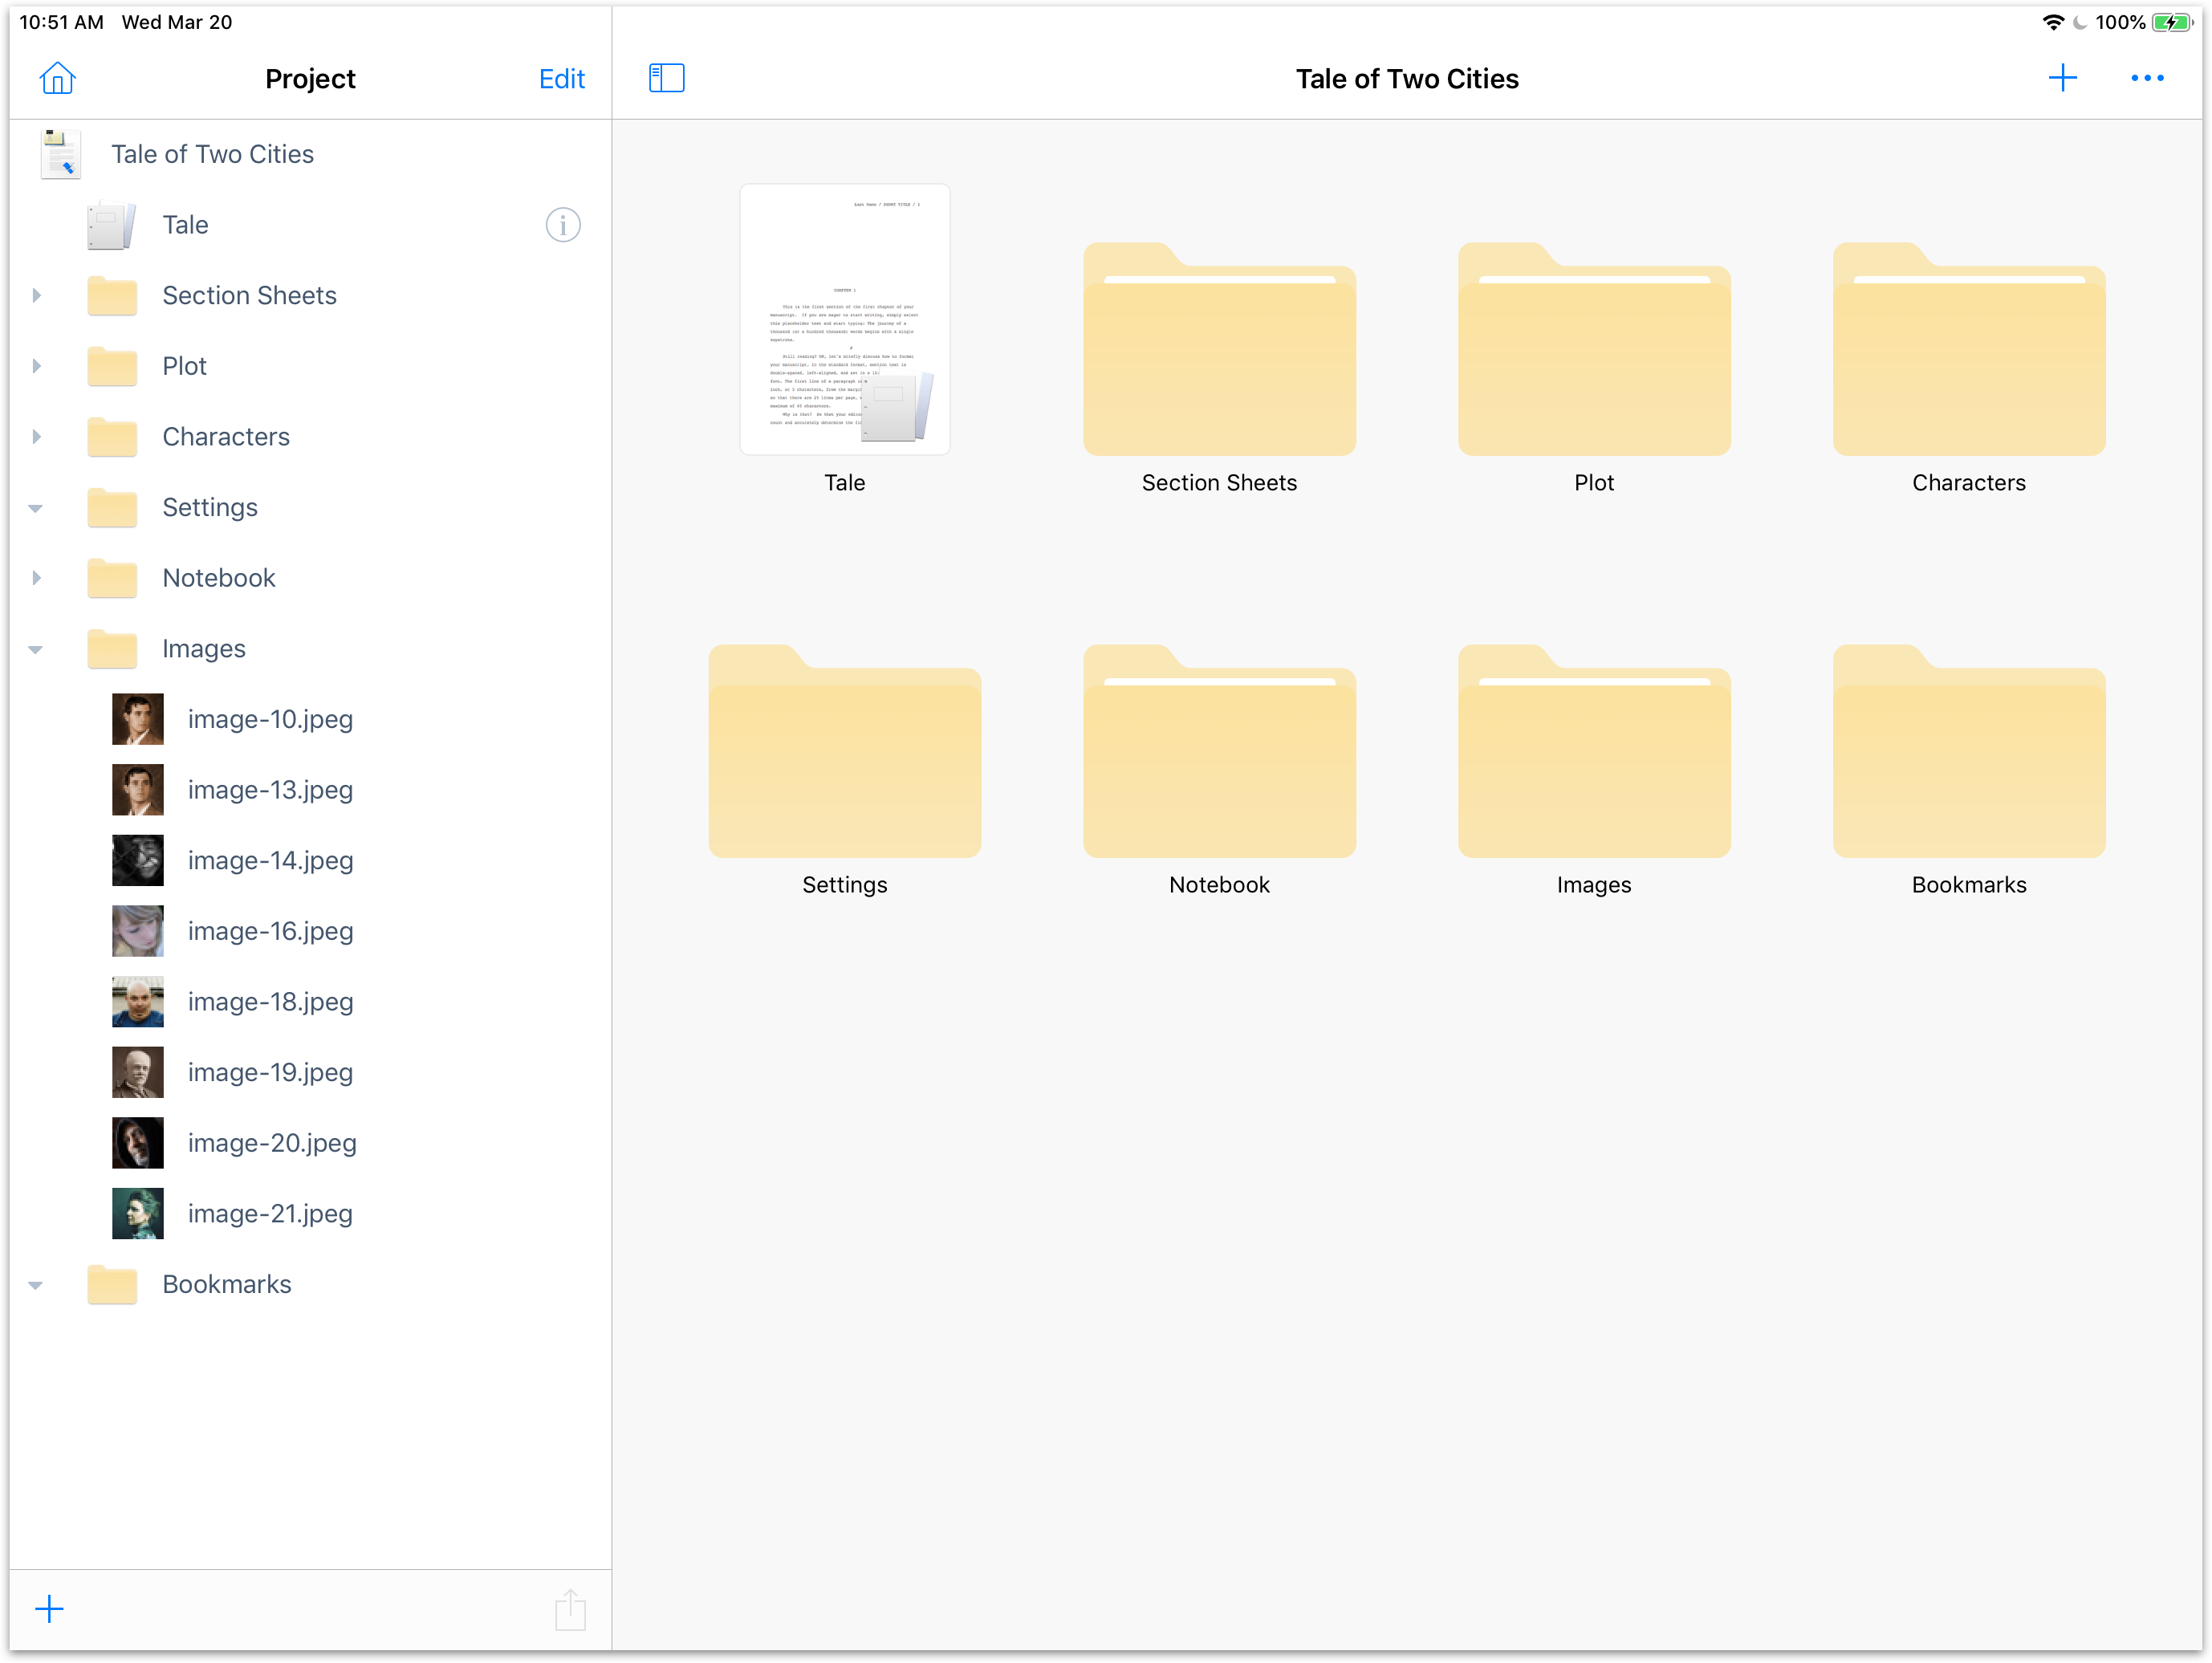
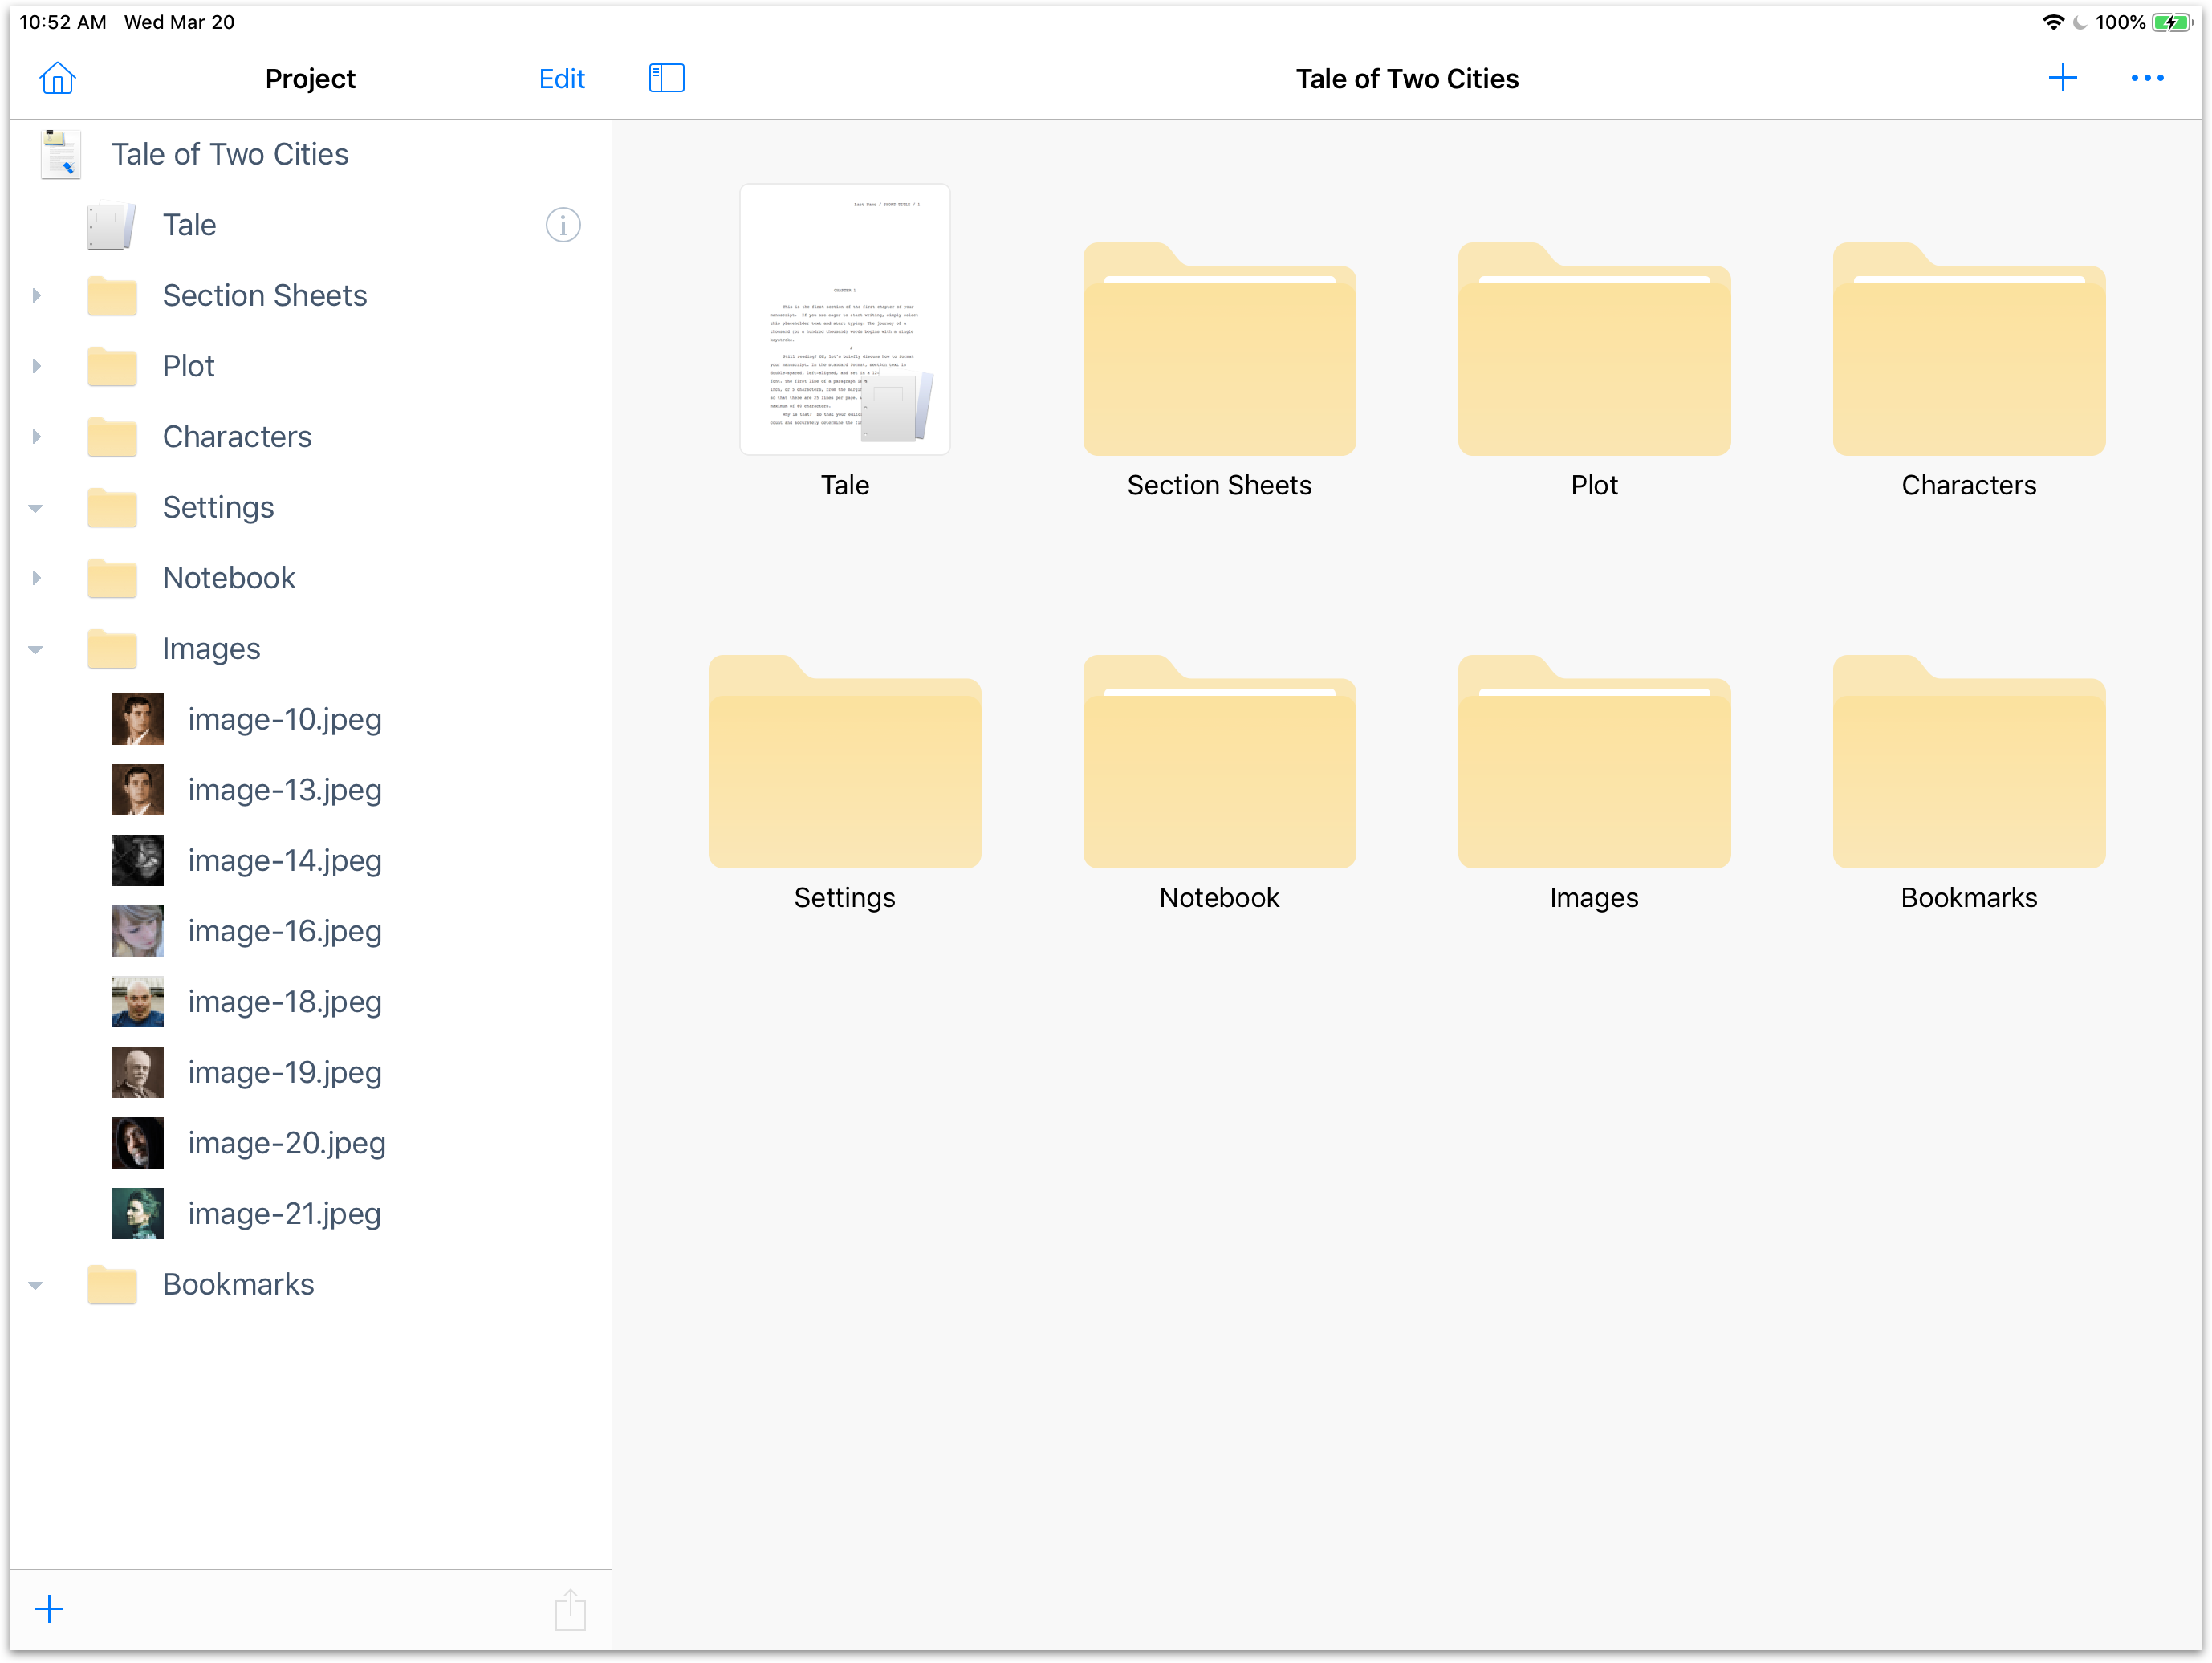
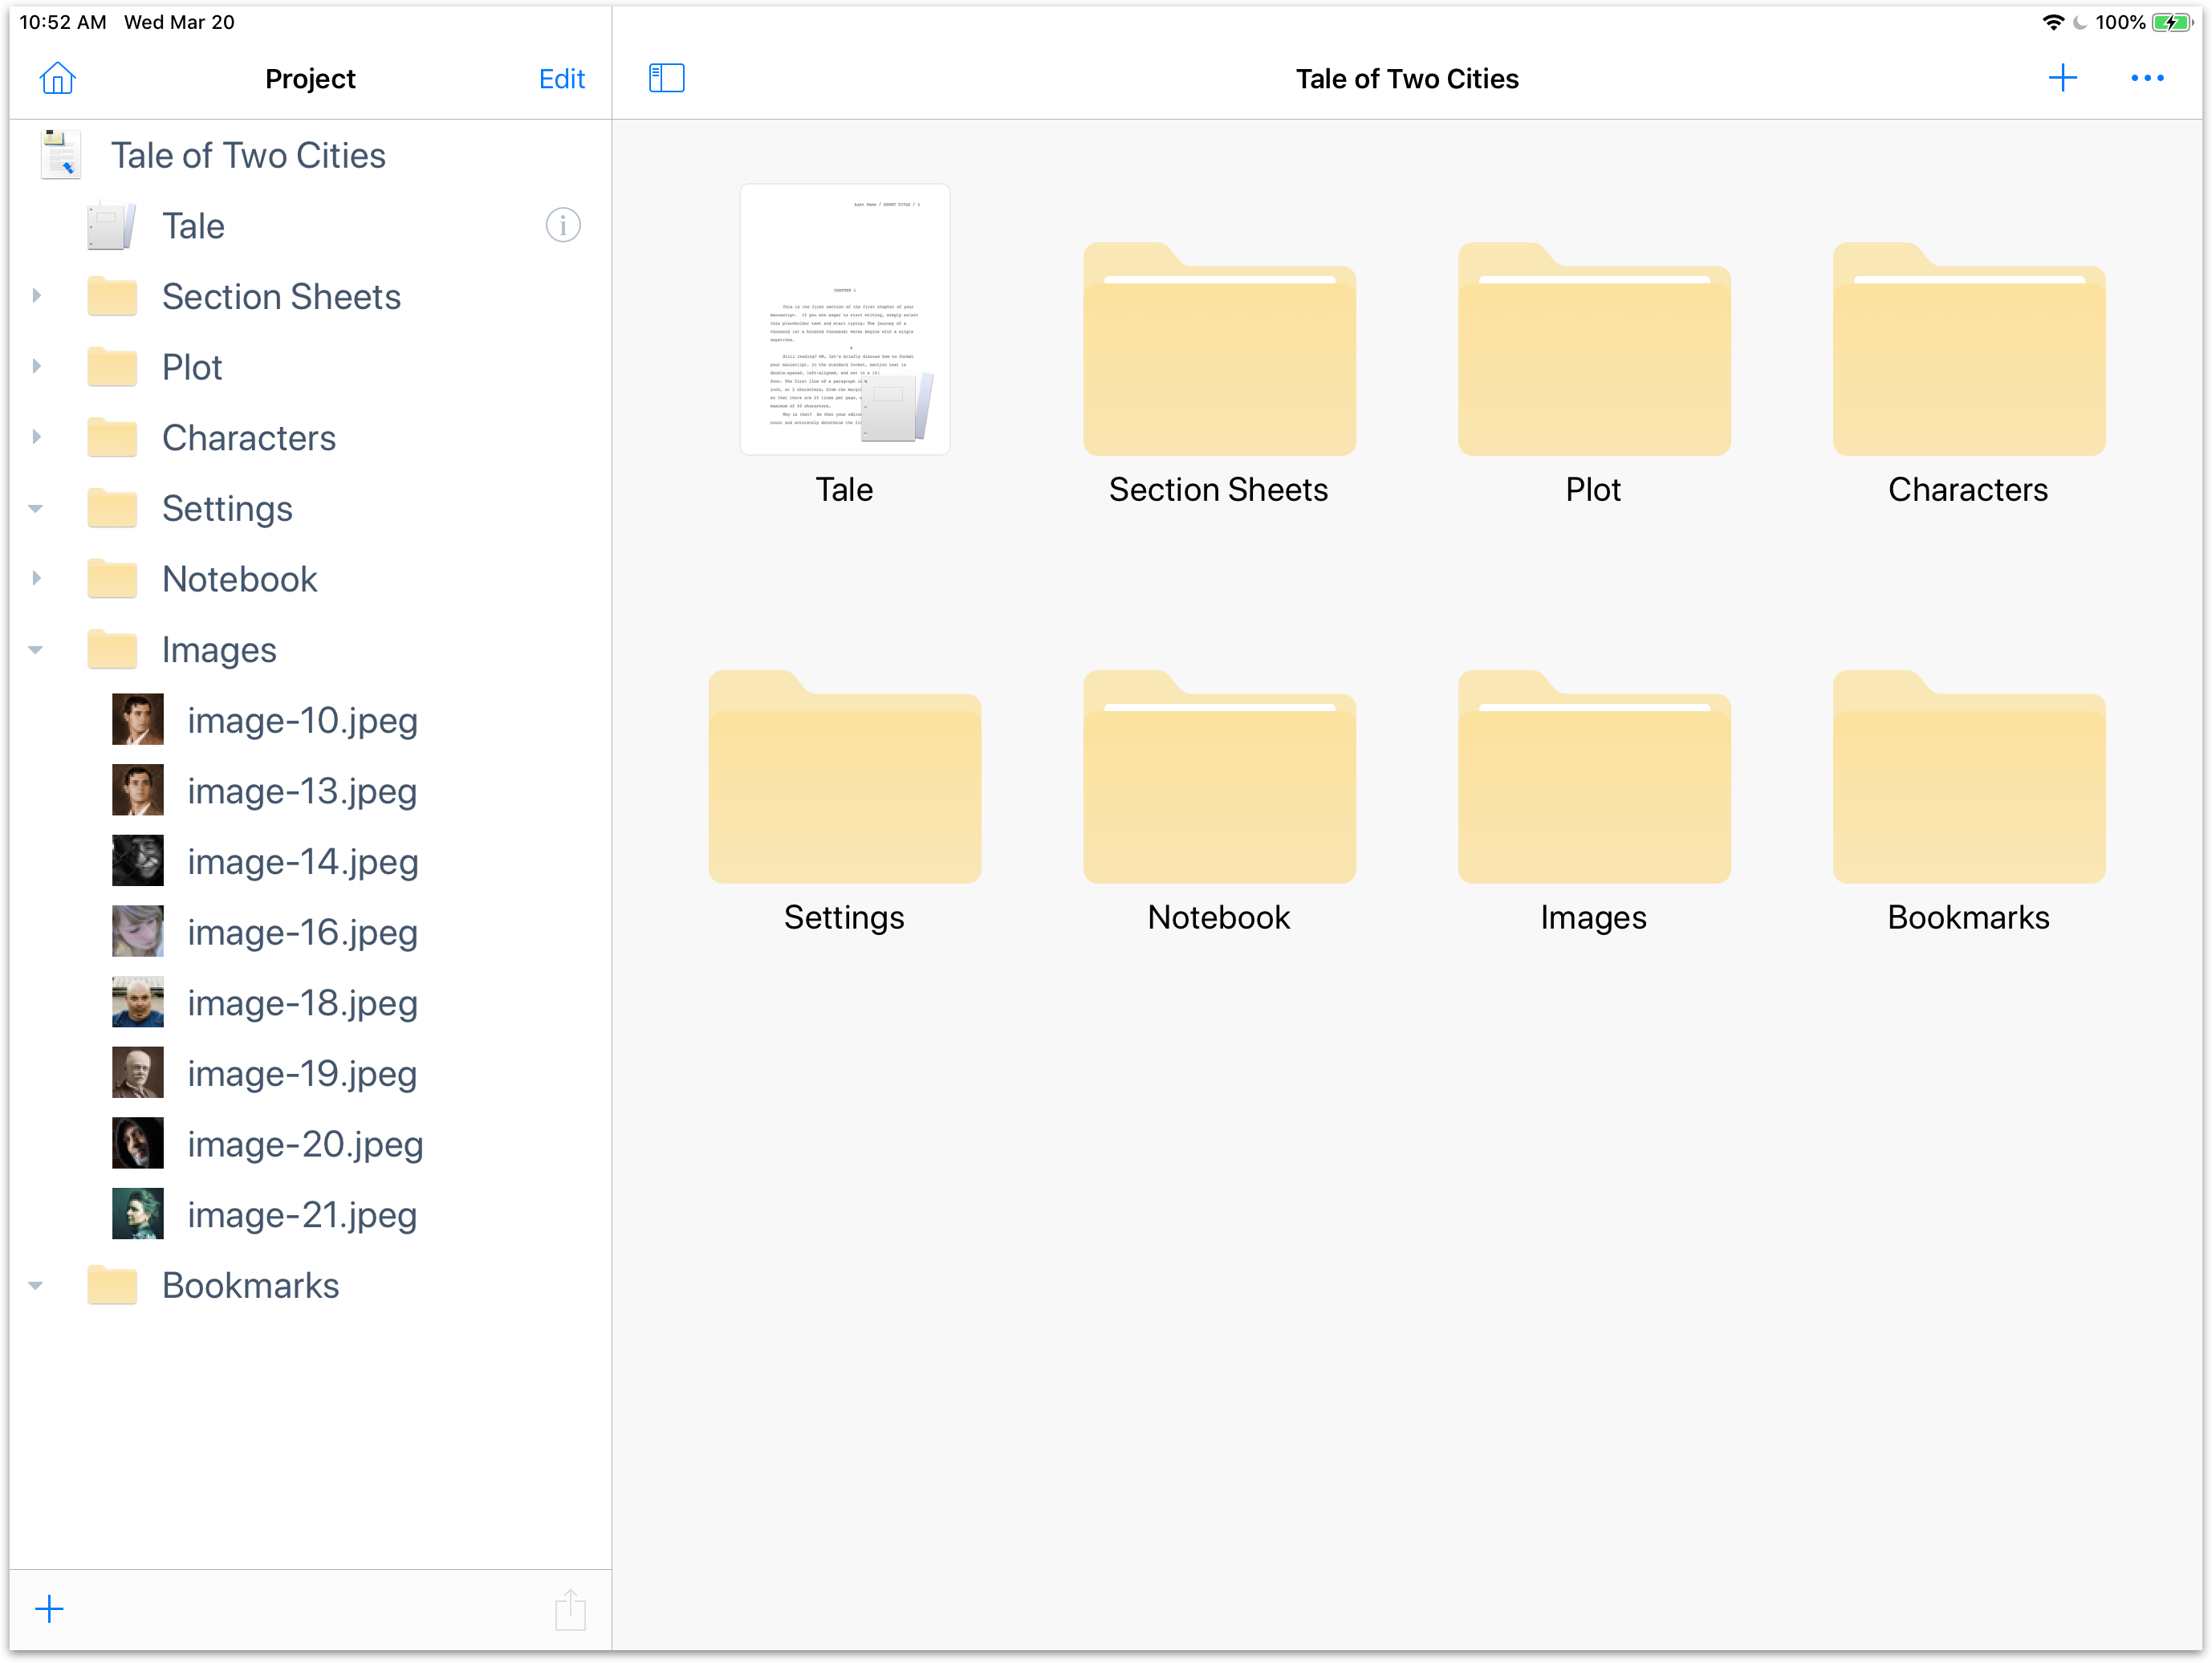
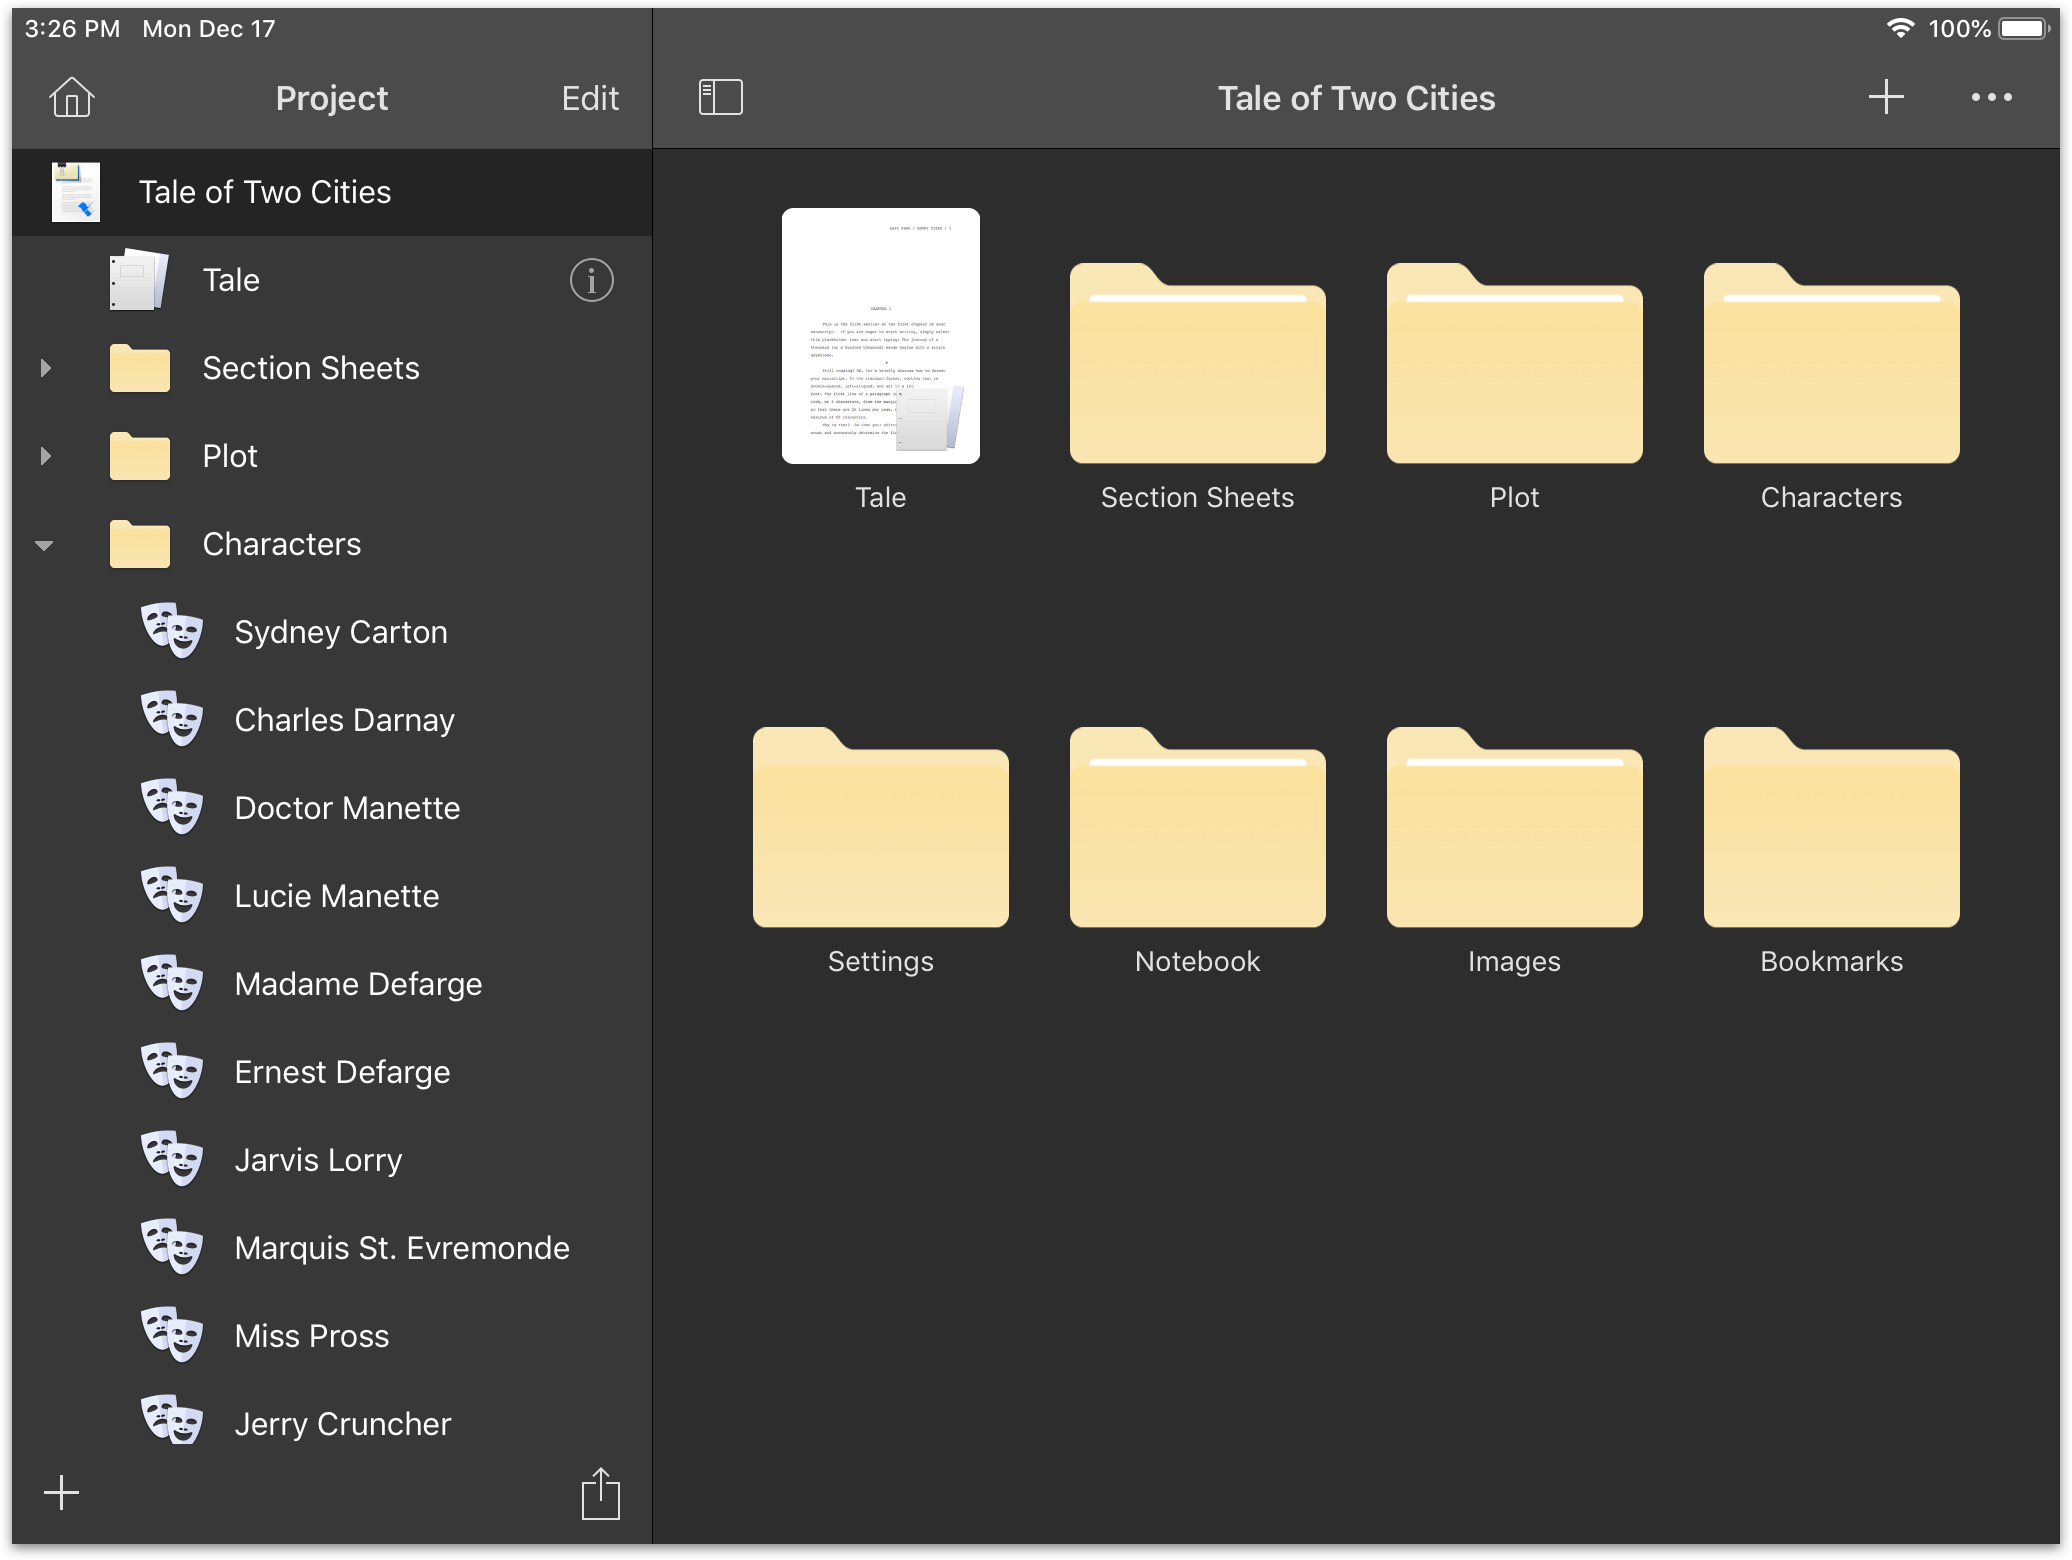
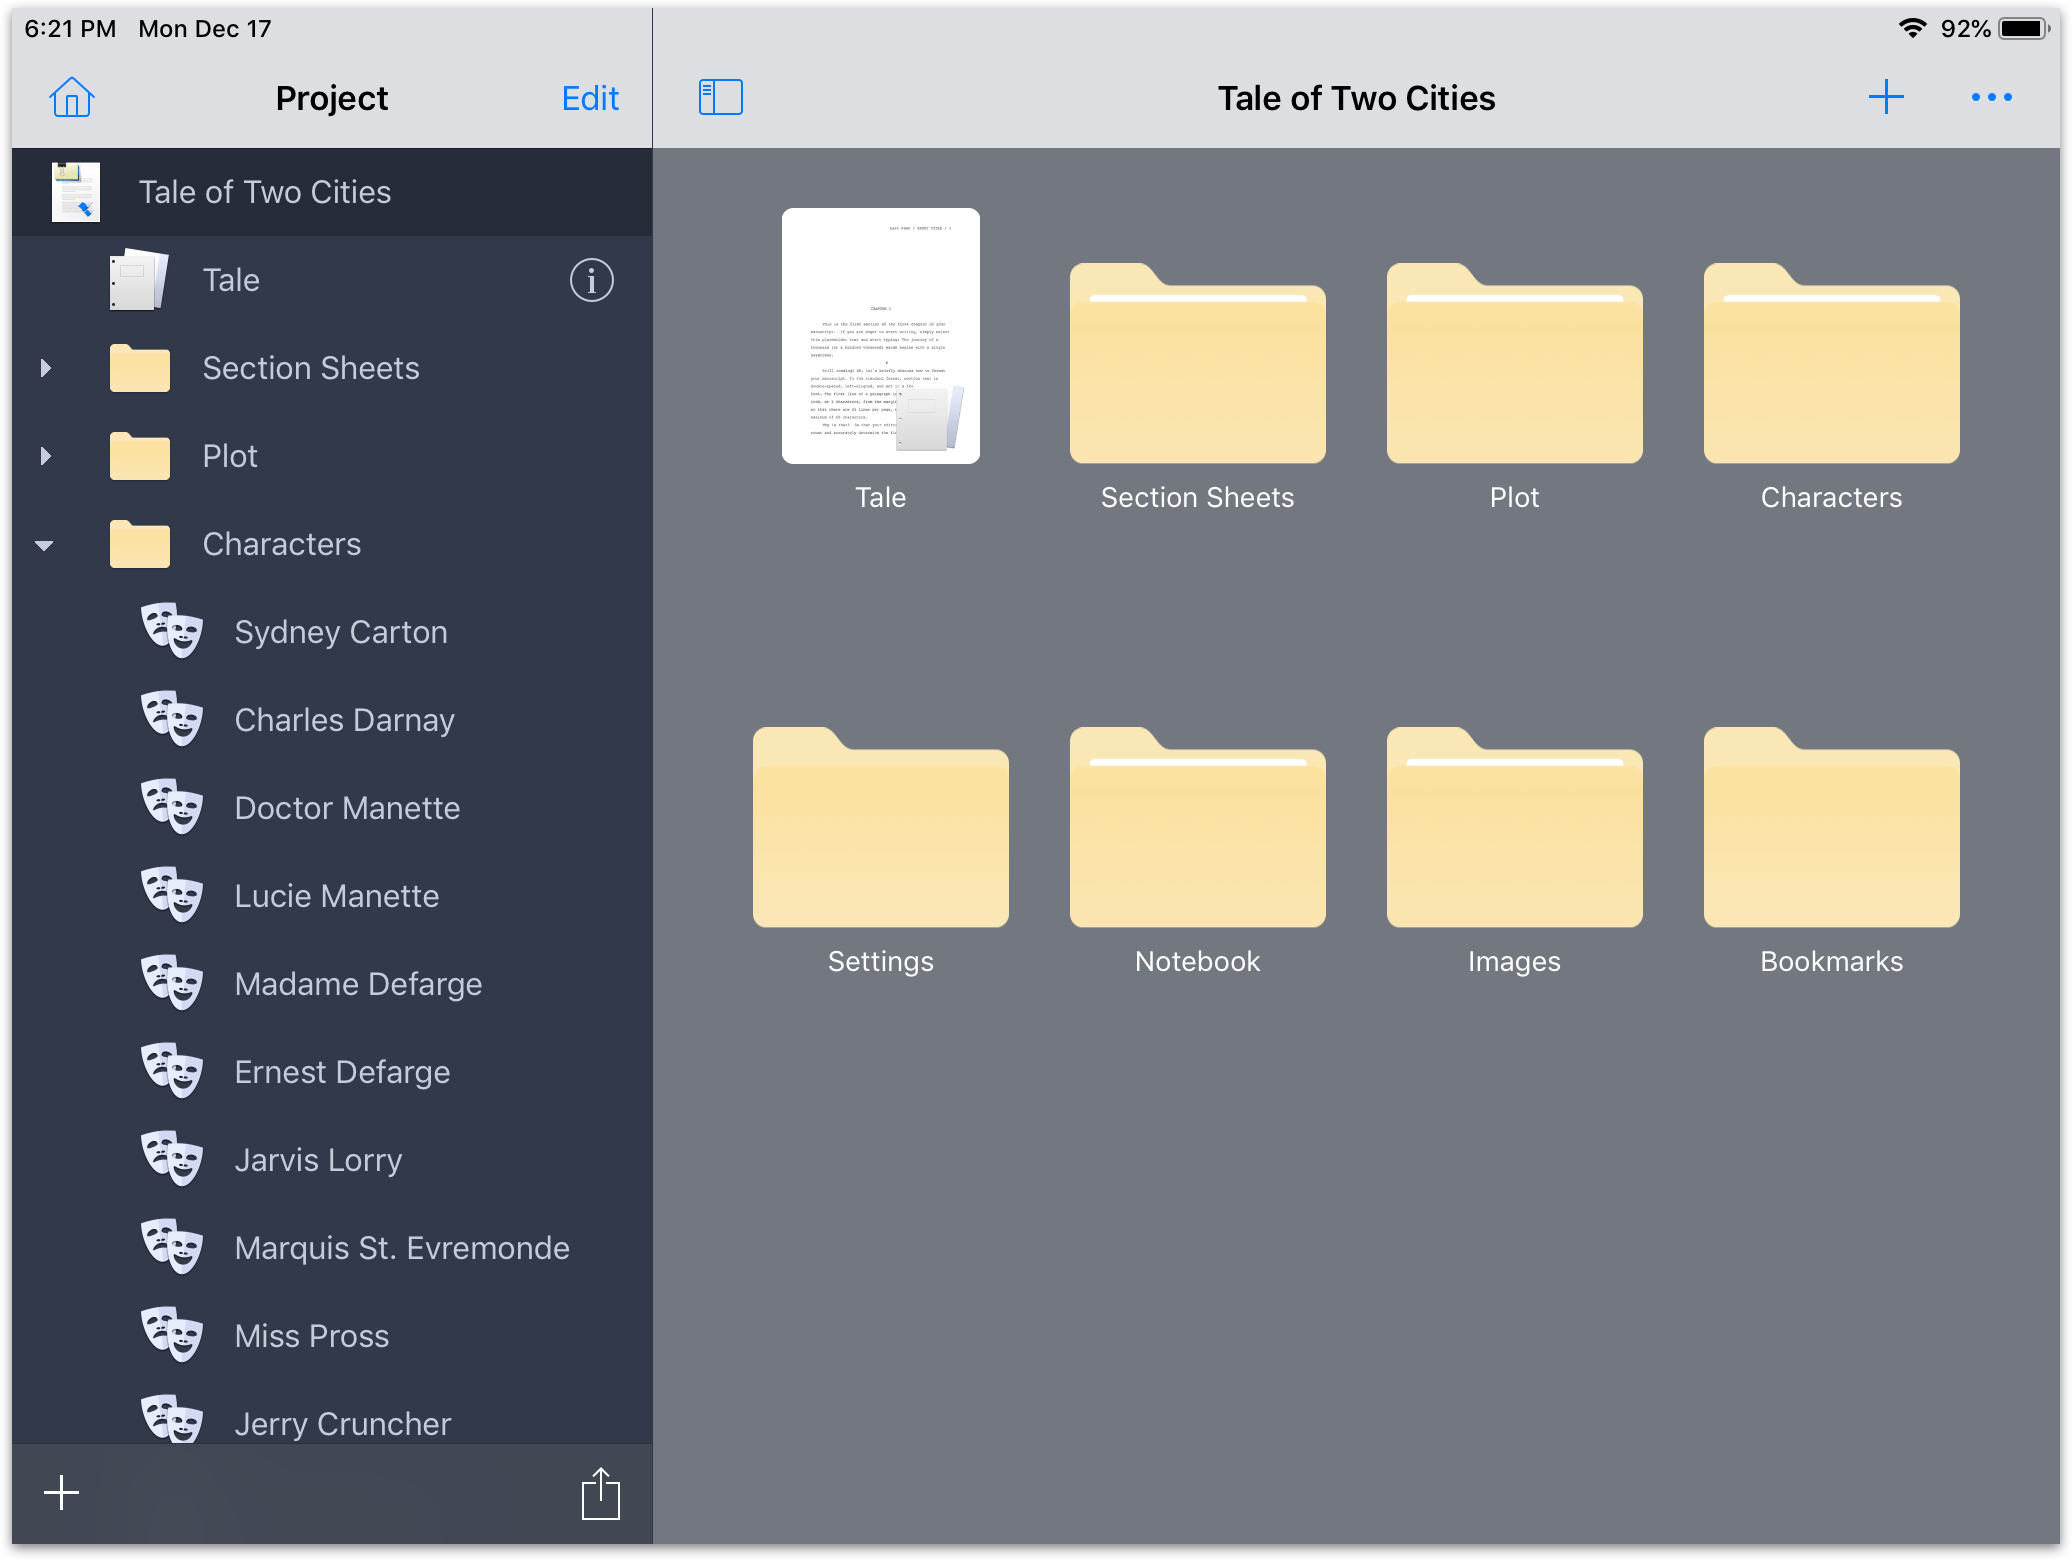
Storyist 3 displayed all of your files at the same level as a grid of icons. Using the Files interface in Storyist 4, you can
The Files interface works with iOS share sheets so you can
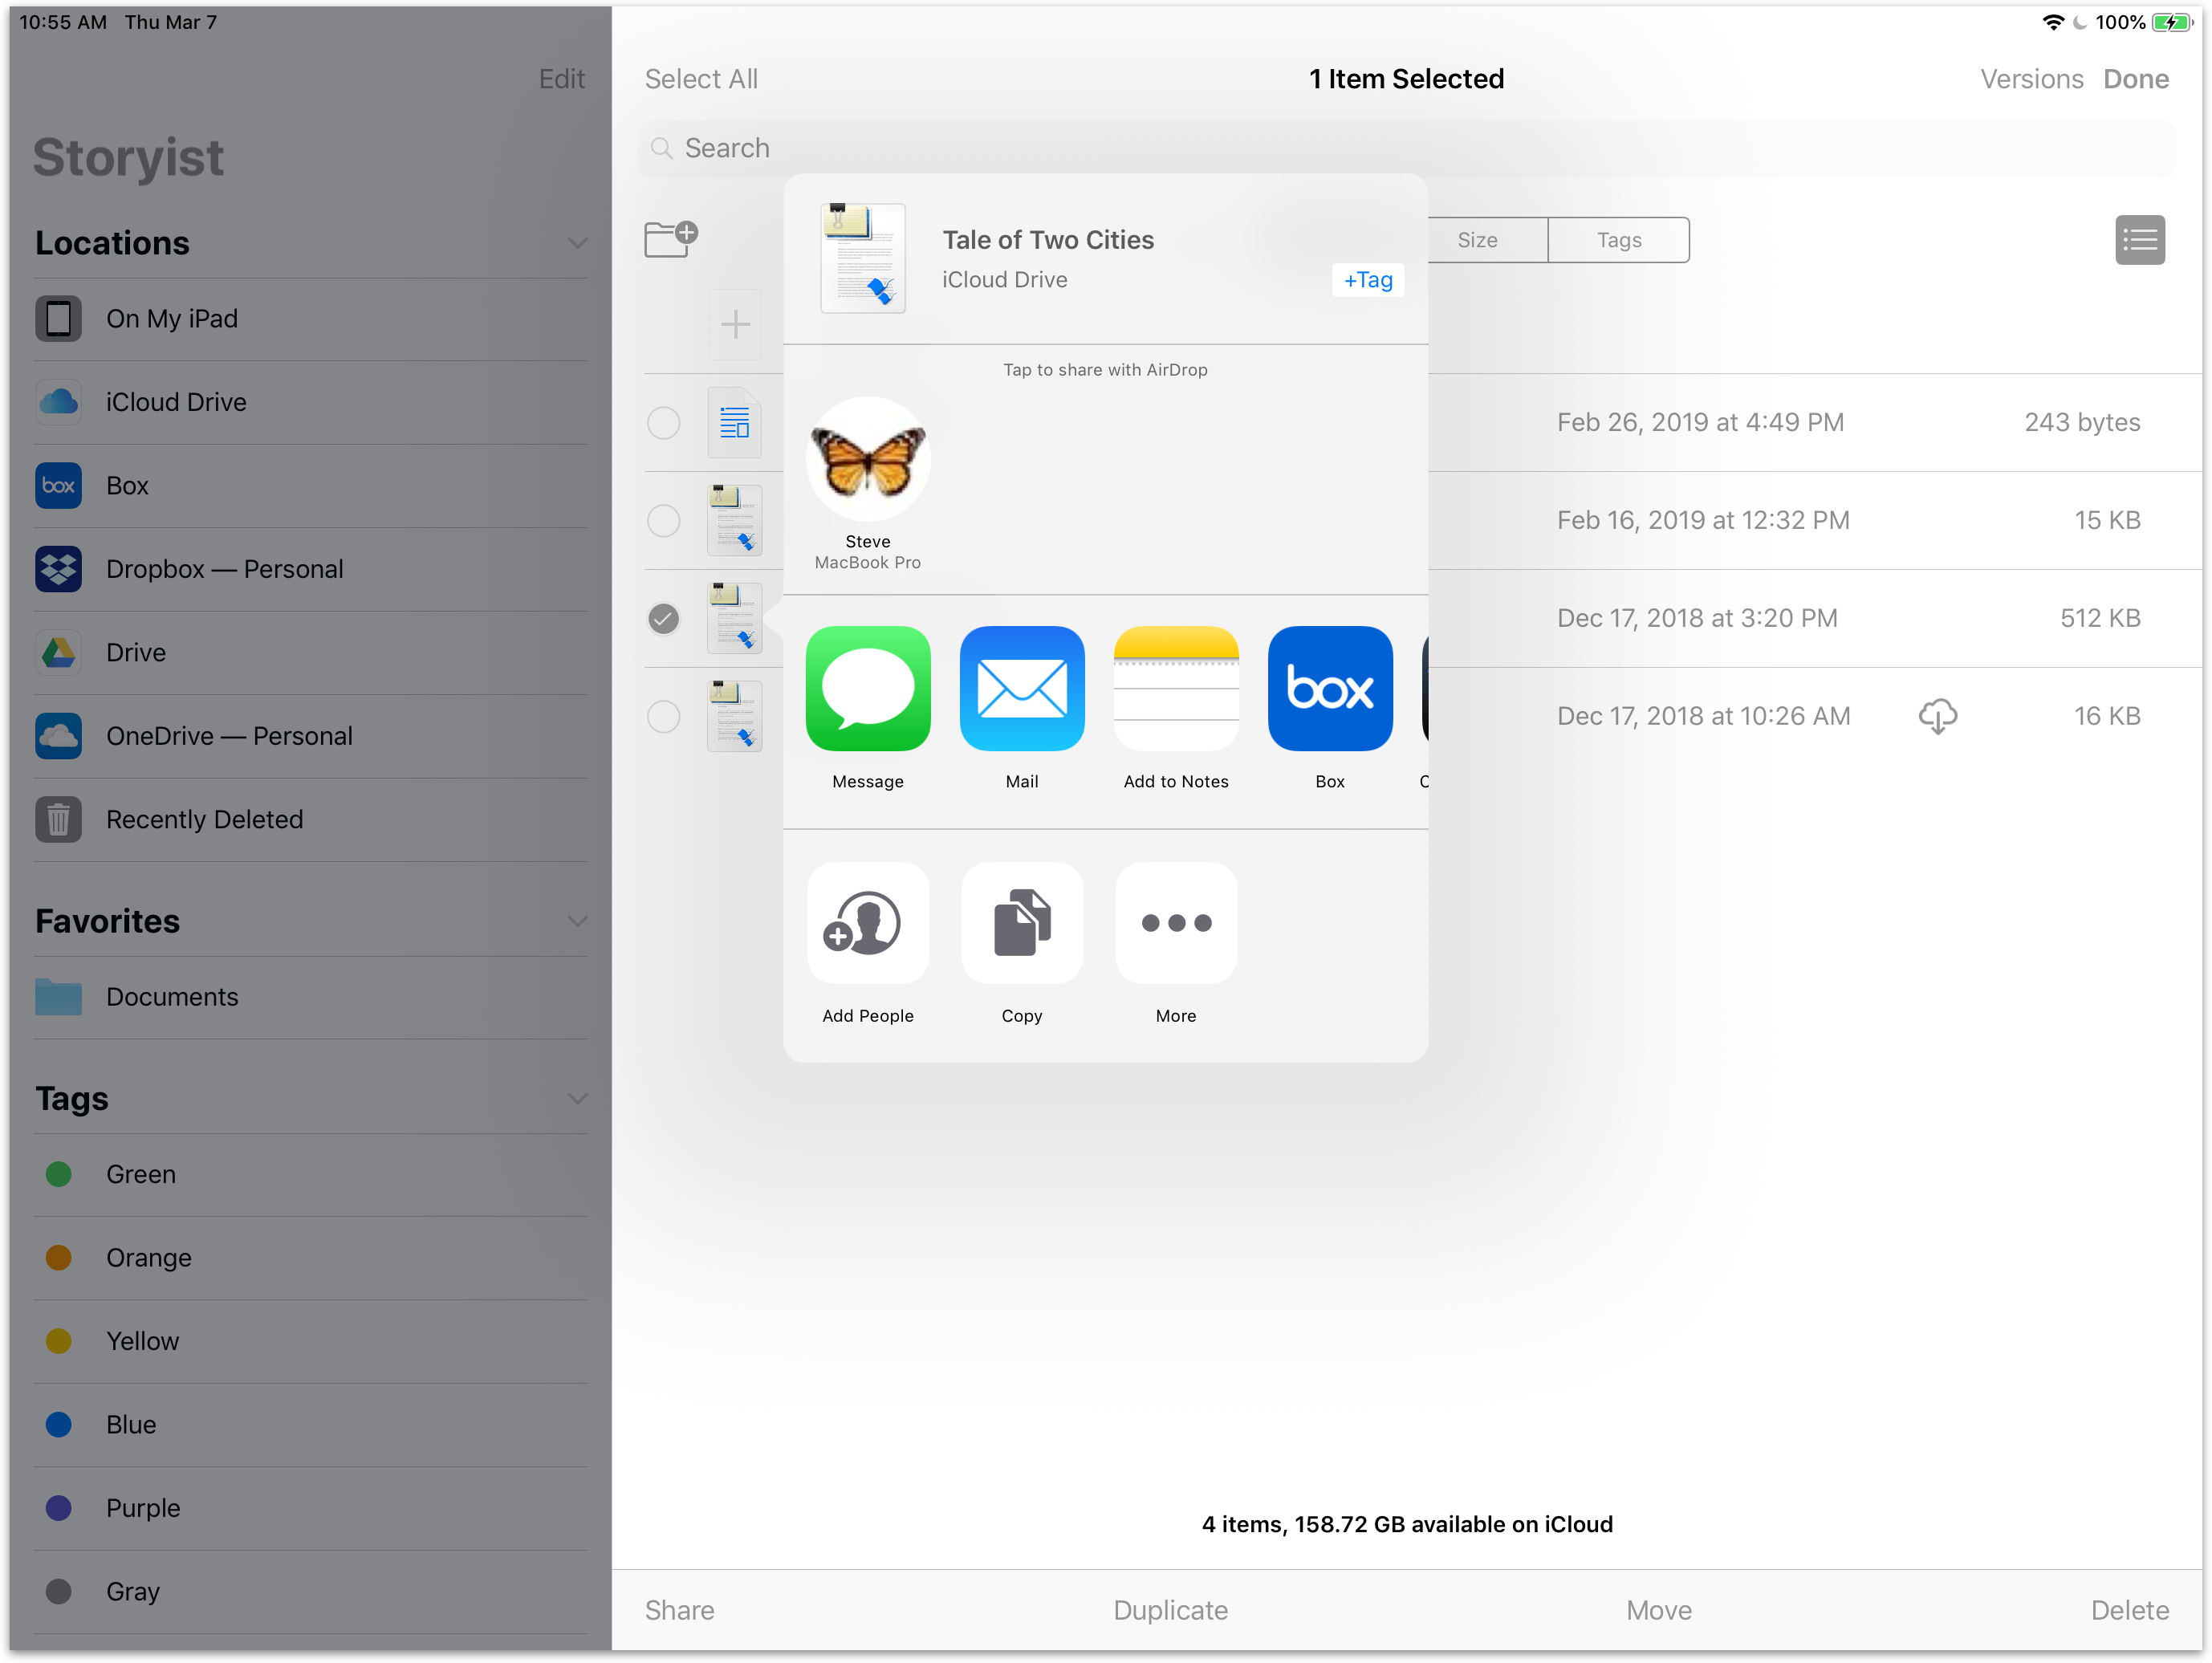
To share a file:
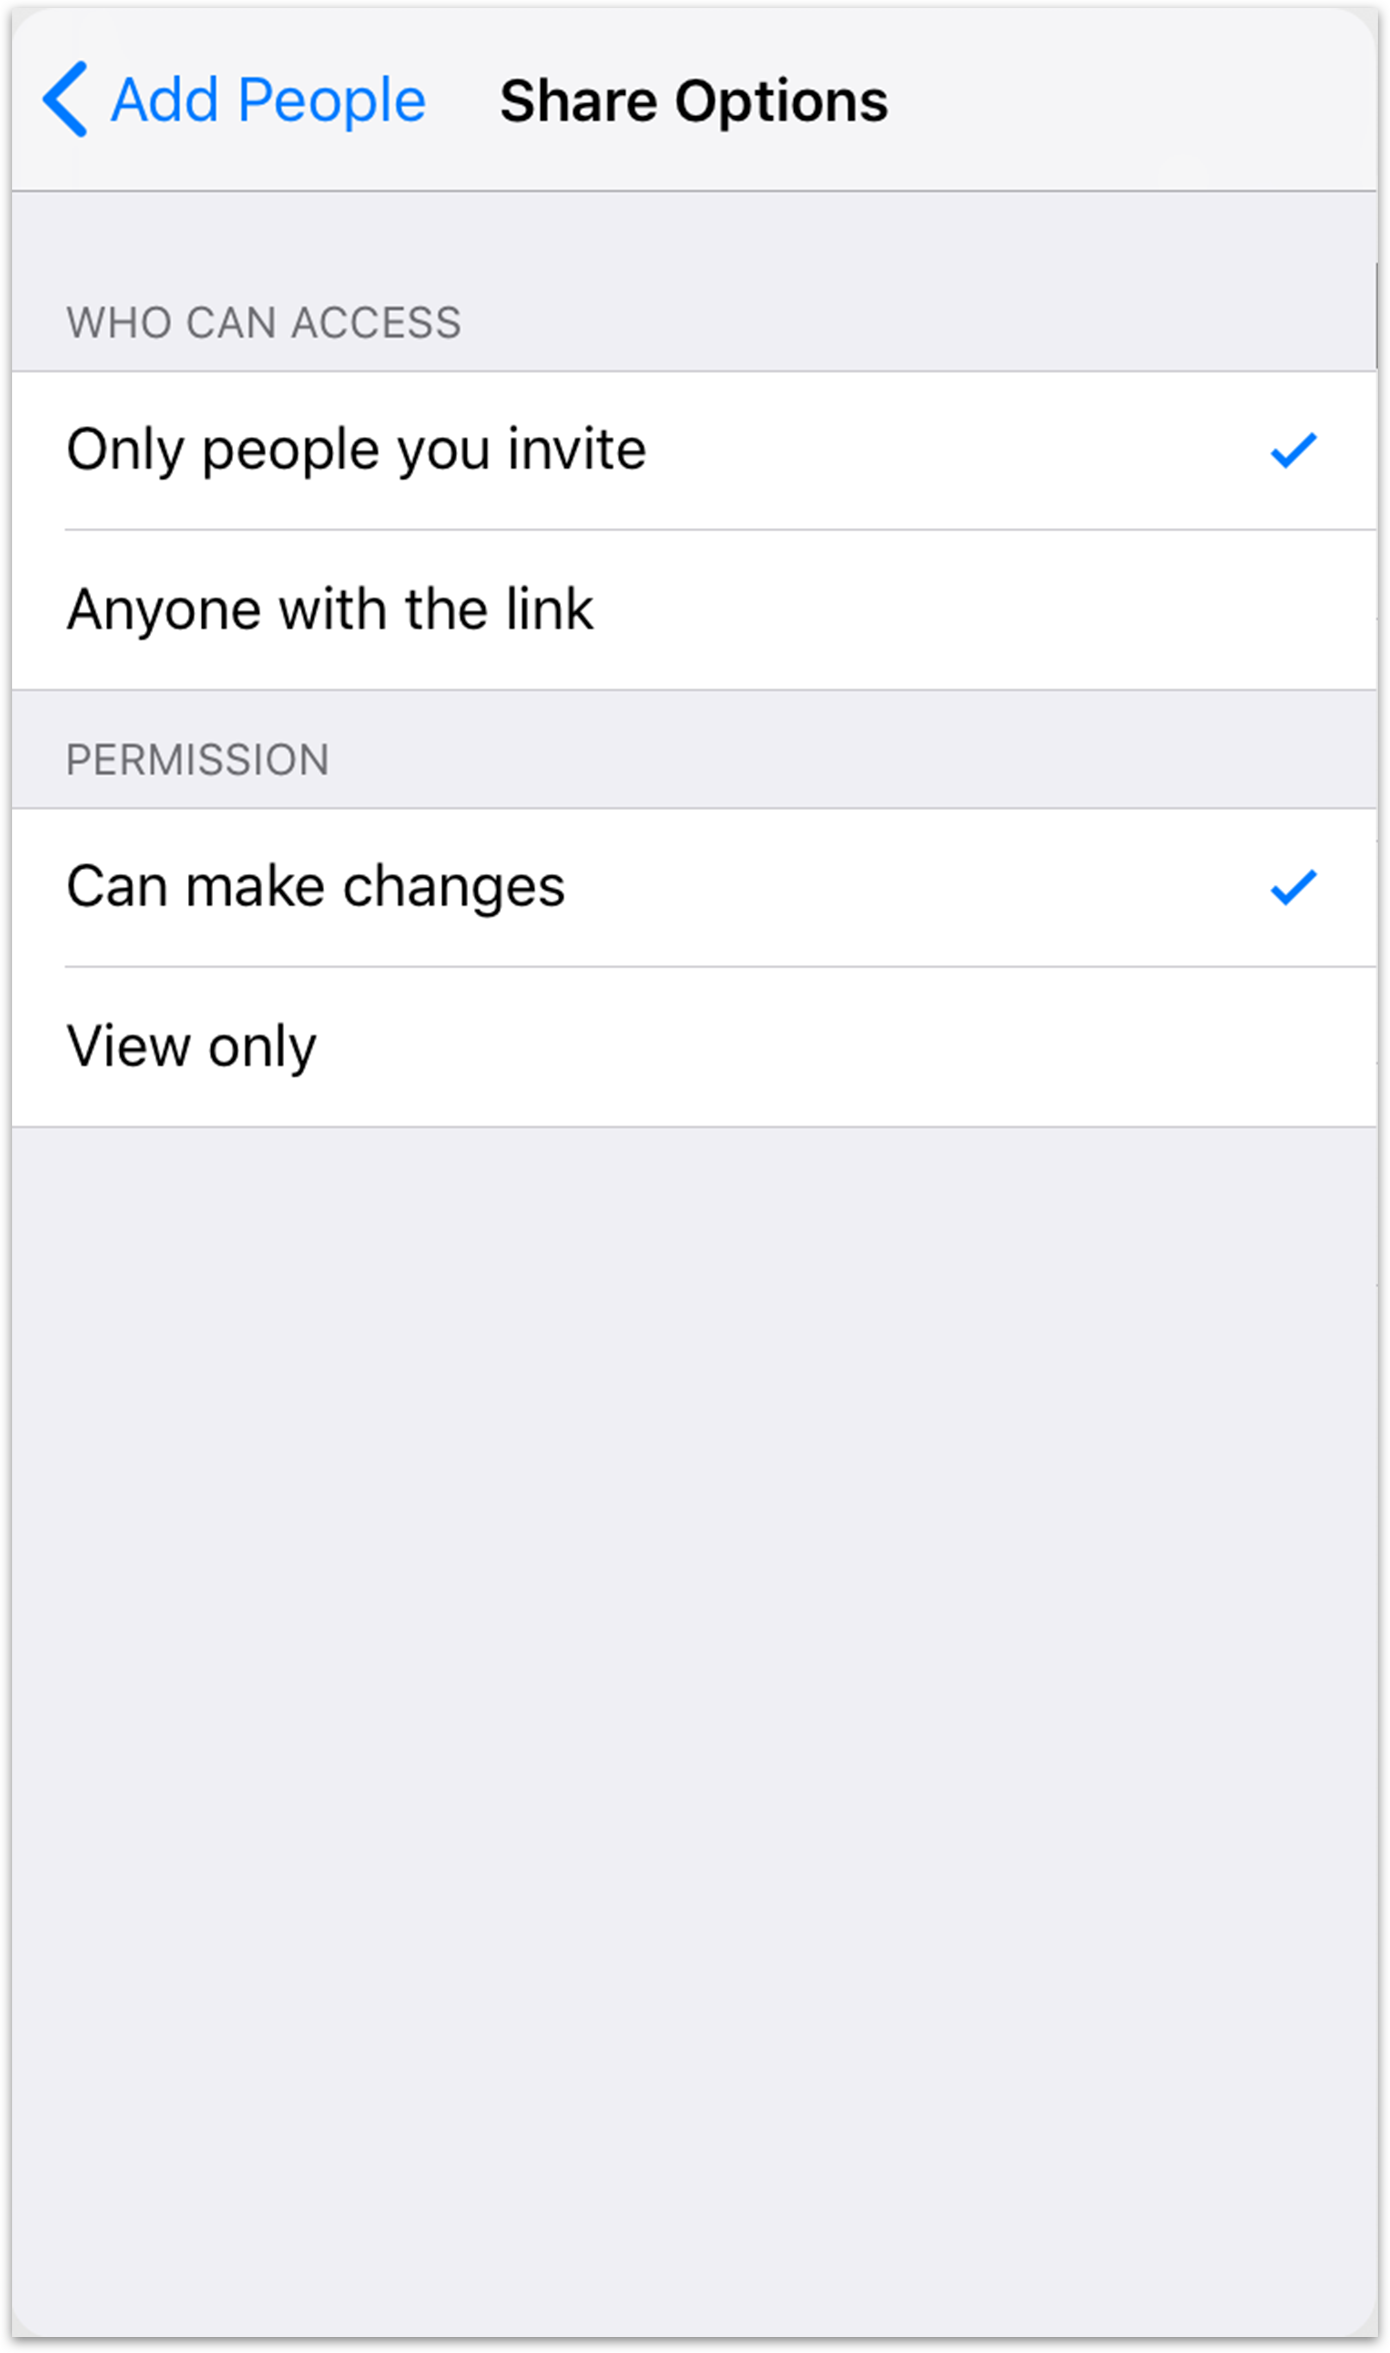
iCloud Sharing lets you share files you’ve stored in iCloud with friends and collaborators who have an Apple ID.
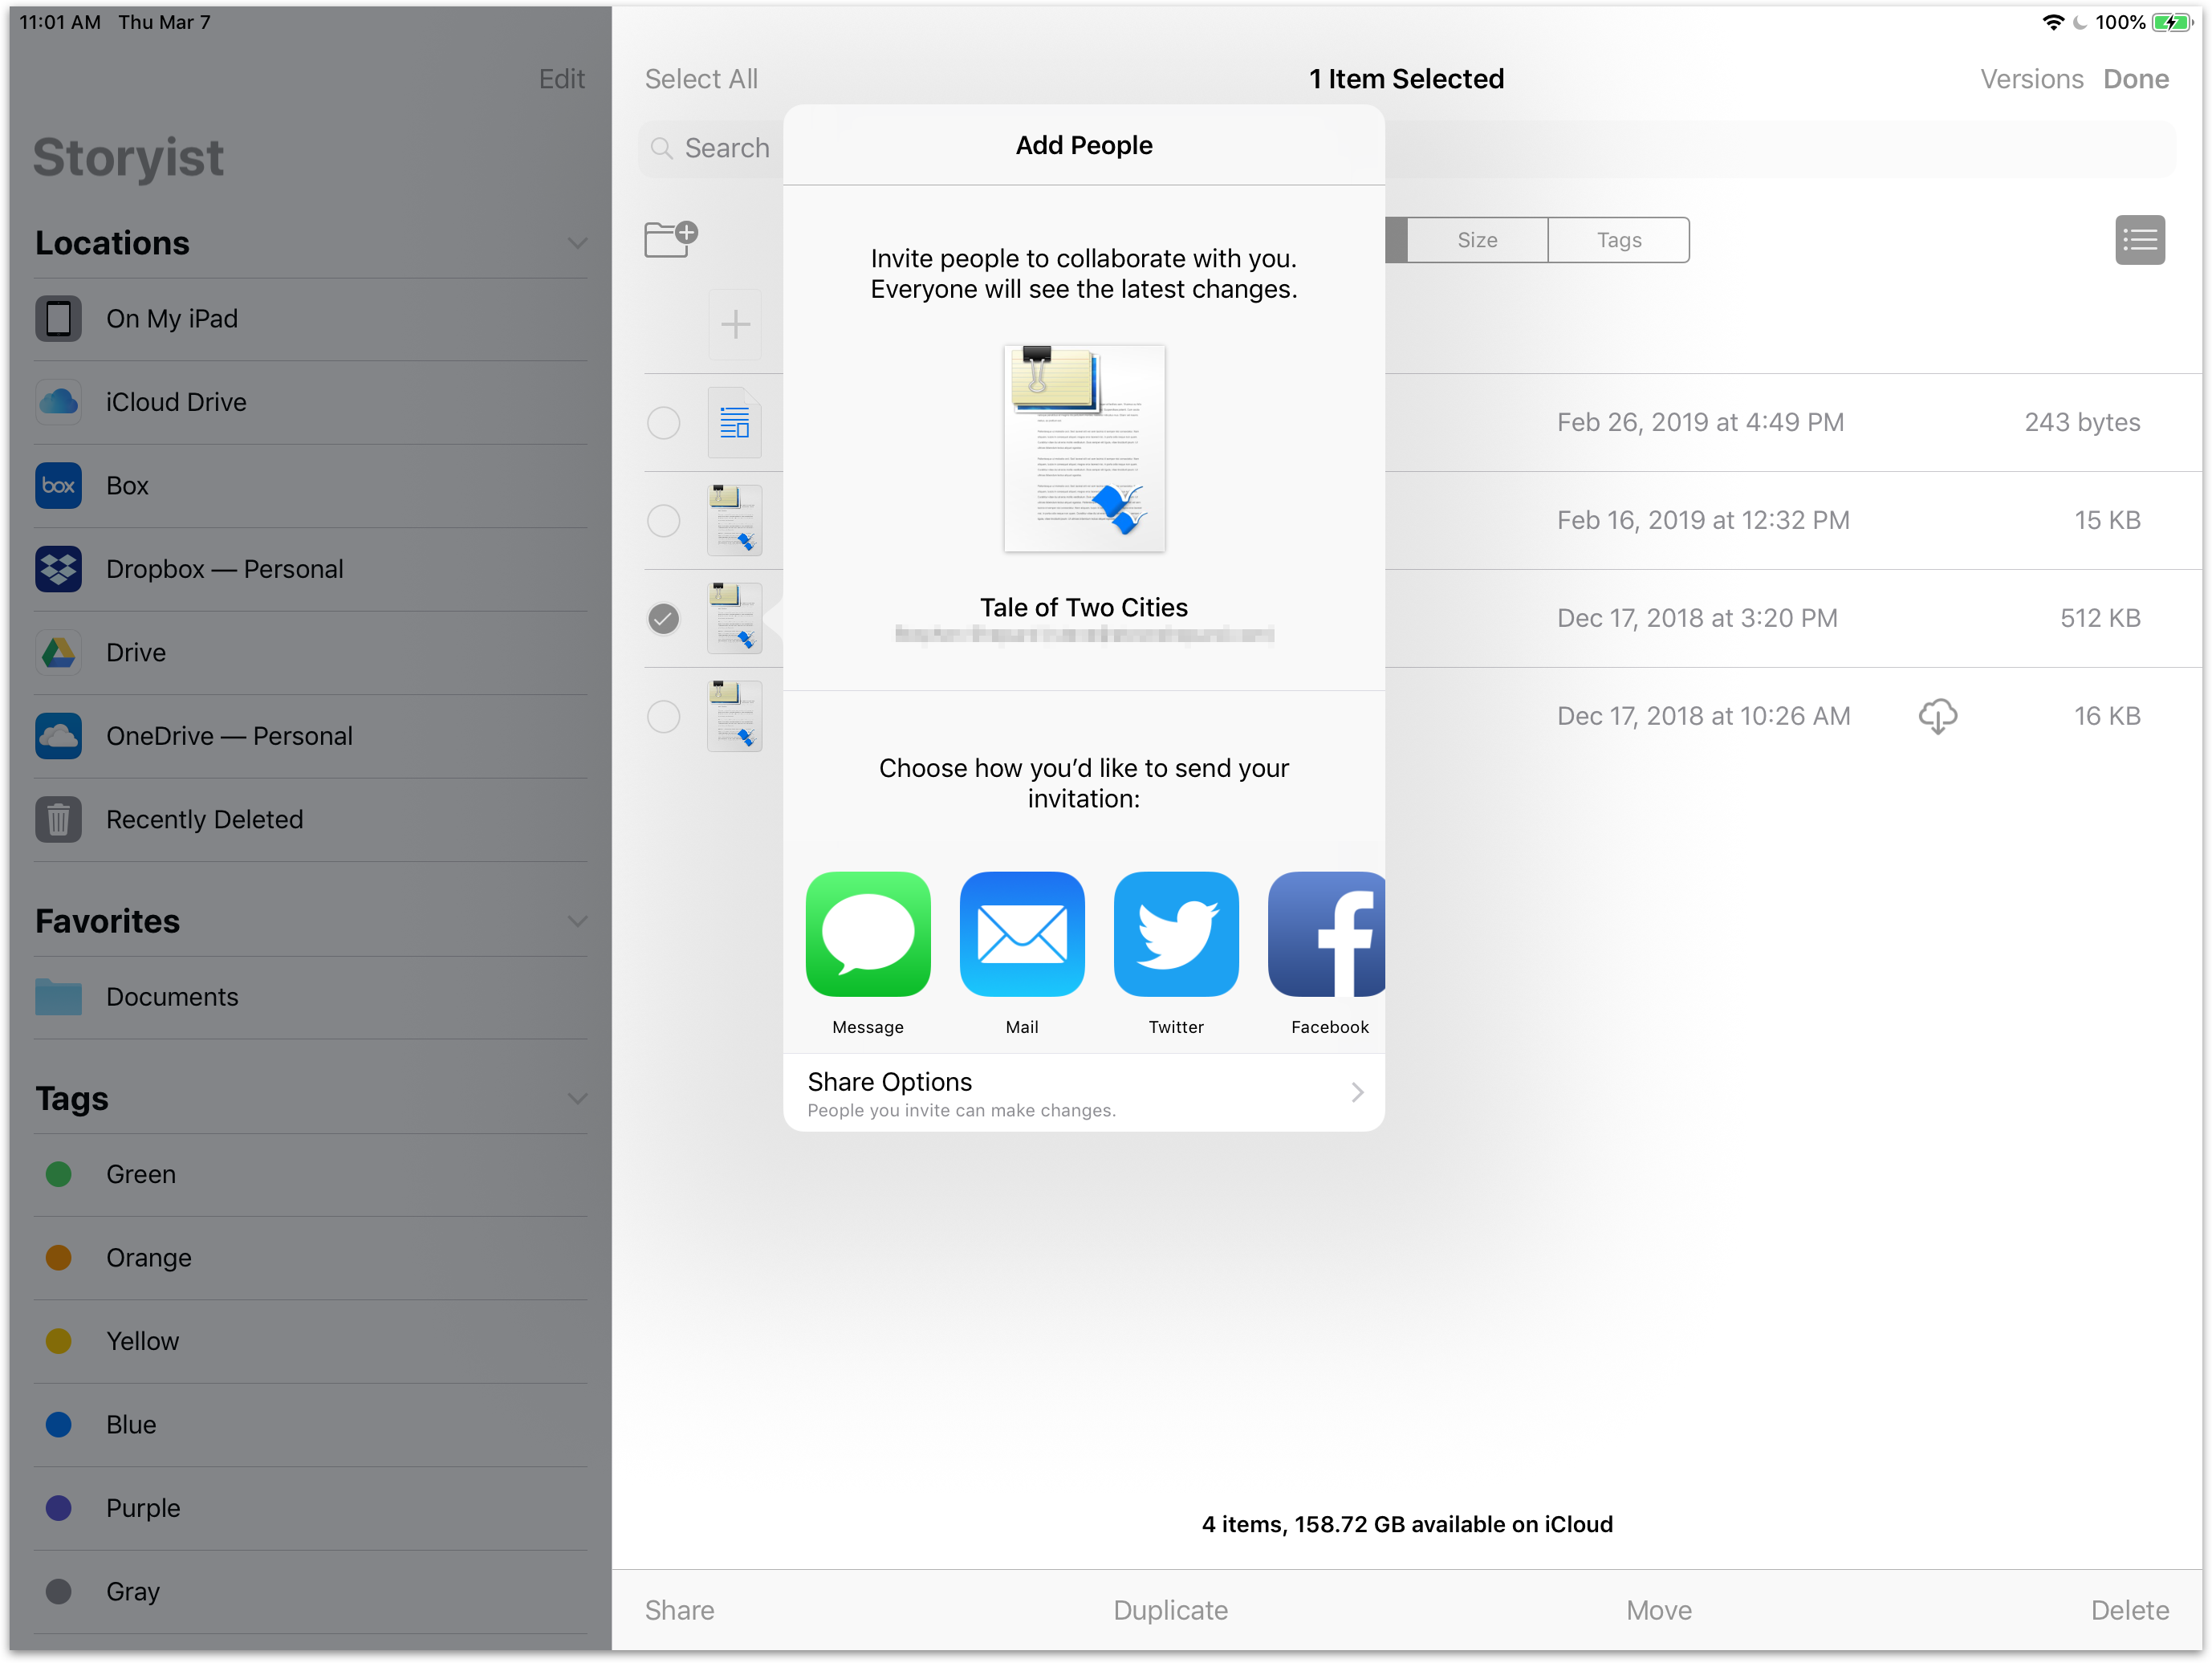
As with iCloud Photo Sharing, you can
The Files interface gives you quick access to recently edited files both in the app and on the home screen.
To see your recently edited files in the app, just tap the Recents tab on the Storyist home screen. To see them on the home screen, press and hold the app icon.
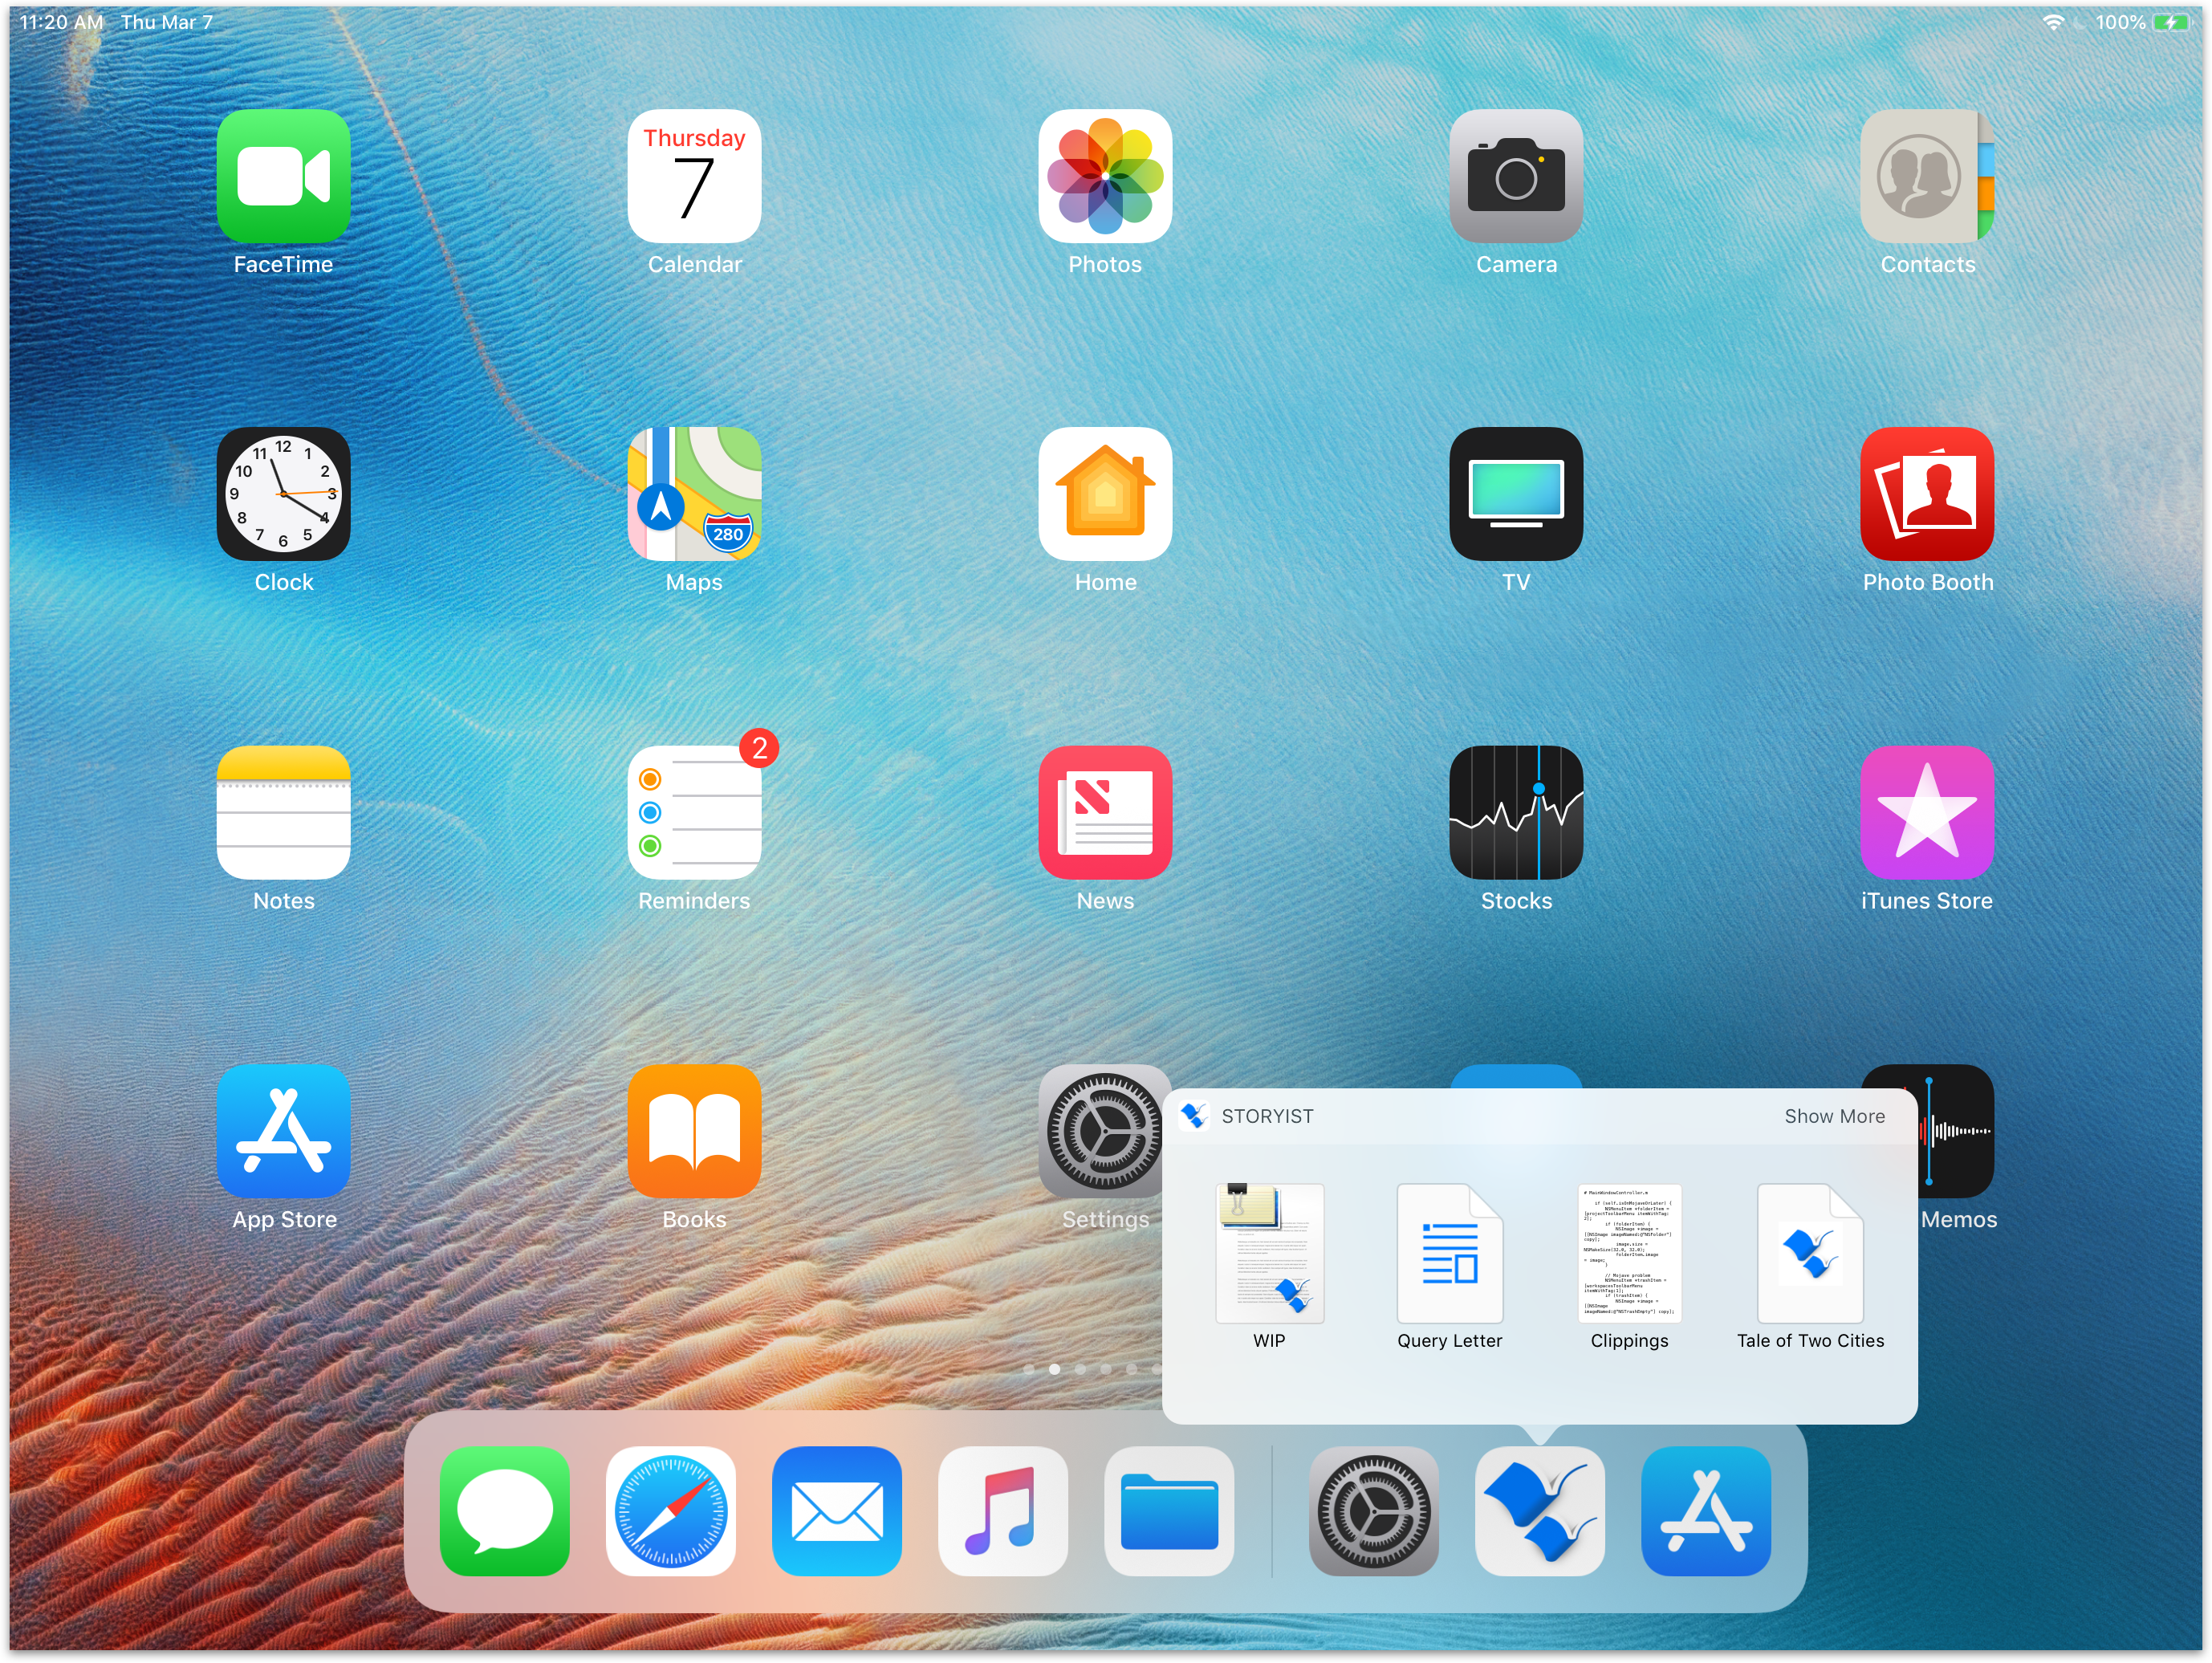
Tapping a file in the Recents lists opens it in the app.
One thing that the Files app doesn’t offer is access to previous versions of your file. Storyist 4 lets you see and restore from previous versions stored in iCloud and in the Storyist folder in the “On My iPad” location.
To view the previous versions of a file, press and hold the file icon and select Versions from the popup menu.
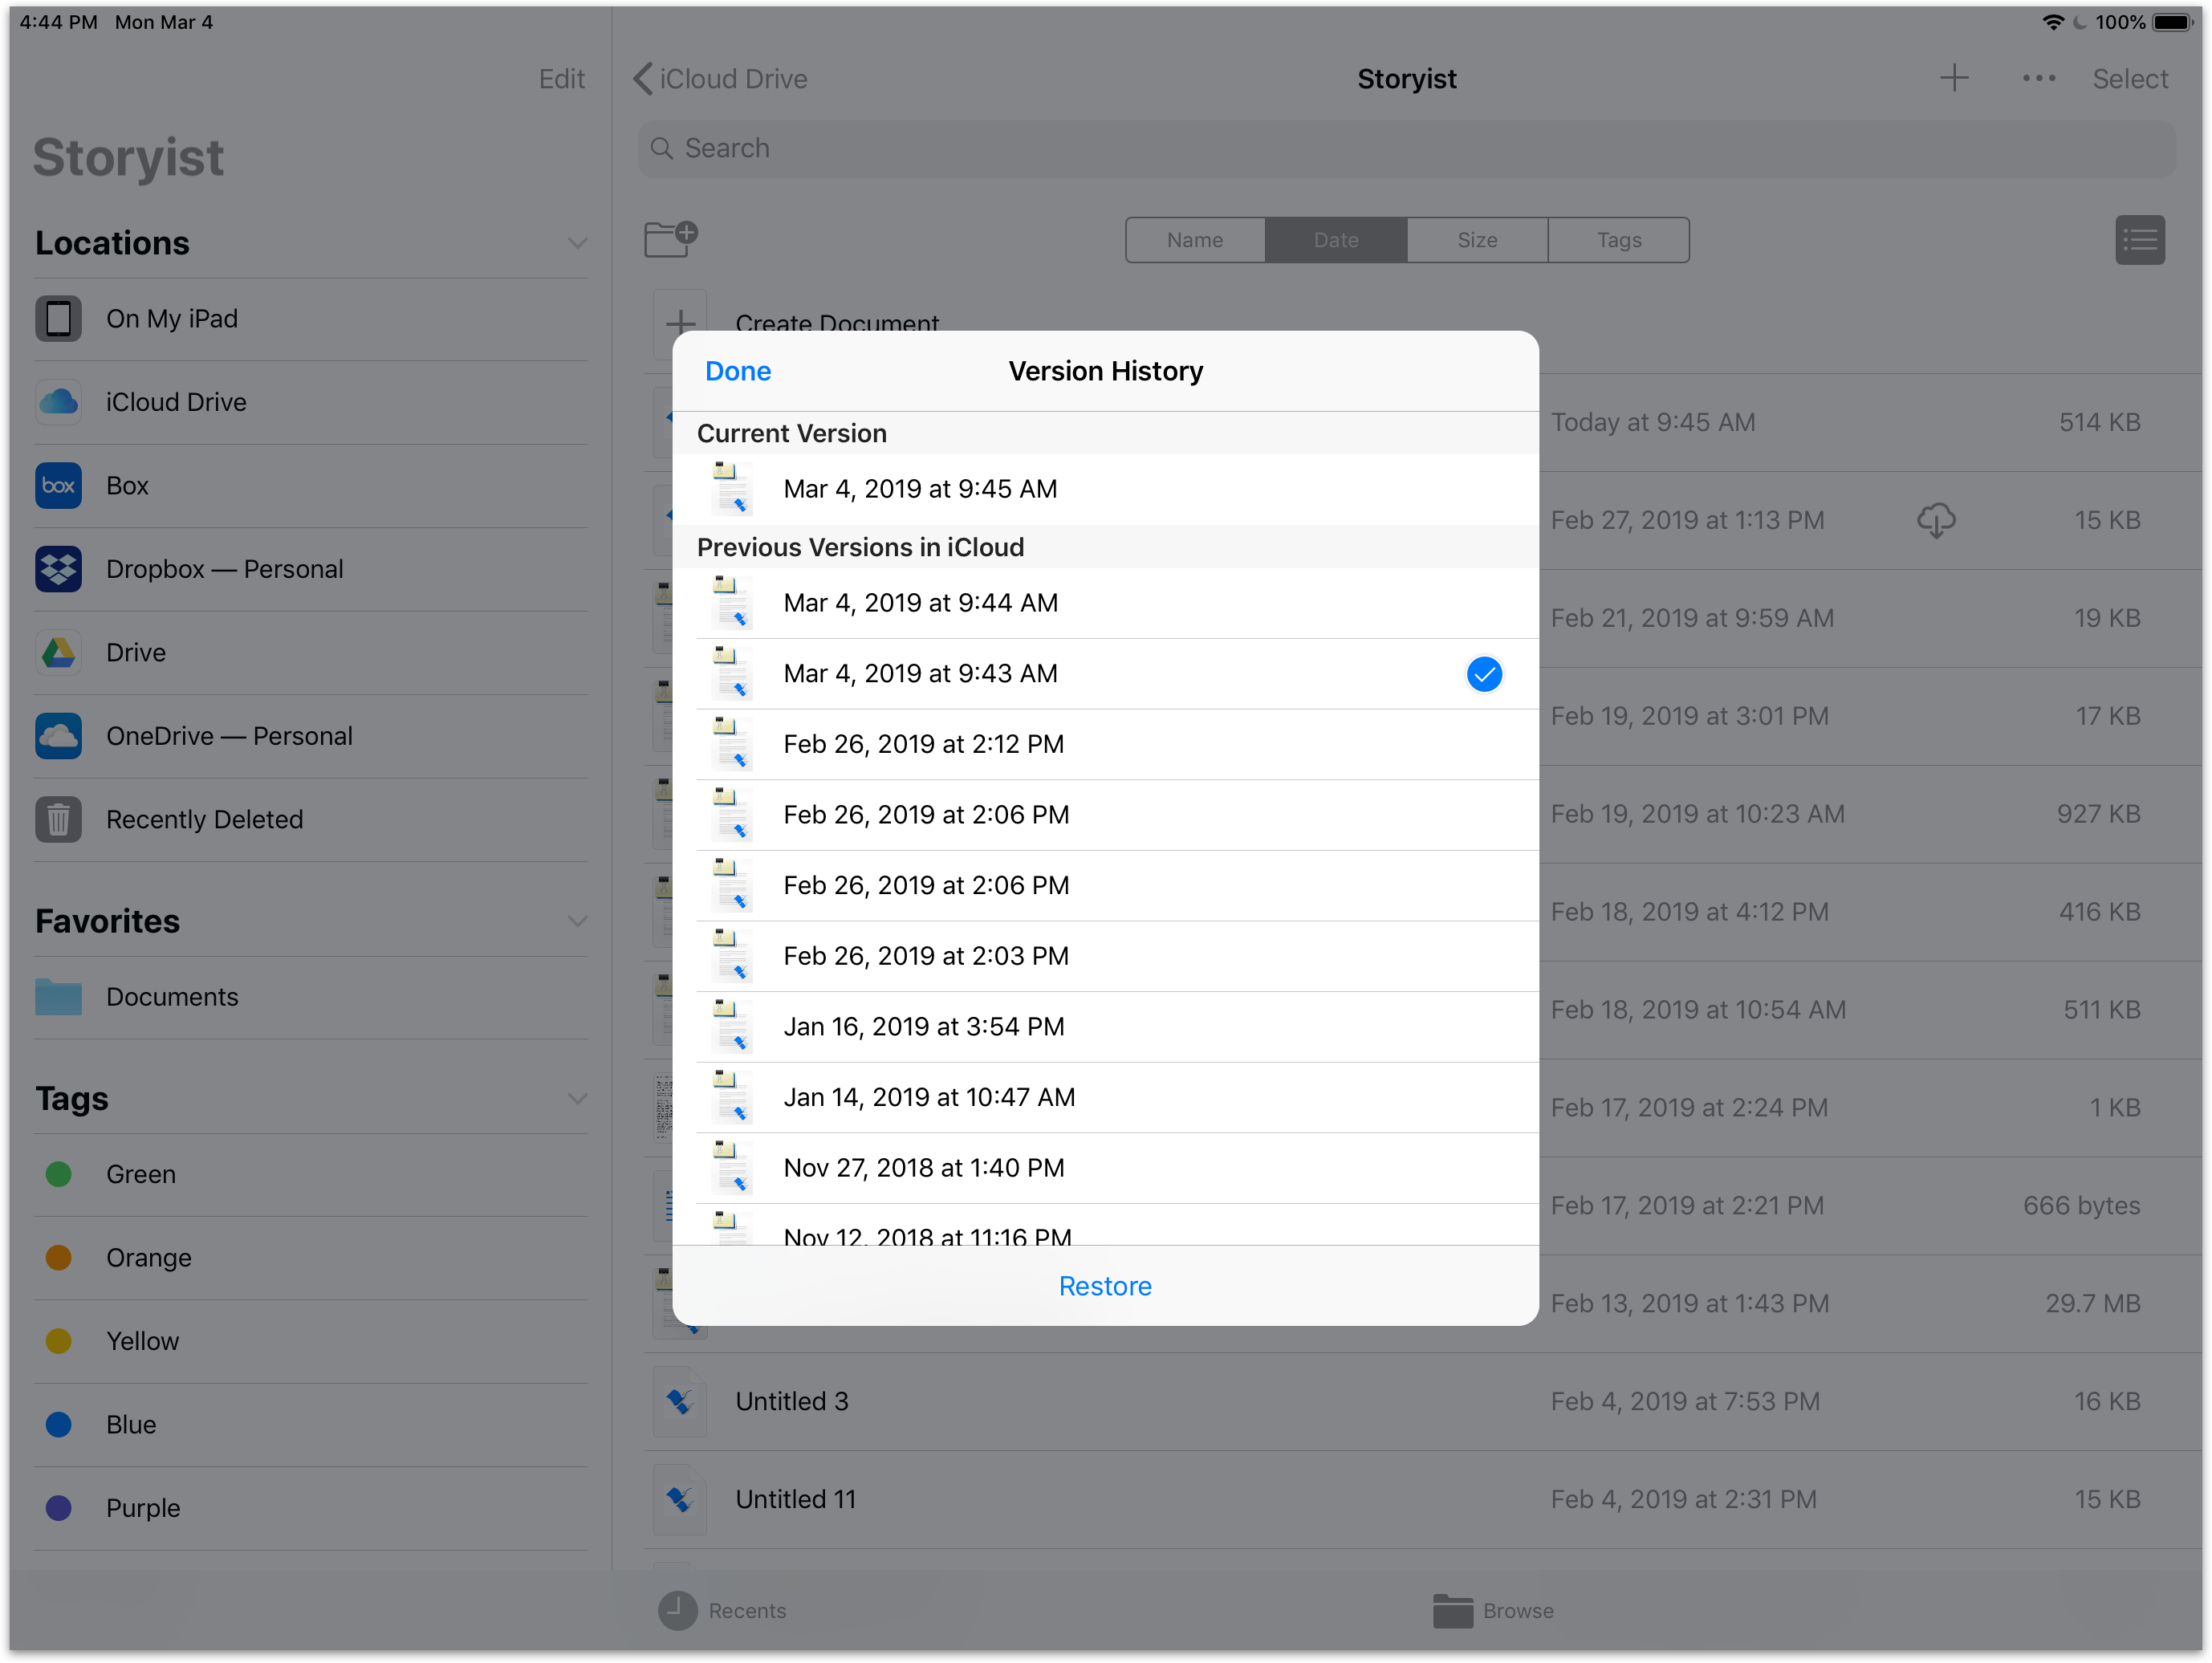
If you want to return to an older version of the file, just select the file and tap Restore.
Note that version history is only available for files stored in iCloud and for files stored in the Storyist folder on your device.
If you’re using a 3rd party cloud storage provider, you may also be able to get version history from the provider’s app or website. For example, both Dropbox and Google Drive support this feature.
For more information, see the “Backing Up Your Work” section in the Users Guide.
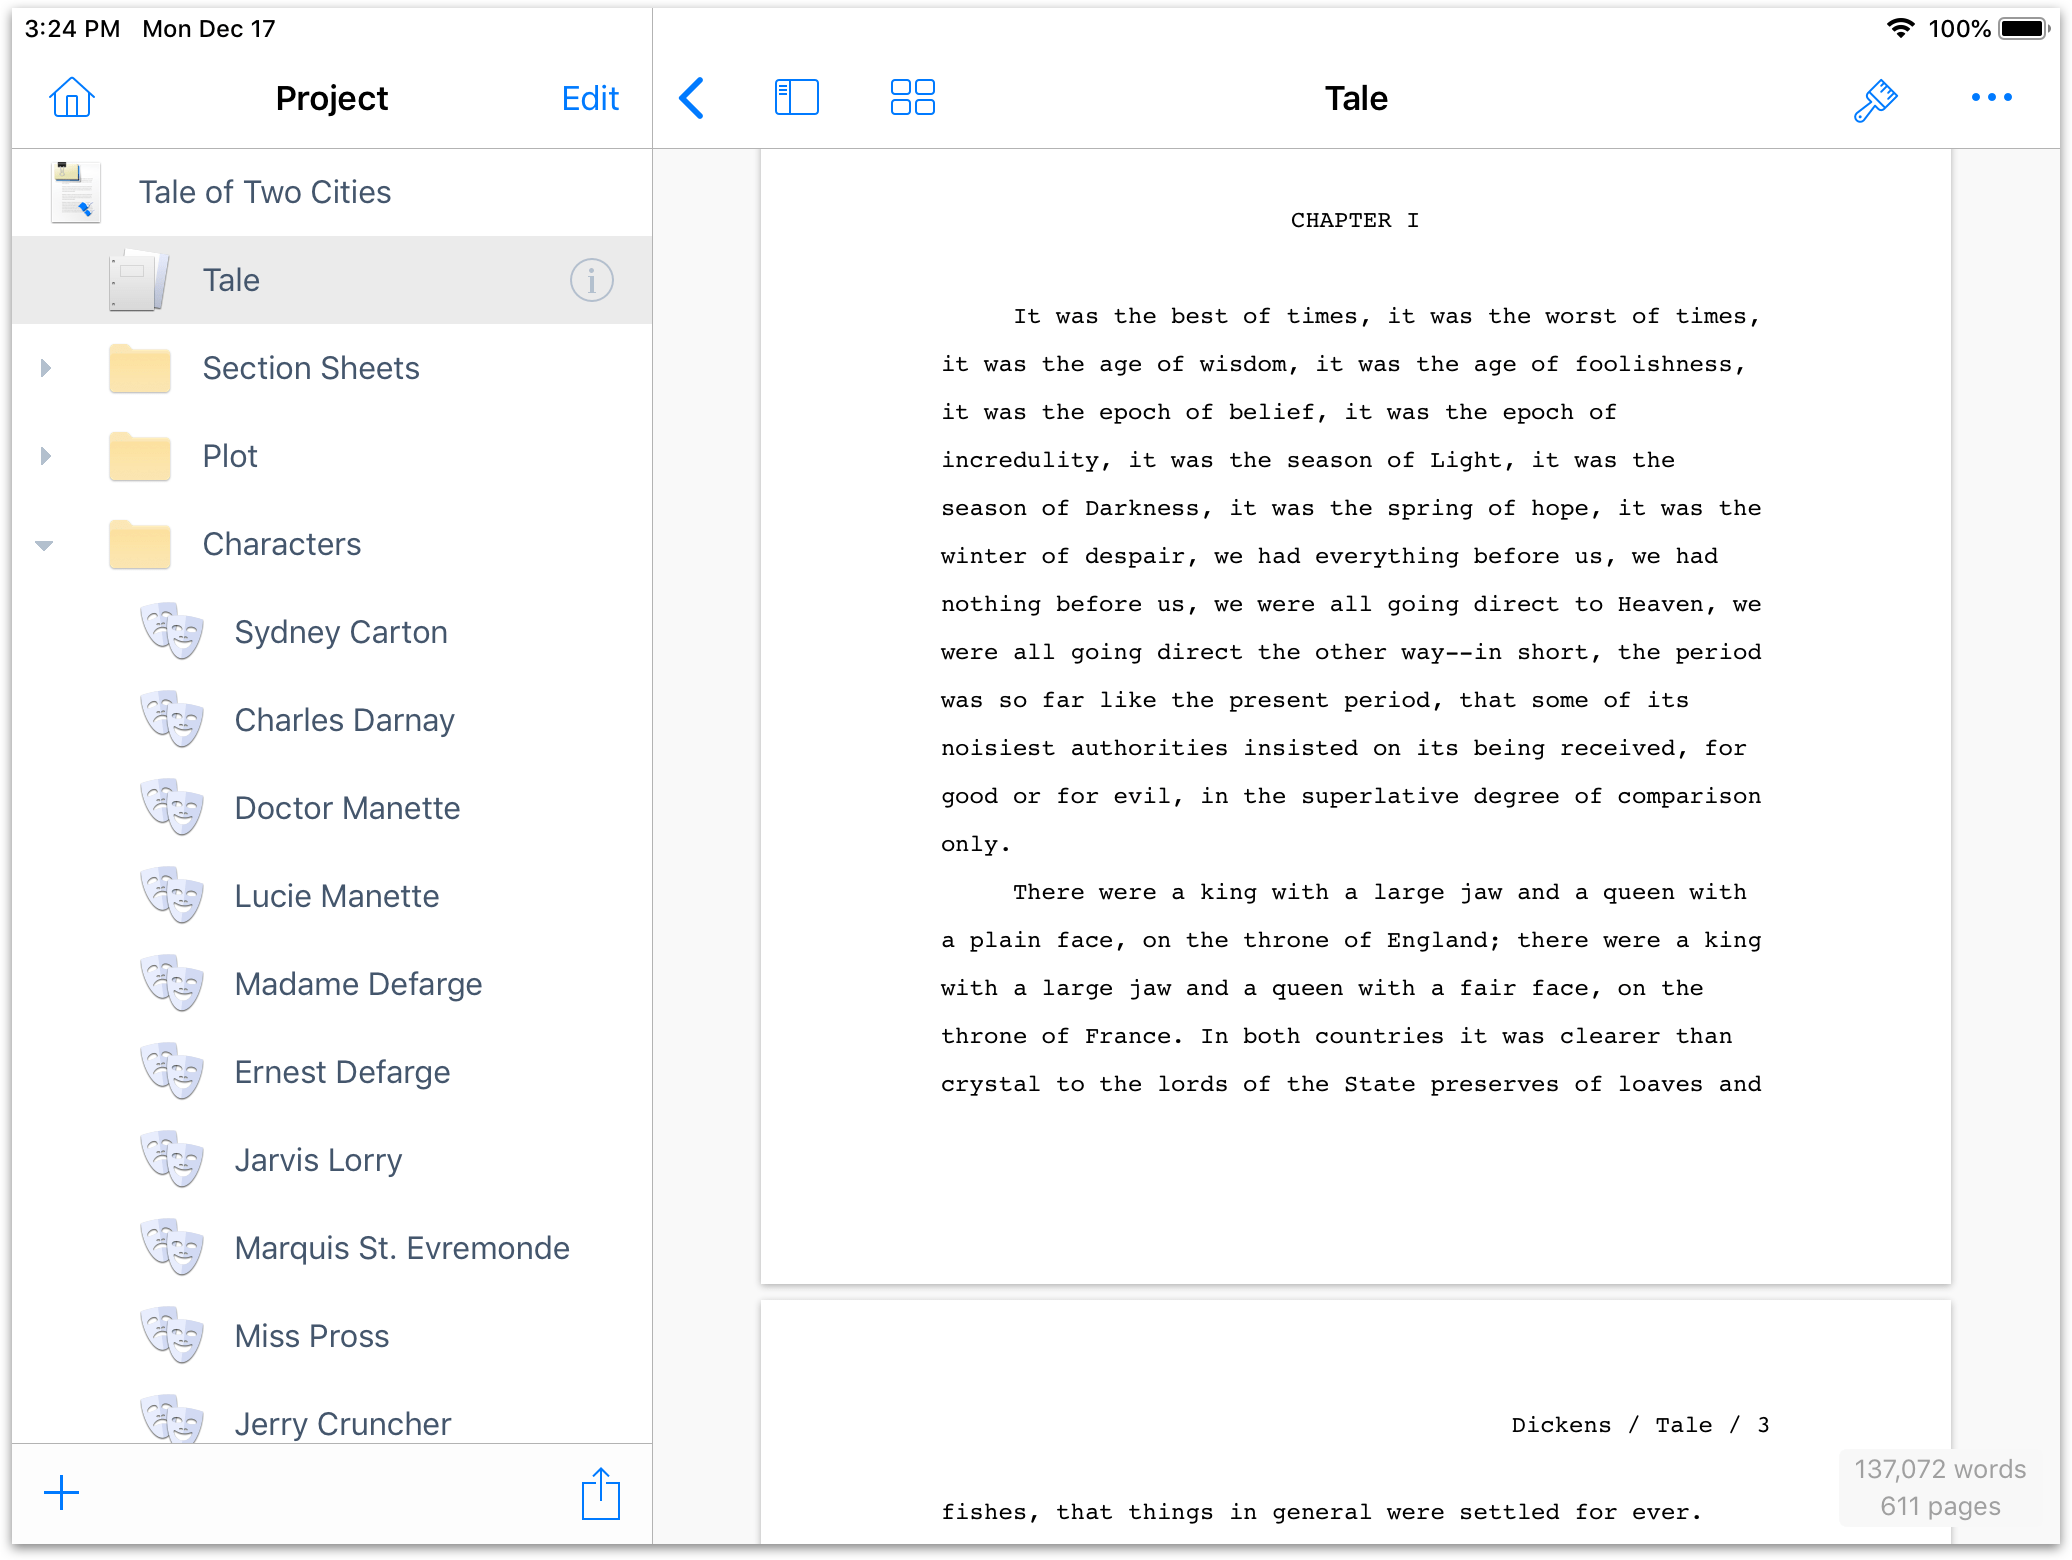
Storyist 3 supported the “slide-under” style of navigation popularized by Facebook in the iOS 6 days, where a swipe right revealed the navigation sidebar under the main screen. Since then, Apple has introduced new navigation conventions in apps like Notes and News which Storyist 4 adopts.
Storyist 4 continues to support the navigation sidebar, though how you interact with it has changed slightly. There are two ways to reveal the navigation sidebar on iPad:
Swipe right. A swipe right temporarily slides the sidebar over the editor, allowing you to select a file or chapter to view. After you make a selection, the sidebar automatically closes.
Tap the sidebar icon. When you tap the sidebar icon in the toolbar, the sidebar slides in and remains open, so you can quickly jump between files or chapters in your project.
You can see both in action in the following screencast.

There are some subtle enhancements to notice here:
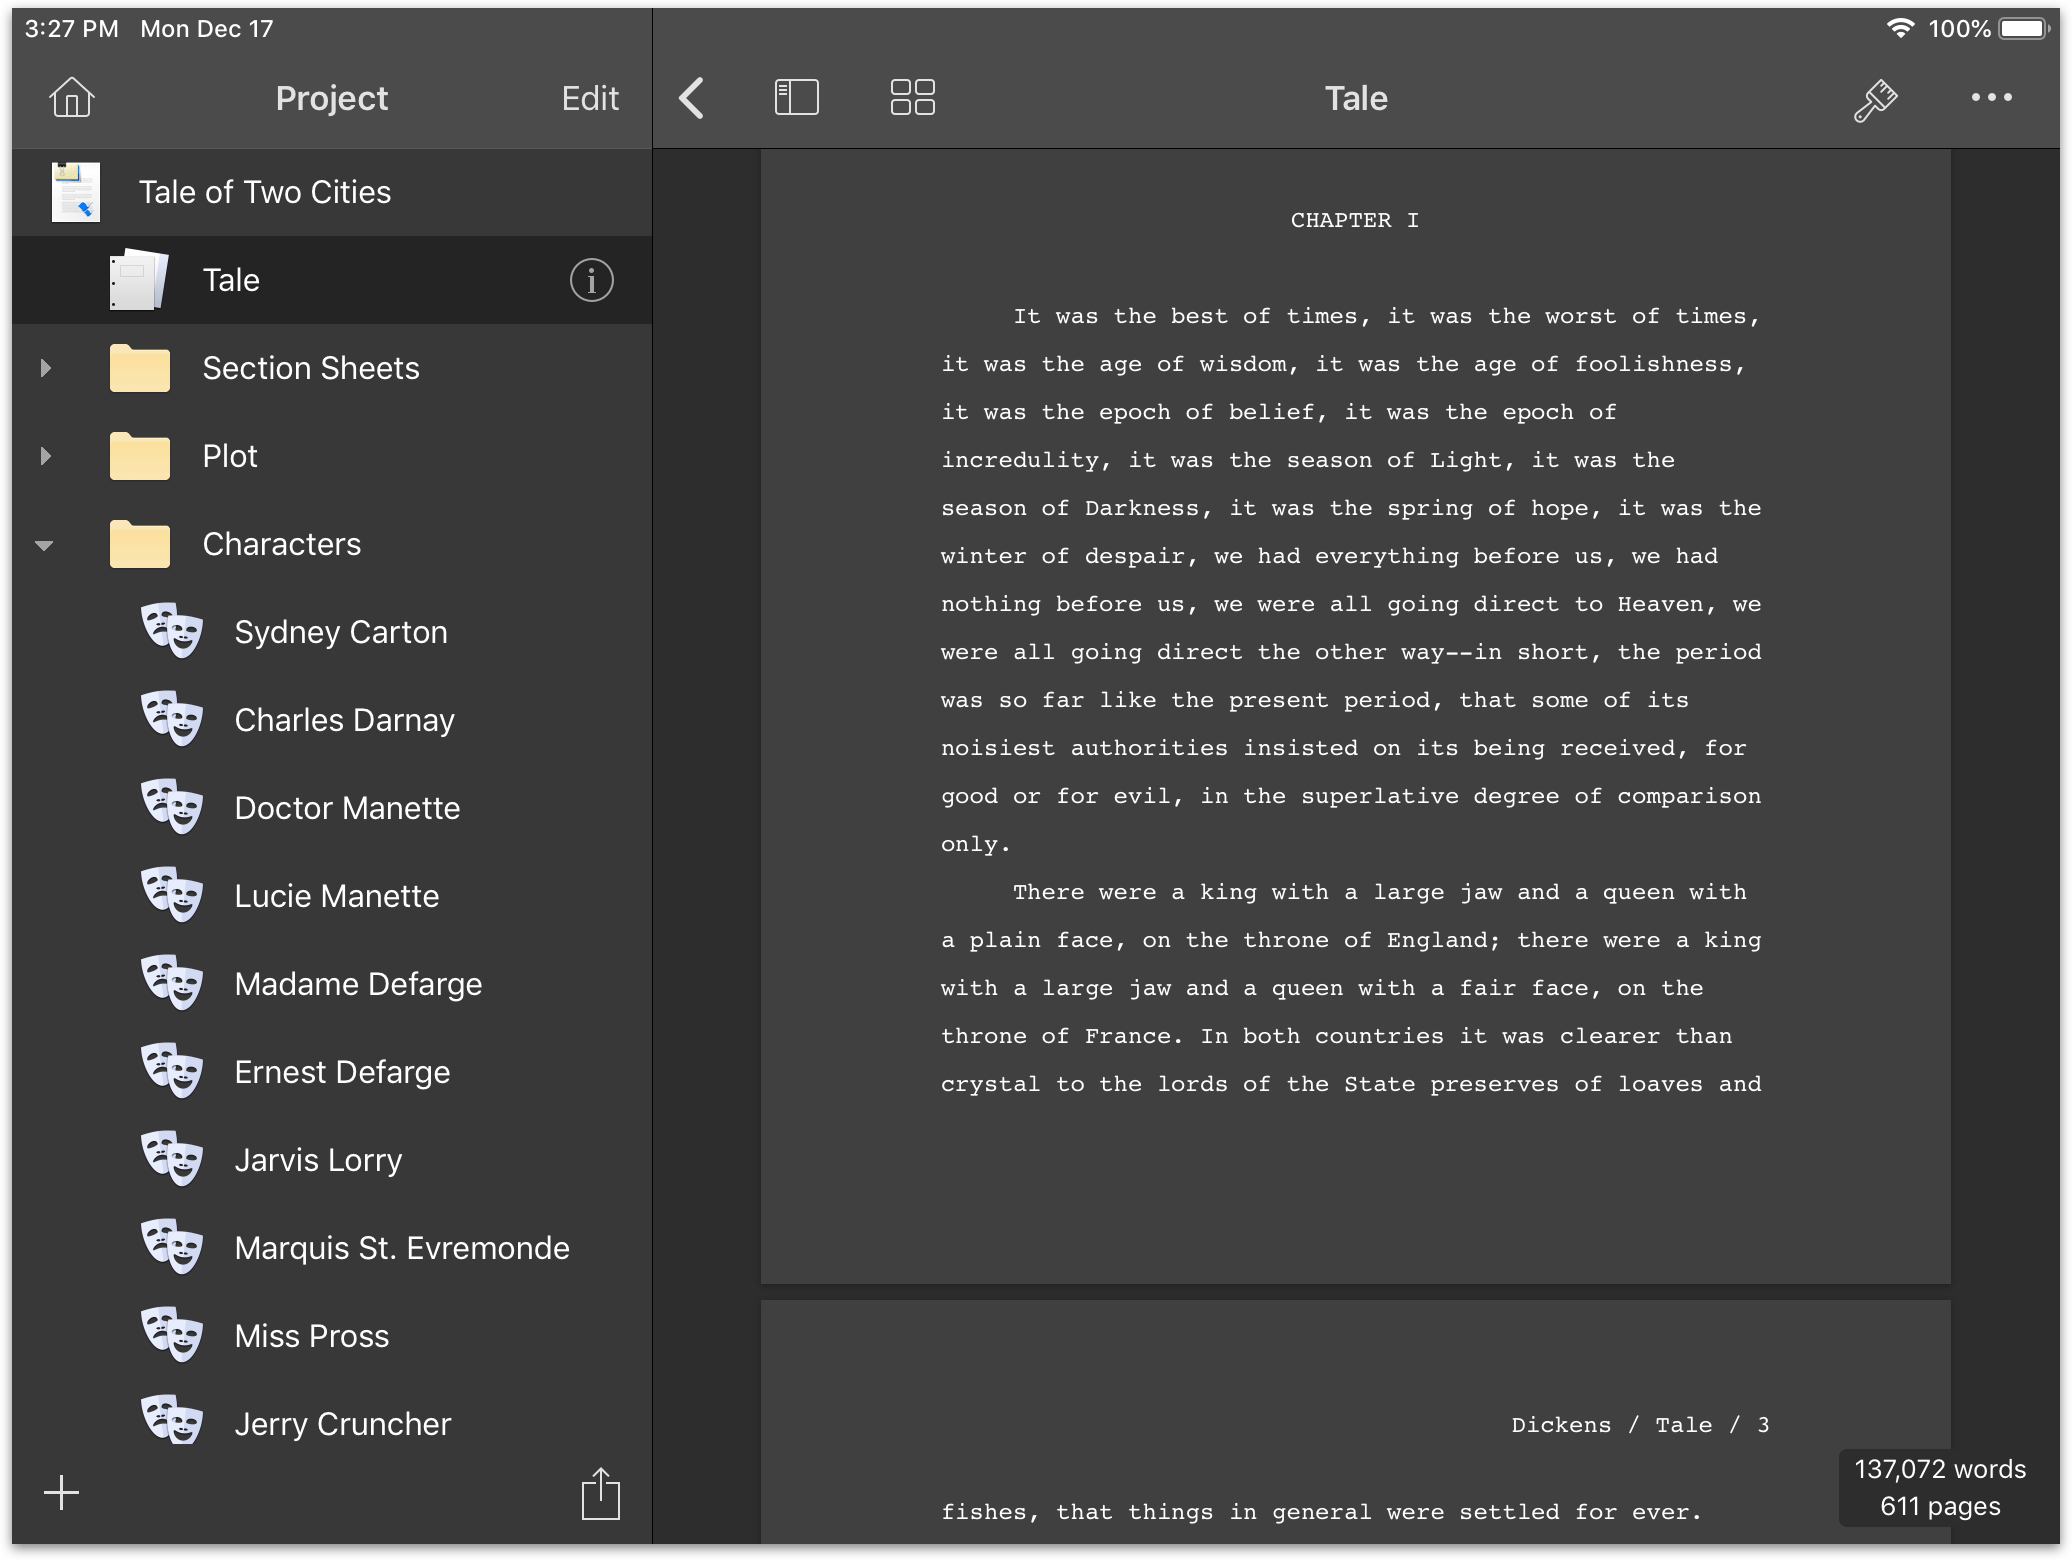
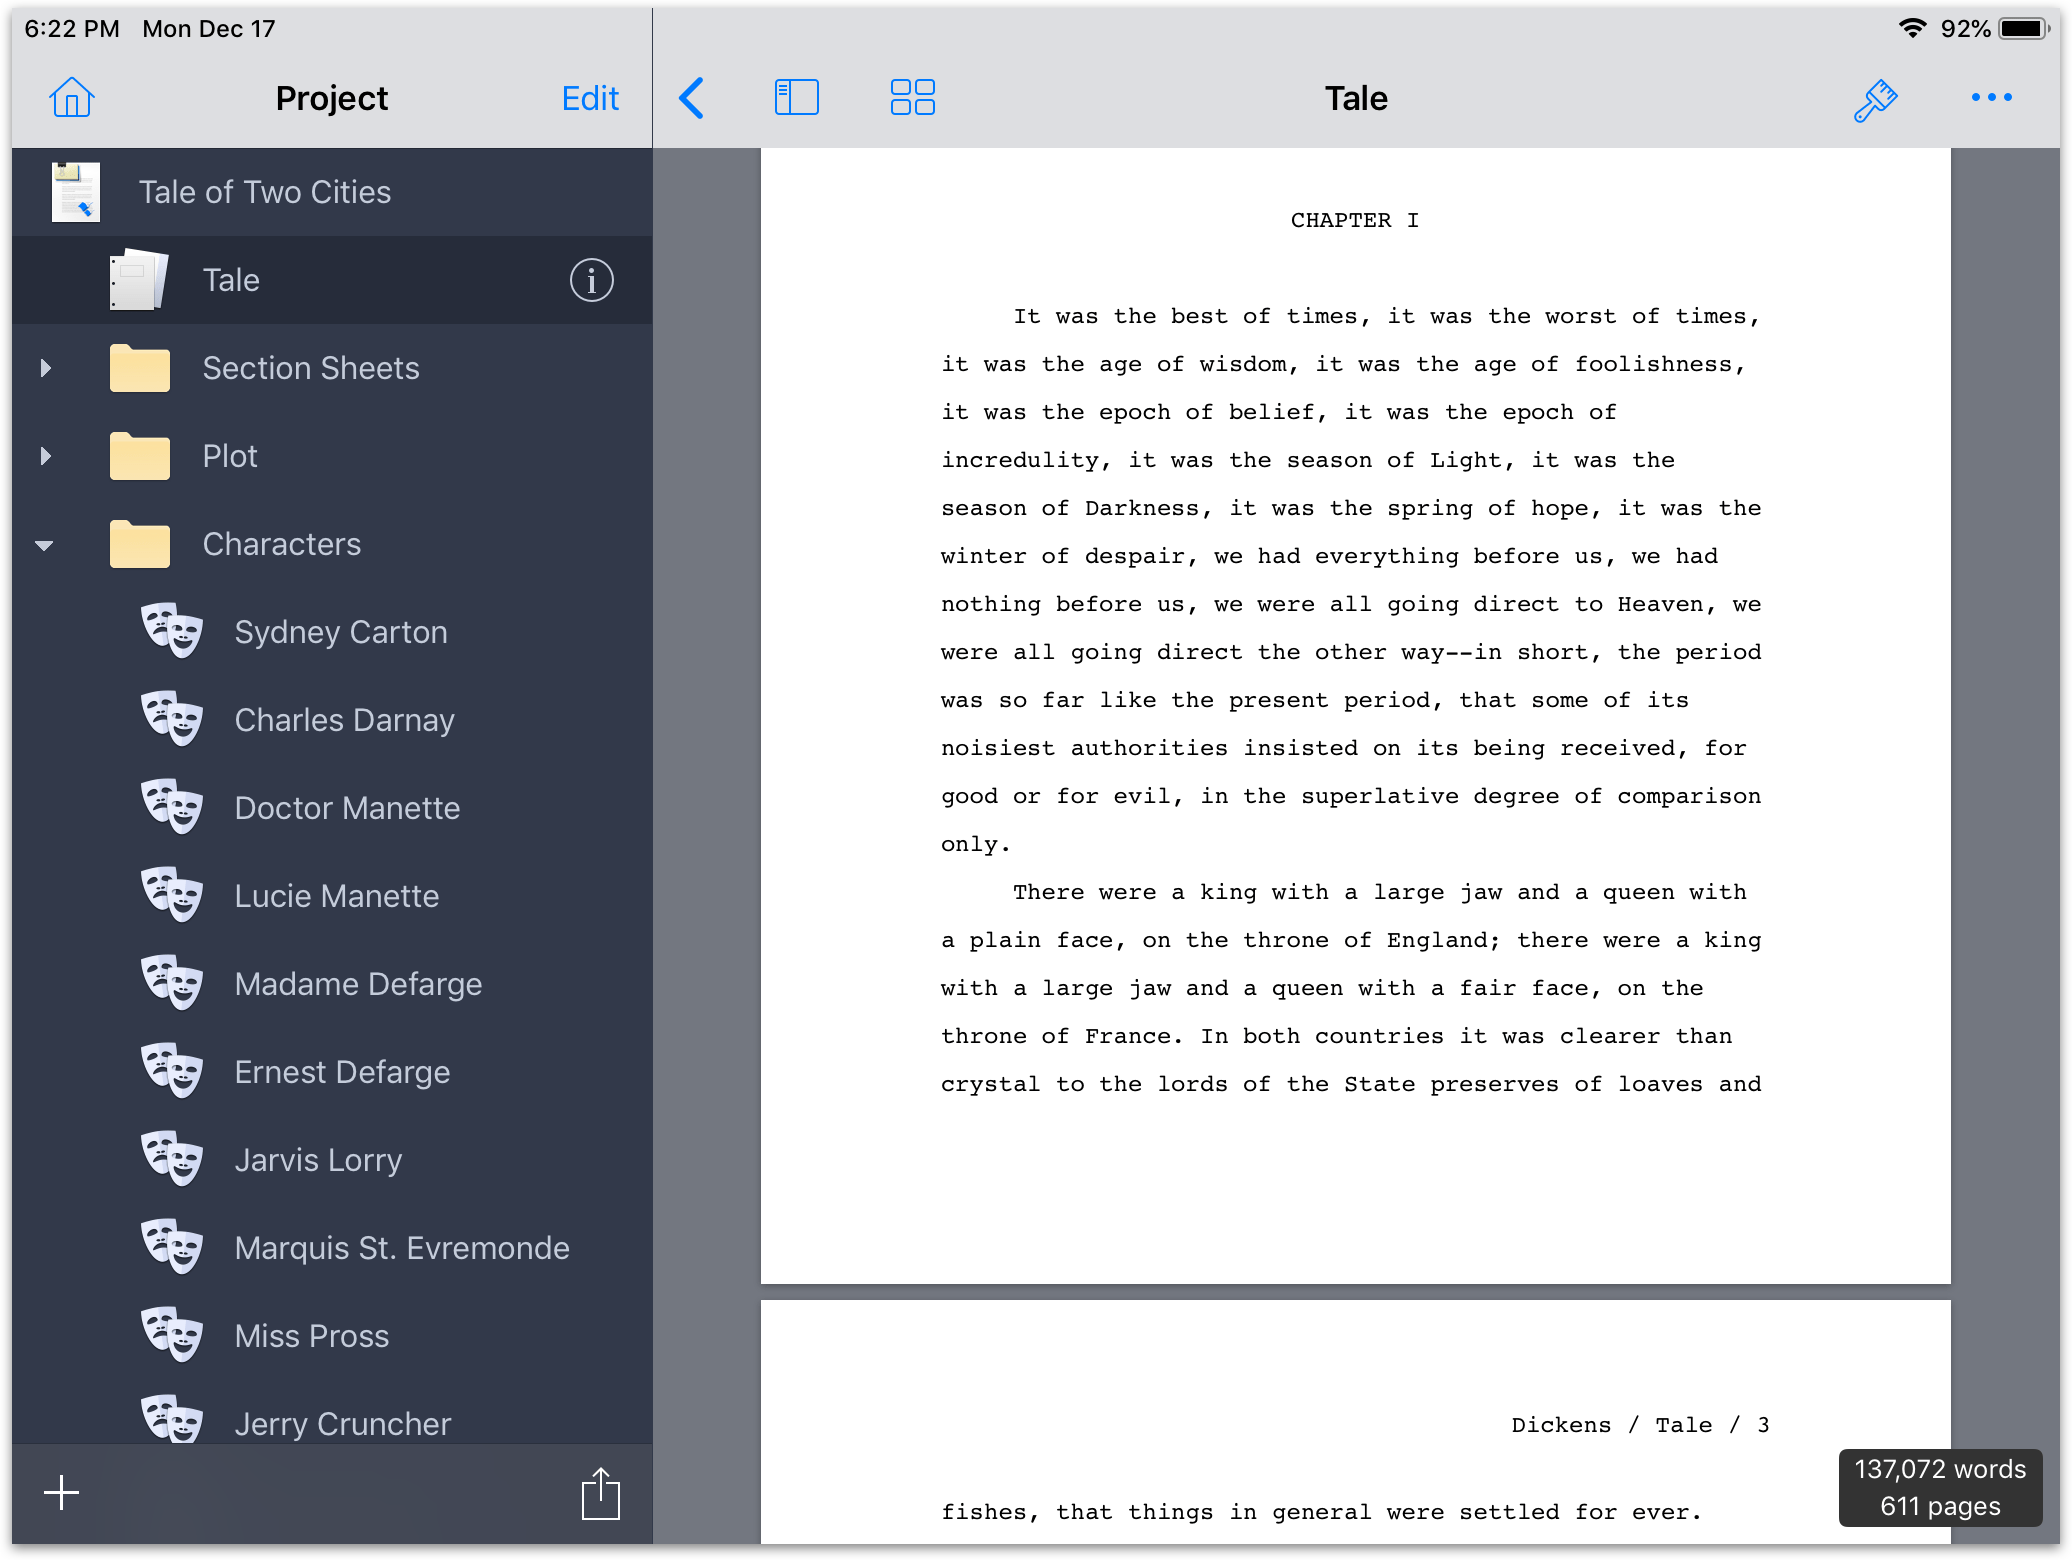
The changes on iPhone are more significant. When you open a project in Storyist 4, the first screen you’ll see is now the project screen. Just tap a project file to view it.
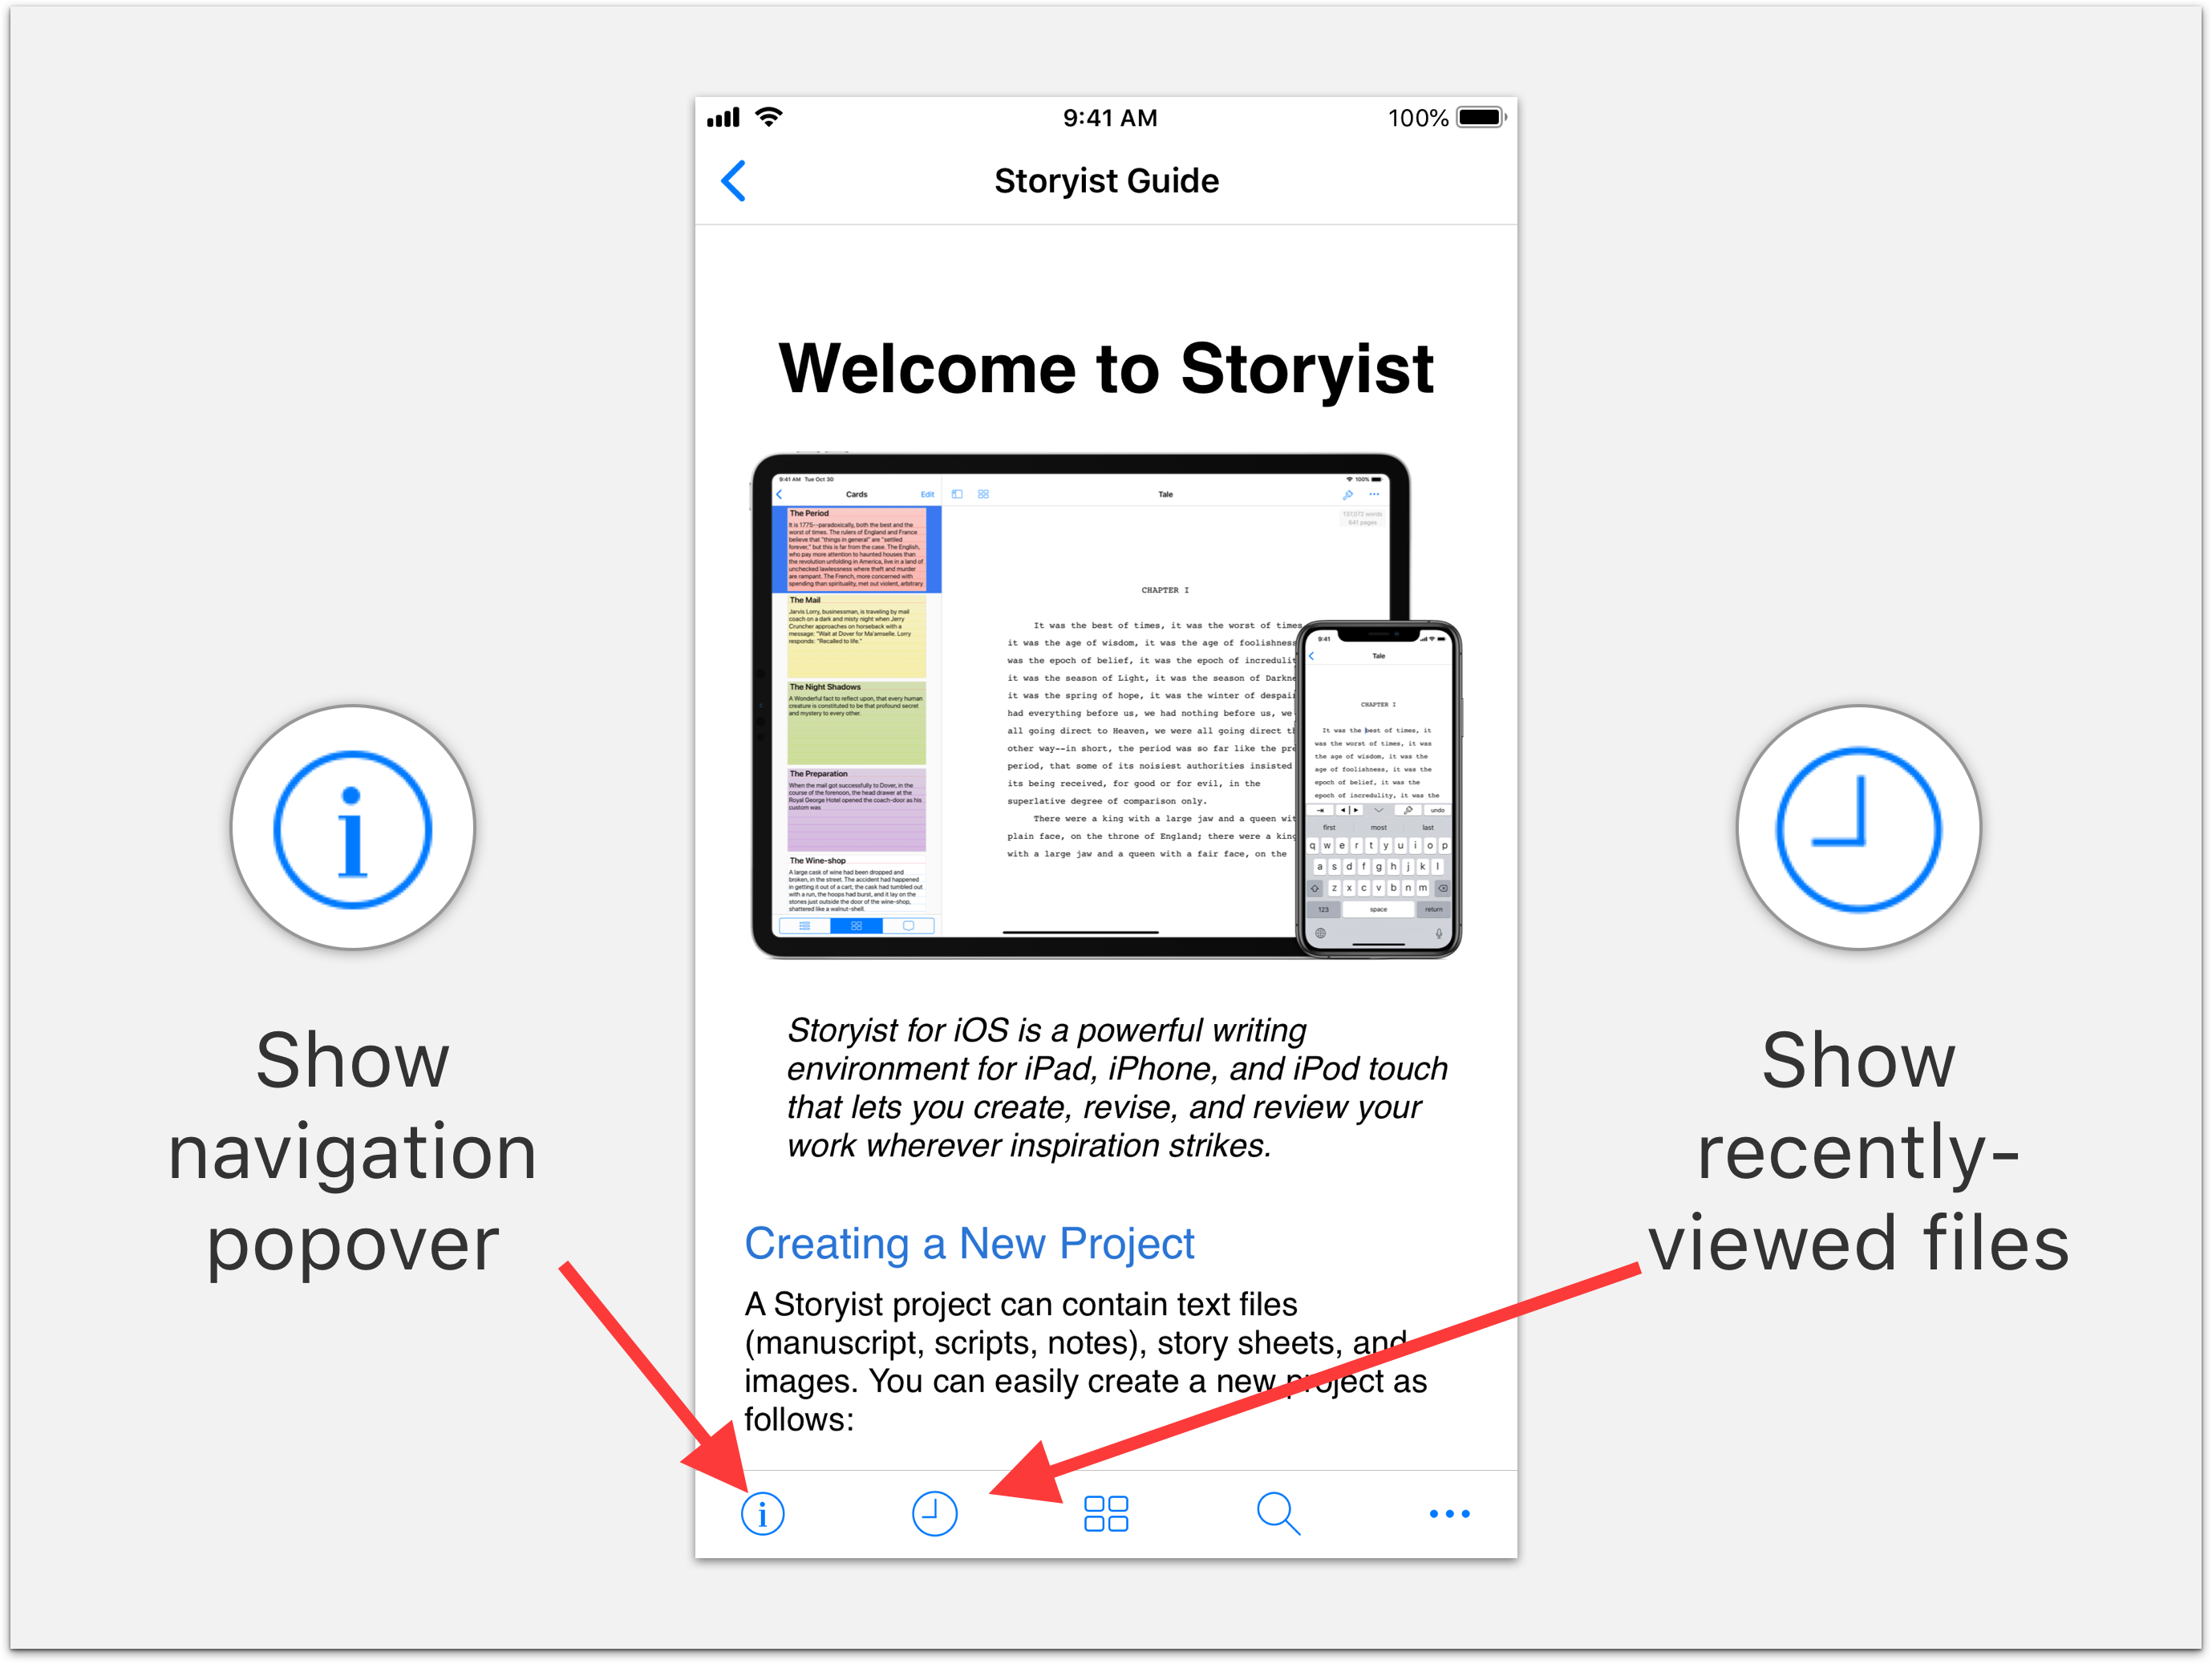
To navigate to a chapter or section within a file, tap the Info (i) button in the toolbar and then tap the item you want to view.
There are some enhancements in the toolbar as well. New in Storyist 4, the Recents (clock) icon gives you quick access to the most recently viewed files in your project.
In addition to the Files interface and the navigation enhancements, Storyist 4 brings several other updates.
Storyist 4 brings better support for Dynamic type. If you prefer your interface fonts a little larger or a little smaller than the default, Storyist will now automatically adjust based on your choice in the Settings app.
Please note that the text size setting in the Setting app affects the text sizes used in the interface (files, navigation sidebar, menus), not the document. If you want to change text sizes in the document, use the Font inspector or the zoom feature.
In Storyist 3, commands appeared in several places in the interface, depending on whether they needed a selection or not. Commands that needed a selection were accessed by tapping the Edit button in the toolbar. Commands that did not involve selection were accessed from the Tools menu.
Storyist 4 simplifies this some. Commands are now accessed from the More (…) menu. If they require a selection, you are prompted to select the appropriate item.
Storyist 3 had two themes, the default theme and a dark theme that was accessed via the dark mode switch in the More menu on the home screen. Storyist 4 adds a light theme and a theme based on the default Storyist for Mac them.
To access the themes, return to the Files interface, tap More (…) and select Themes.

The light theme is now the default. If you prefer the default Storyist 3 theme, just select Classic.
Storyist 4 has other subtle enhancements and bug fixes too, including:
Better support for iPhone X in landscape mode.
For more information, see the Users Guide.
Storyist for iOS has been available in the App Store since 2011, and we’re grateful to our long-time users for their support over the years. As a thank you, we’re offering a 50% discount to folks who purchased an earlier version of Storyist for iOS.
You’ll find information about how to receive the discount in the tutorial titled “Downloading Storyist 4 for iOS”.