Storyist for macOS has some powerful tools and templates for creating print-ready PDF books.
In this tutorial, you’ll learn how to take your finished manuscript and turn it into a beautifully formatted book, complete with front matter, that you can upload to a printing service like Blurb. If you’d like to follow along, download the sample files for this tutorial and open the “Pride and Prejudice – Start” project.
Note: “Pride and Prejudice – Start” was the ending point in the Working with Styles tutorial. This tutorial assumes that you’re familiar with the style concepts covered there.
The first step in creating a PDF for print is to create a new project item to hold your book. To accomplish this, choose File > New > Book.
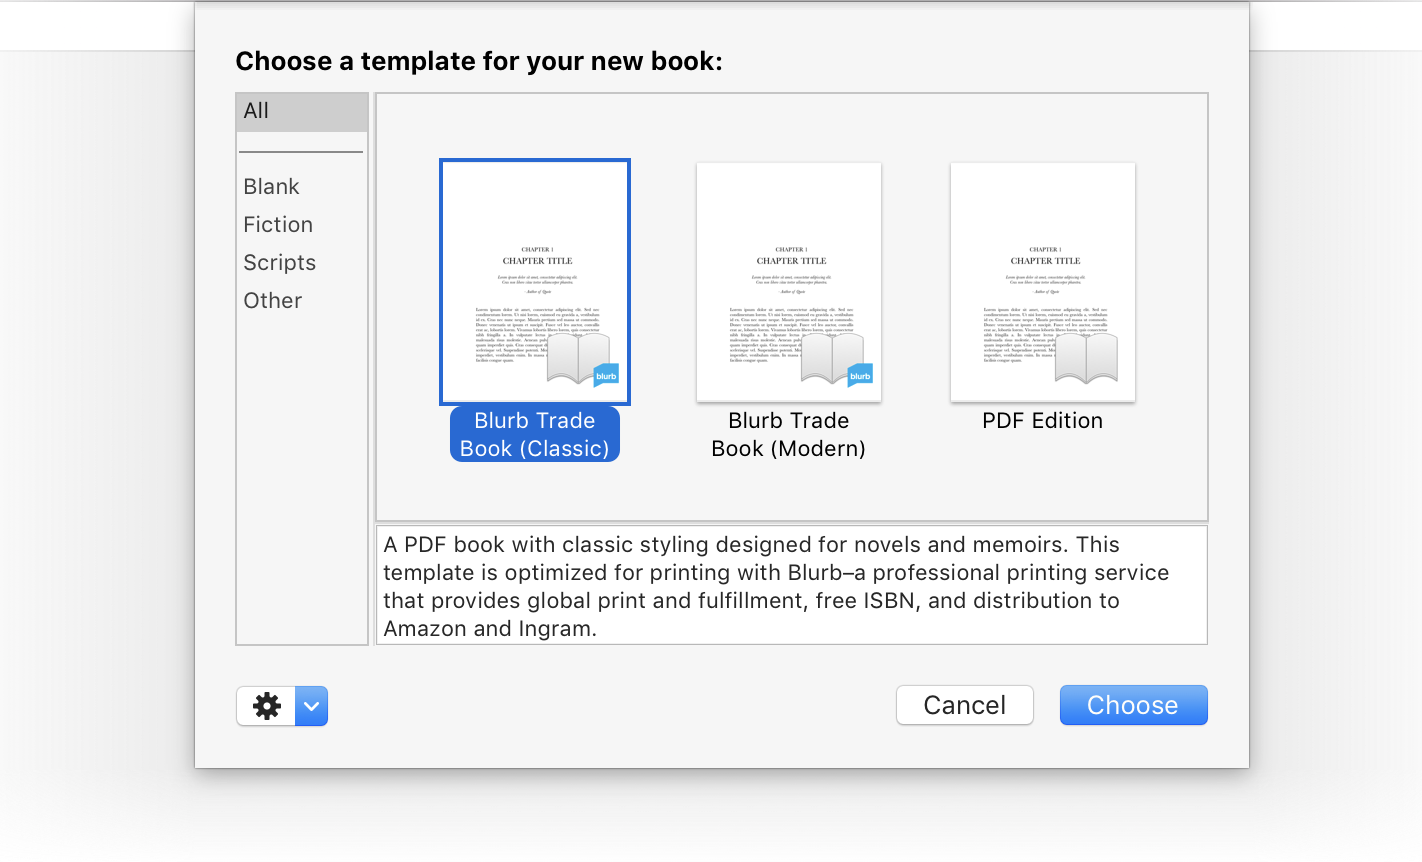
The template chooser will appear, and you’ll see a list of book templates. Here is what they look like:
Blurb Trade Book (Classic)
Blurb Trade Book (Modern)
PDF Edition
For this tutorial, we’ll choose Blurb Trade Book (Classic).
Notice that a new item appears in the Project view. You can change the name if you’d like.
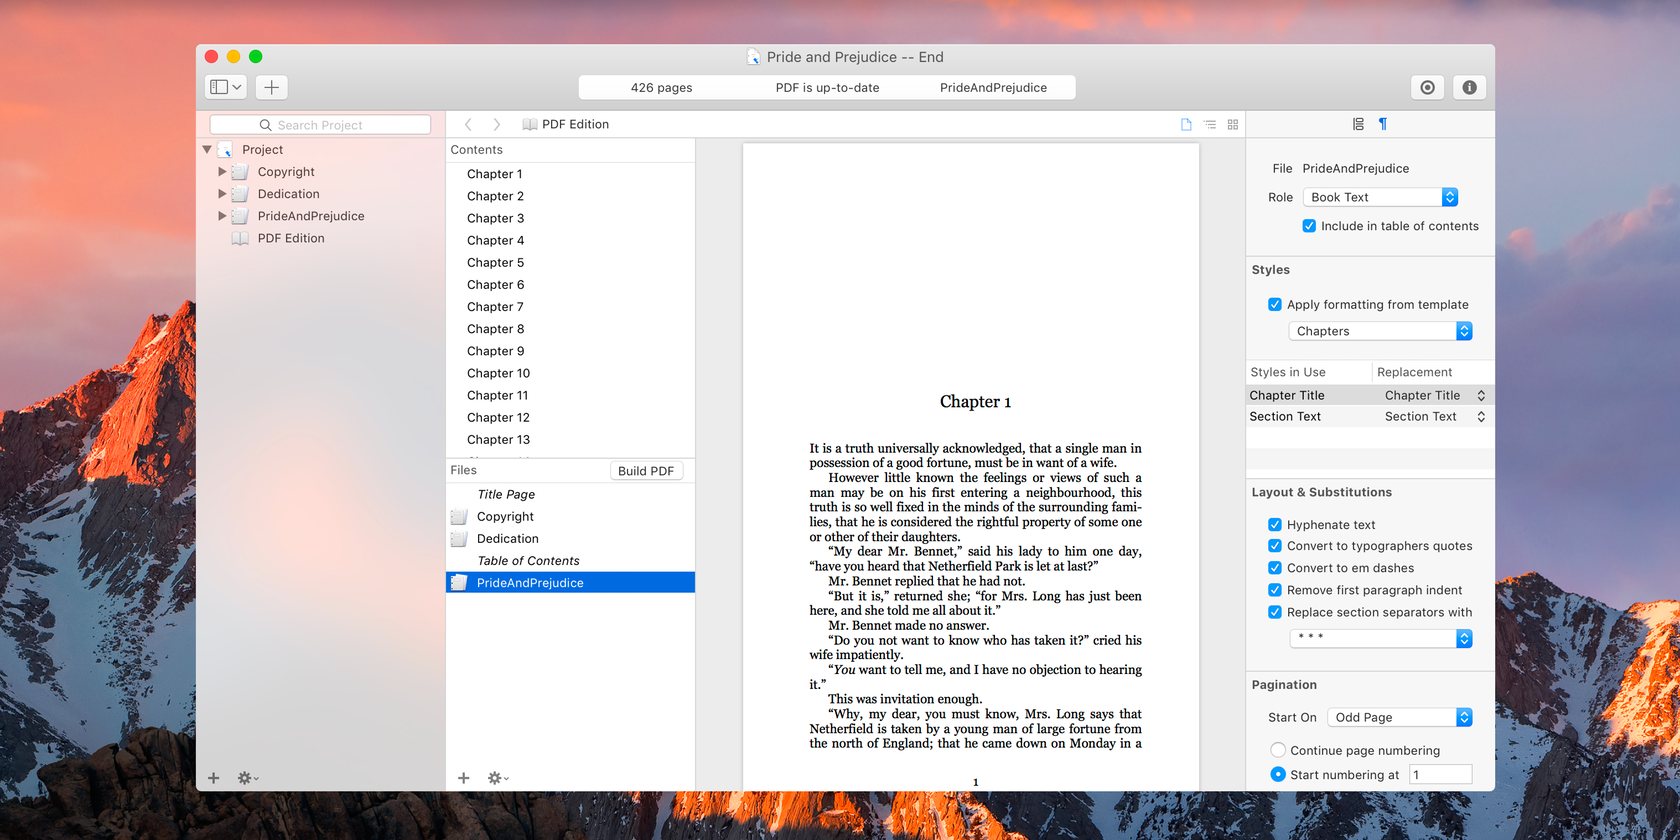
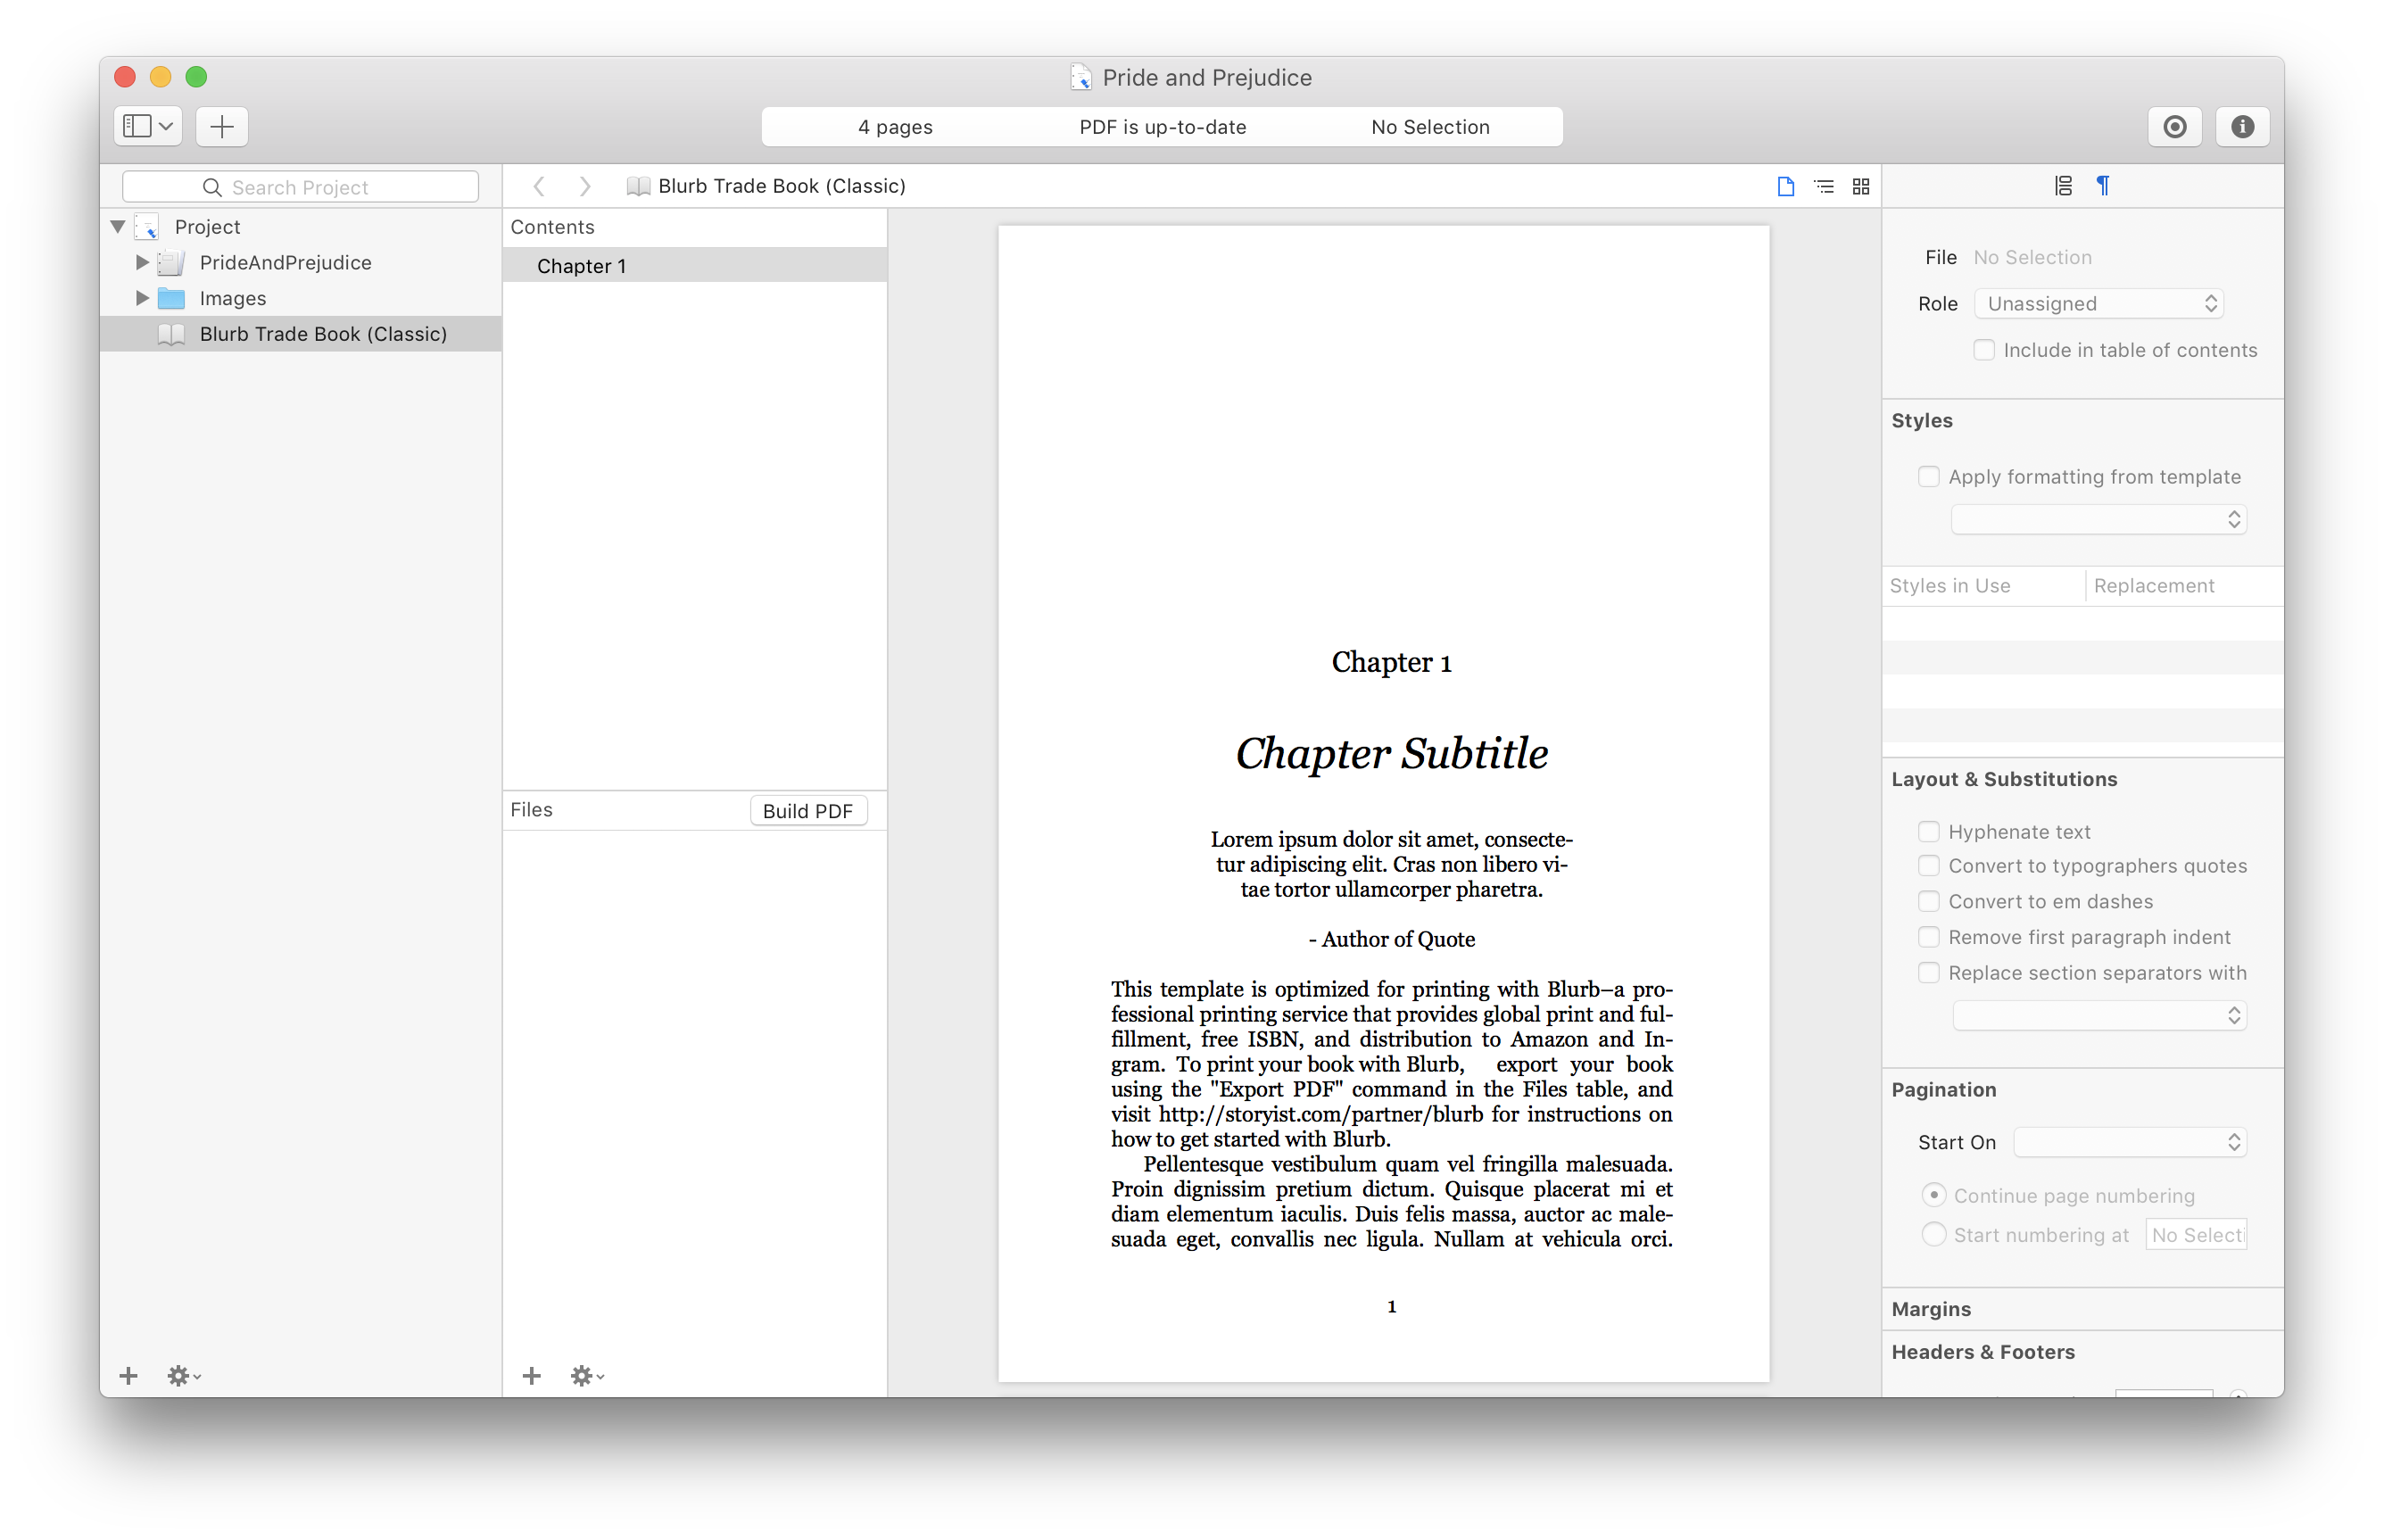
Clicking on your new book brings up the book editor, which contains the Contents table, the Files table, and a preview of your PDF. You haven’t added your manuscript yet, so the PDF preview shows some sample formatting from the template.
The next step is to add your manuscript to the book. You can do this either by clicking the Add (+) button at the bottom of the files table and selecting Add Project Files or by simply dragging the file from the Project view to the File table. If you’re following along, go ahead and drag Pride and Prejudice from the Project view.
Now click the “Build PDF” button in the Files table. (Note: If you’re running Mavericks or Yosemite, you won’t see this button. Instead, click the Action (gear) button and choose Build PDF.)
A lot has happened. Let’s take a look.
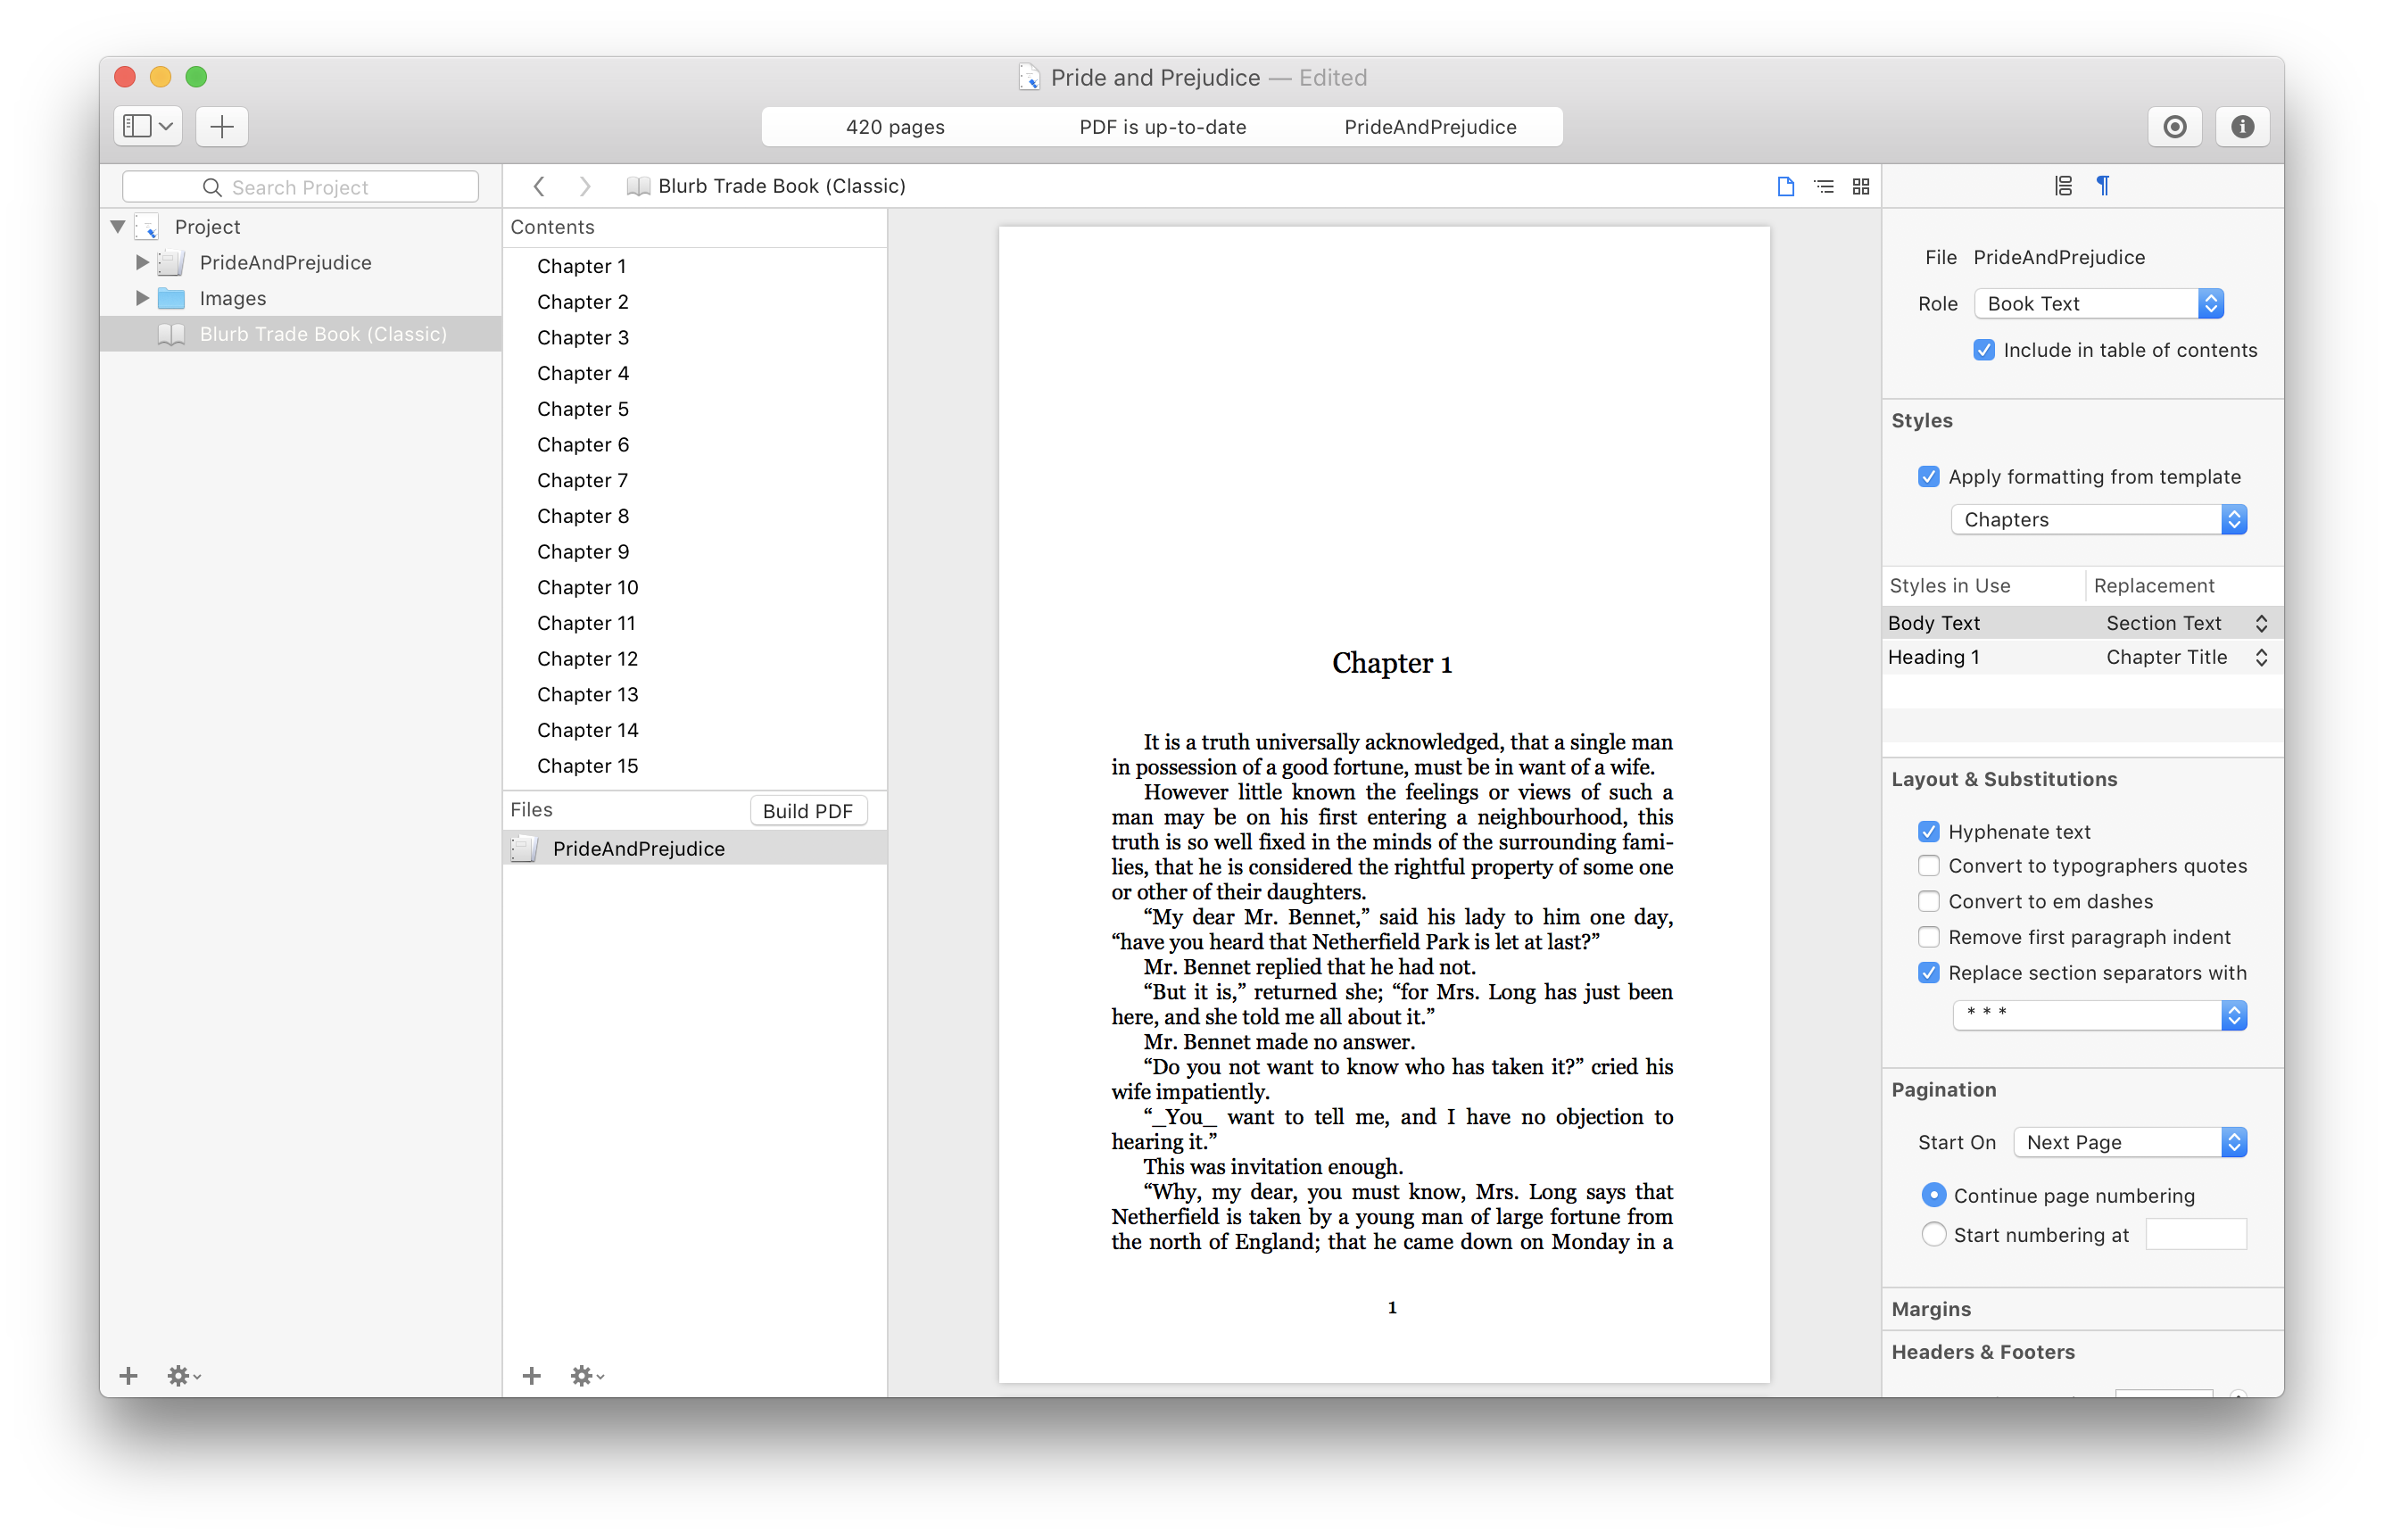
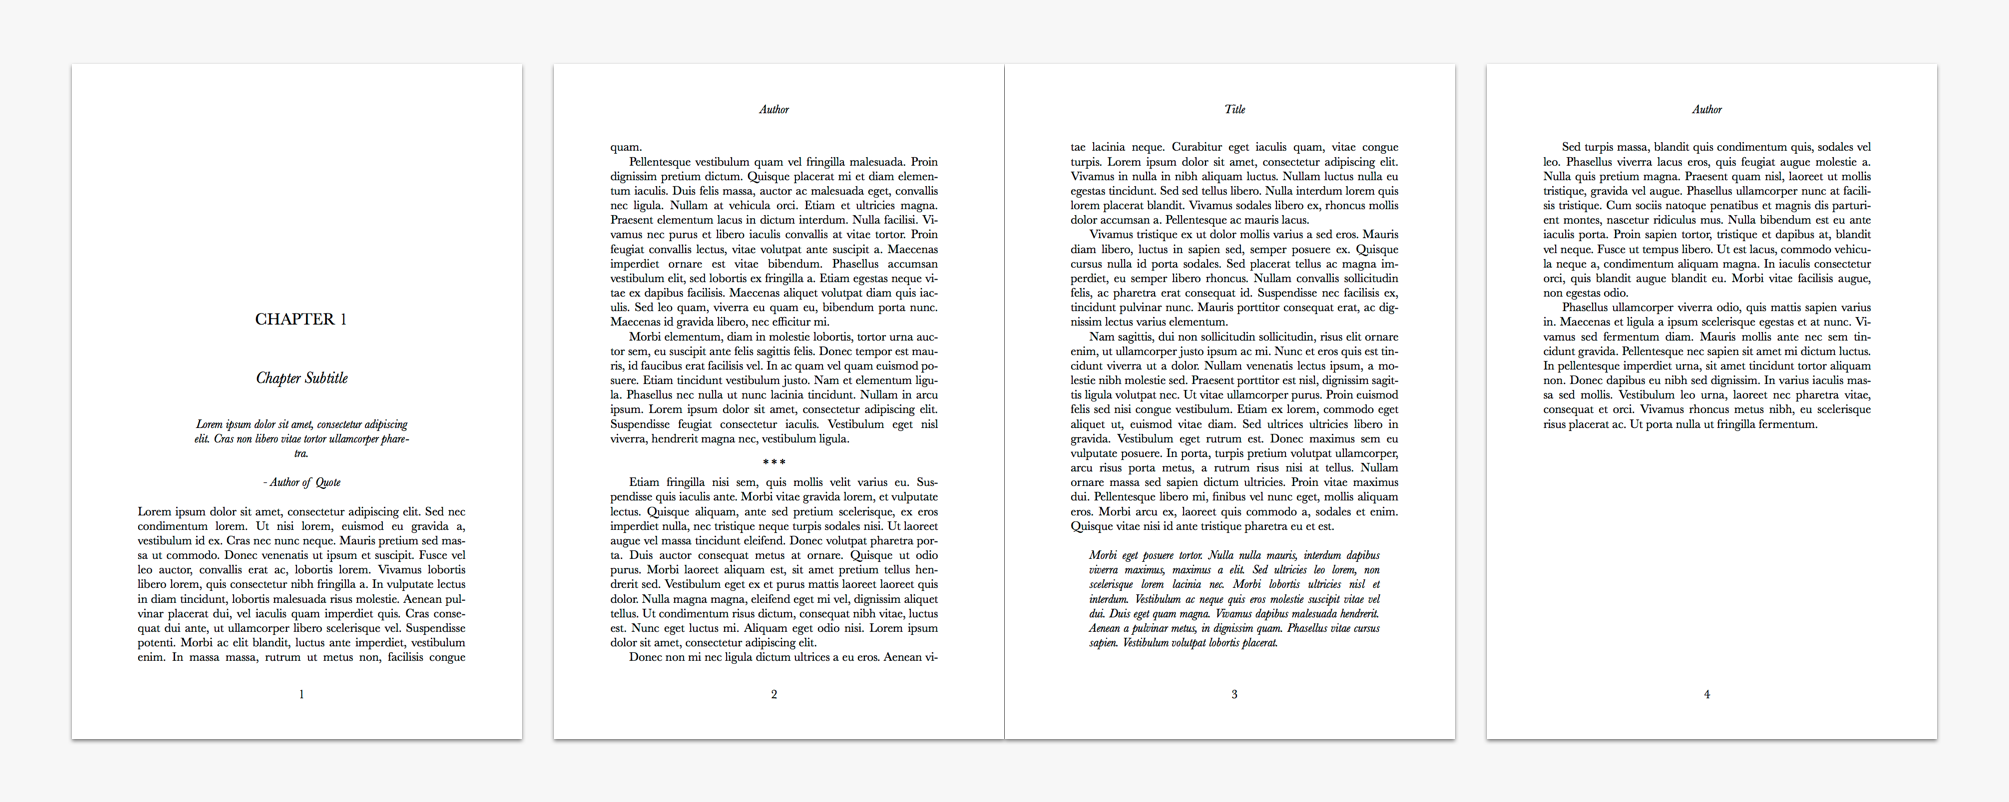
The first thing you’ll notice is that the PDF preview now shows your content and that it’s been reformatted with the template styles.
The second thing to notice is that the headers and footers from your manuscript have been replaced with ones from the template.
This happens because for this template, the “Apply styles from template” checkbox in the Formatting inspector is on by default.
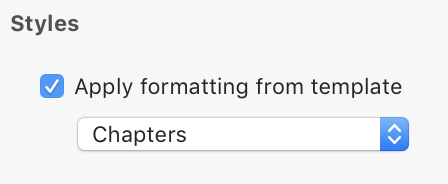
Try turning it off and clicking “Build PDF” again. Notice that the PDF is updated, but your original formatting has been preserved. We’ll leave the checkbox checked for the rest of this tutorial.
So how does Storyist decide how to reformat your manuscript? Let’s take a look at the styles table in the Formatting inspector.
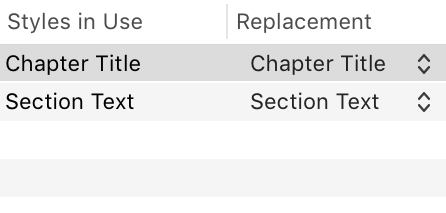
It has two columns. The one on the left shows the styles that are currently used in your manuscript. The one on the right shows the template styles that will be applied when building the PDF. In this example, both the manuscript and the template have styles named “Chapter Title” and “Section Text,” so the style mapping is straight forward.
Storyist tries to choose the right styles for this mapping, but if your manuscript has different style names, you might want to fine tune it. You can do this by manually selecting the template style you want to apply from the pop up button in the Replacement Styles column.
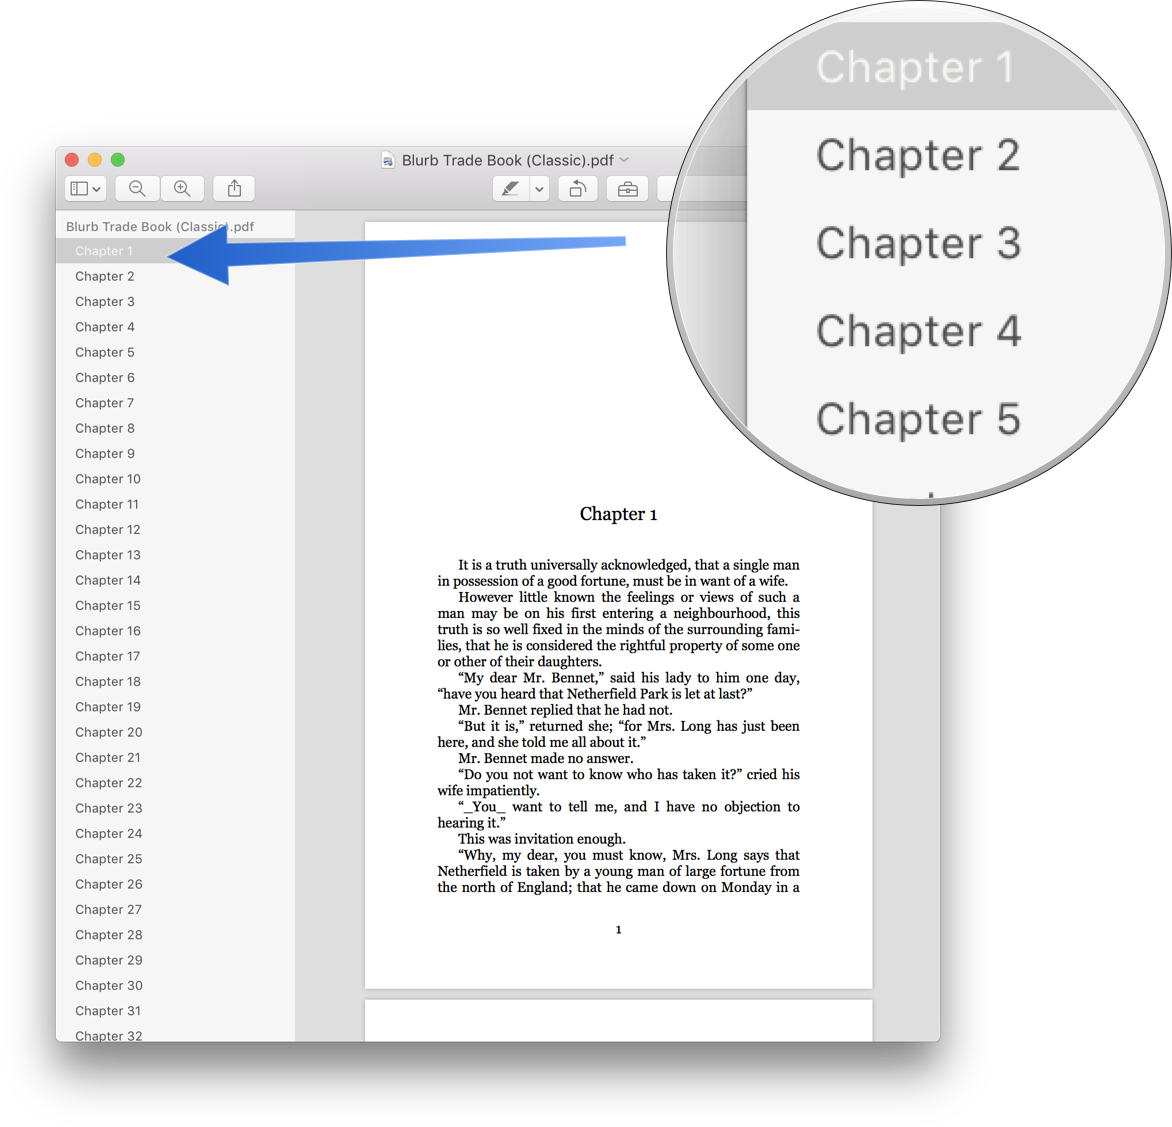
The last thing to notice before we move on is that the Contents table now has the table of contents for your book. This table of contents is live, and you can navigate through your PDF as you would in a PDF viewer like Preview.
If fact, Storyist lets you preview your PDF in the Preview app. Just click the Action button and choose Open with Preview. Notice that the table of contents is still available.
Our book is starting to come together. The text is now justified and properly hyphenated. How did this happen? As you might expect, the justification setting came from the Section Text style in the template.
Hyphenation, on the other hand, is controlled in the Layout & Substitutions pane of the Formatting inspector. It’s on by default in this template, but you can turn it off if you want.
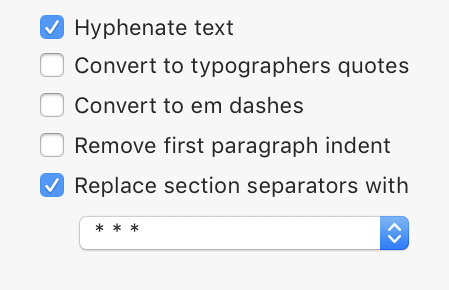
This pane also includes settings for replacing straight quotes with curly (or typographer’s) quotes.
One option that might give you pause is the “Remove first paragraph indent” checkbox. It’s common for book designers to set the first paragraph after a title or a section break flush to the left edge of a page.
You could accomplish this by creating a separate style in your manuscript and applying it to your first paragraphs. However, this is a common enough design element that Storyist has the option of doing this for you when building the PDF.
The last checkbox here controls the handling of section separators. In manuscript formatting, you usually use the pound (“#”) character to signify a section break. In book design, it’s more common to use three asterisks (“* * *”) or a blank line. You can use the “Replace section separators with” checkbox and pop up button to choose which separator Storyist will use in the PDF.
Ok. Moving on. We´ve already got a virtual table of contents in the Contents table, let’s add one to the book itself. To do this, choose Add > Automatically Generated File > Table of Contents.
Notice that Storyist adds a new item in the Files table for you. It appears in italics and doesn´t have a project icon, so you know it´s an automatically generated file.
Click Build PDF. The table of contents is now part of your book.
Let´s take a look at the page spreads by turning on two-up mode. To do this, choose View > Layout > Page Layout - Two Up.
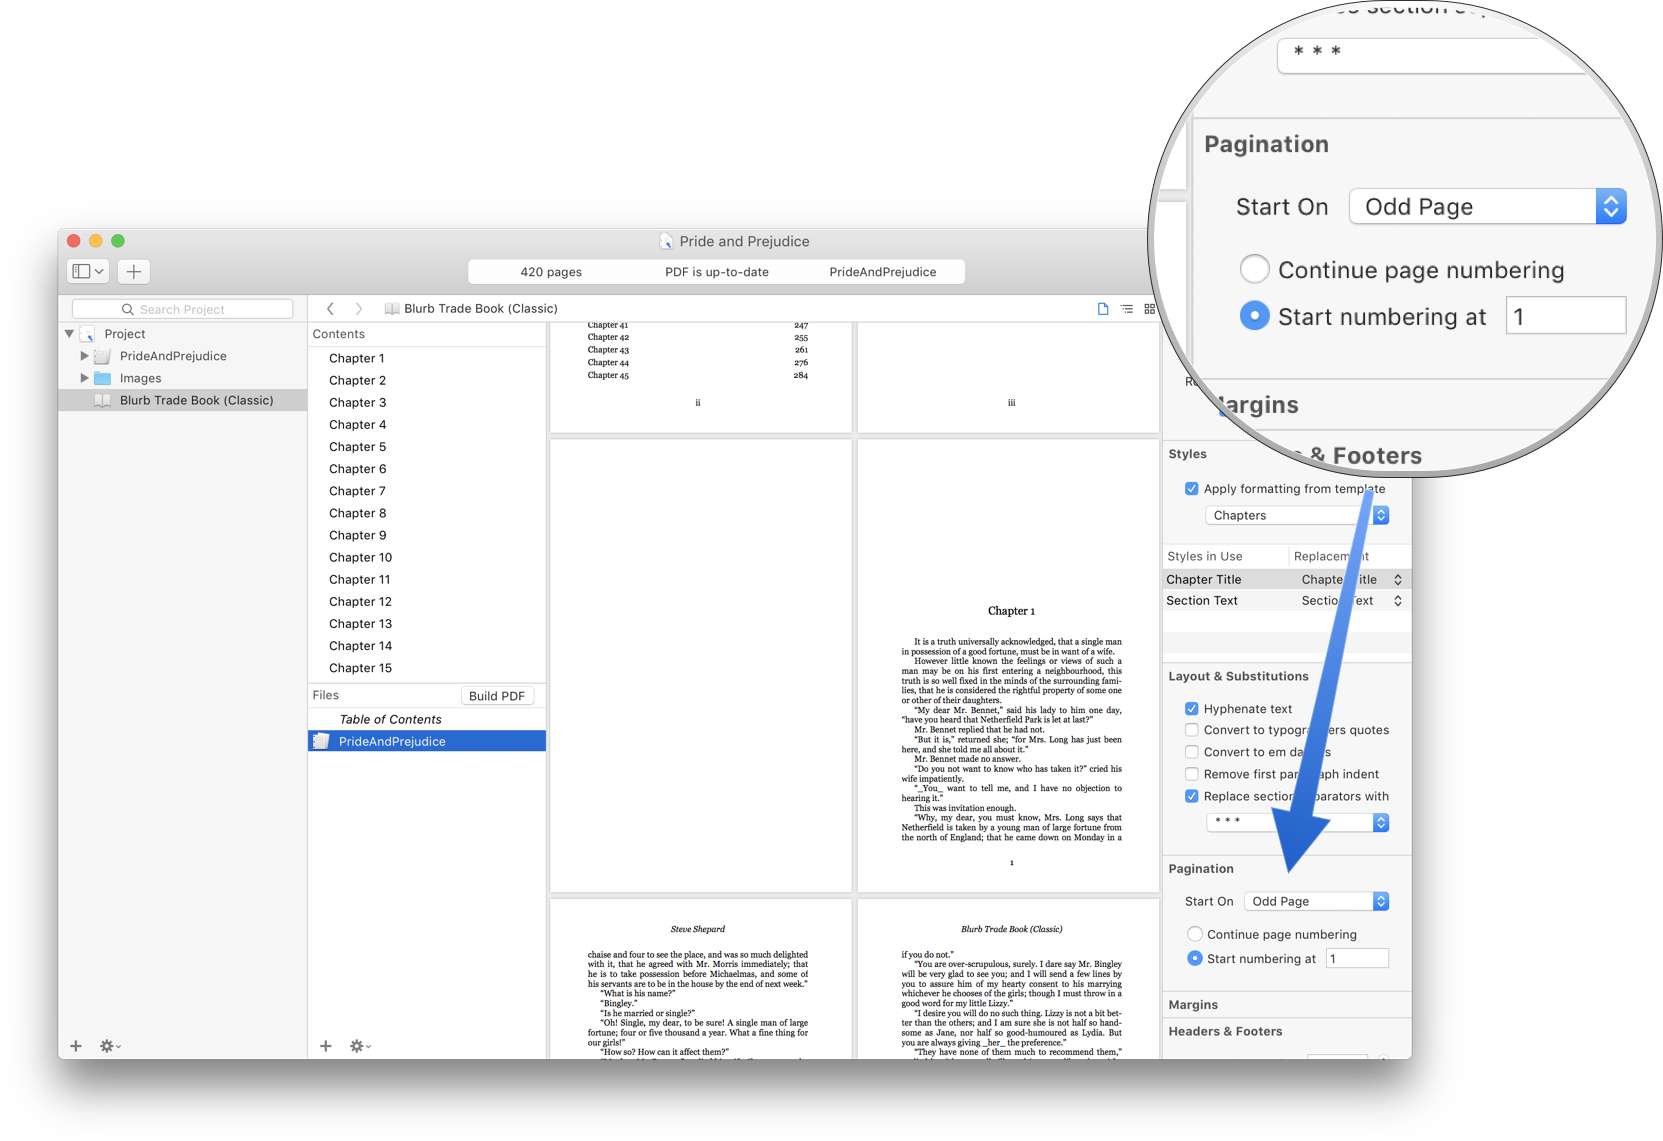
Notice that the first chapter, which is the start of the book body, now starts at page 4 on the left. We’d like the book body to start at page 1 on the right. Let’s fix that.
First, select the book body file in the Files table (if you’re following along, it’s named”PrideAndPrejudice”). Then, in the format inspector, set the Start at pop up to “Odd Page,” and set the numbering to start at page 1.
Click Build PDF. Fixed.
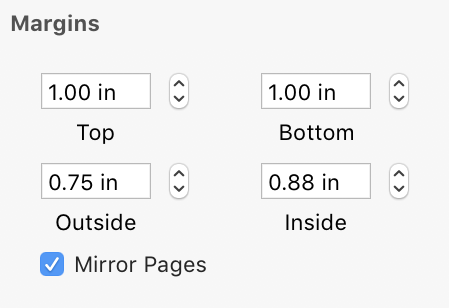
You can also change the margins and header/footer spacing here as well. We won’t change these value here, but notice that the margins are mirrored, which means that the left and right margins become outside and inside margins. We use this to give a little extra room to the inside margins so that the inside text won’t be obscured when the physical pages of the book are bound.
Ok. Let’s add a title page. To do that, click the Add button and choose Automatically Generated File > Title Page.
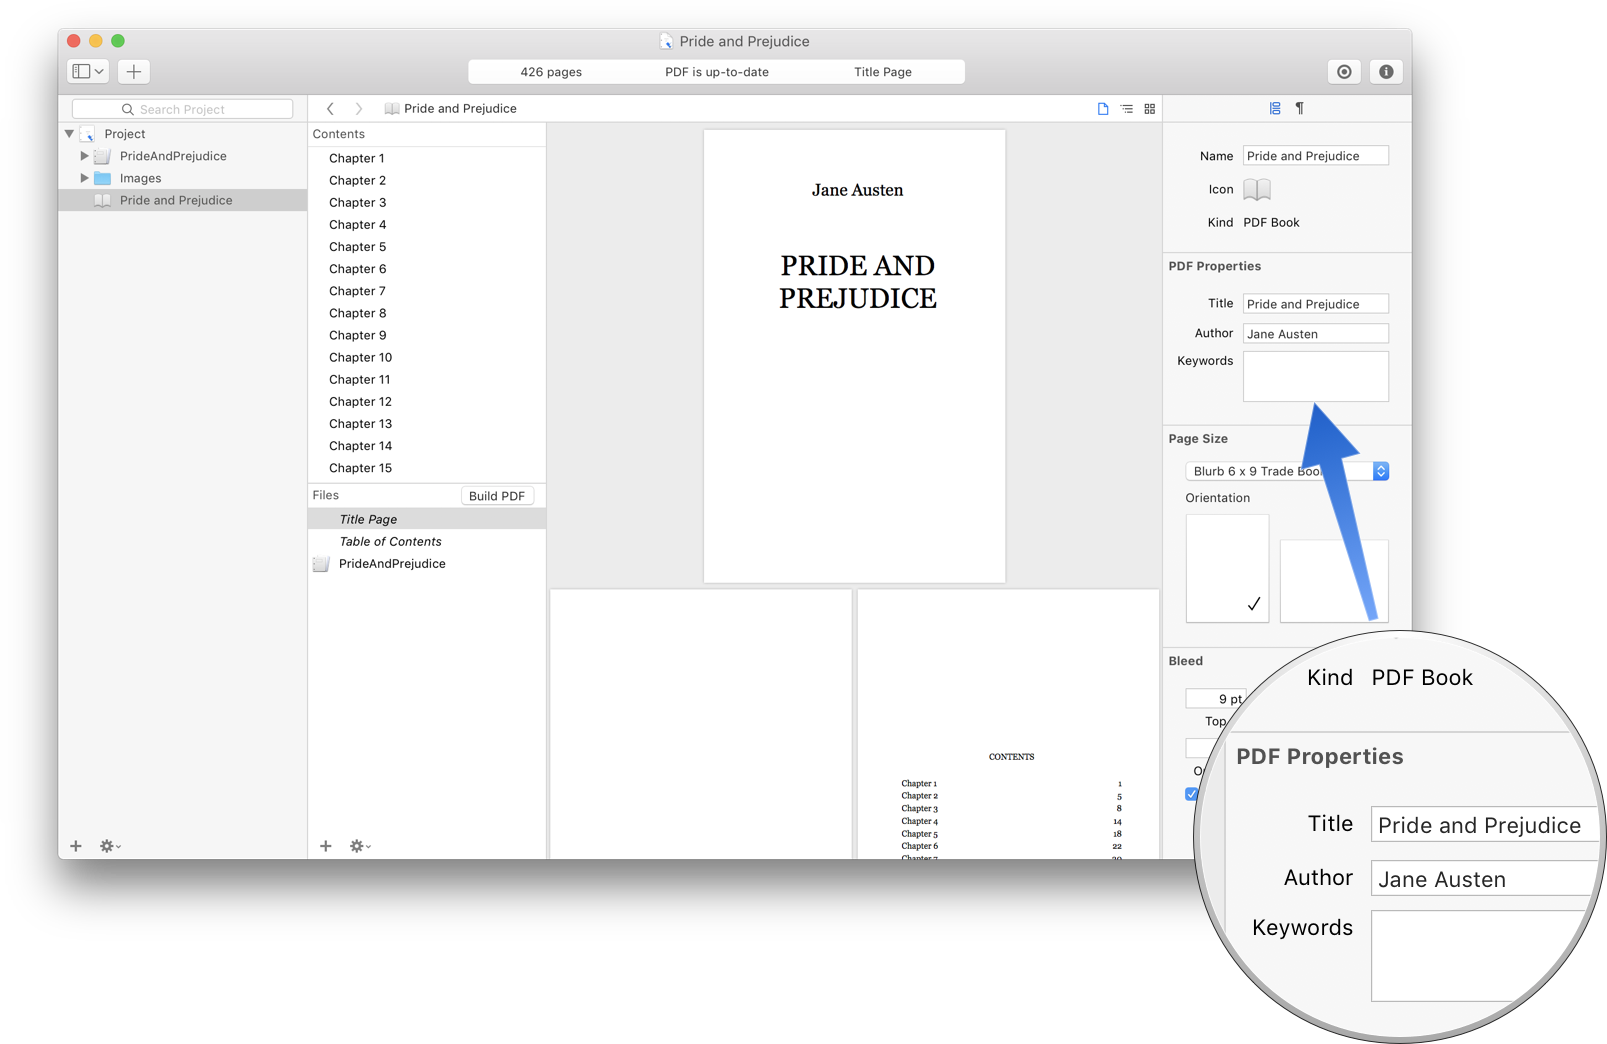
After you rebuild the PDF, you’ll notice that the title and maybe the author aren’t quite right. You can edit these values that by switching to the File Info inspector and setting the title and author fields there.
We’re getting there. Printed books usually have a couple of more pieces of front matter, like a copyright page and a dedication page.
For this demo, I’ll just drag a couple of already-prepared RTF files to the project and add them to the book. You can take a look at the sample files if you’d like more information.
The Chicago Manual of Style has a good description of the parts of a book and how they’re assembled, so if you’d like to dig deeper, that’s a great place to start.
The last thing to do is to make sure the page size is correct.
Switch to the File Info inspector and make sure the page size and orientation match the trim size you plan to use.
Also, if your printer requires a “bleed” (a printer’s term for extra space around the pages), enter it here.
That’s it. Click Build PDF.
If everything is to your liking, click the Action button and choose Export PDF.
The PDF is ready to upload to a printer like Blurb.
Final note: When your book is available for purchase, drop a note to support@storyist.com with a link. We’d be delighted to post a notice to our Facebook and Twitter feeds.